gourmetcubicle

Tech by day. Cook by night.

The food blog of an engineer. Whether you're a tech nerd like me who wants to eat homemade meals and experiment with reproducing that amazing restaurant dish you ate, or a seasoned cook who wants to find inspiration for your next meal, you're in the right place.

  • home
  • blog
  • about
  • recipes
  • pantry essentials
  • contact

Traditional Hungarian Bean Goulash (Babgulyás)

February 19, 2017 by Aurel Pop in Soup

Happy 2017 beautiful people! I was ready to leave a less-than-stellar 2016 behind and re-focus in 2017. This is going to be my year; I can feel it! I recently went on a vacation to Romania and Hungary. It was great seeing my family, working with my old coworkers, and hanging out with my childhood friends, but overall, it was a trip to forget. I missed one of my flights which lead to having my ticket cancelled and having to buy a new one. I also managed to come down with an awful cold which kept me glued to bed unable to to anything.

As soon as I got back to Austin though, everything has started falling into place in terms of health, career, and side projects. I’ve also launched my newest passion project, a monthly pop-up dinner called Cameromania. My new endeavors are leaving me energized, fulfilled, and excited about them.

The idea for Cameromania was born from my friend Rudi’s New Year’s party. Rudi and I have known each other for quite some time. We met at work while I was living in Hungary, and shortly after I moved to the United States, he invited me to his home for New Year. Rudi and his mom prepared some traditional Cameroonian dishes that I found extremely flavorful, exotic, and delicious. In some ways Cameroonian cuisine remind me of Eastern Europe: lots of hearty meat based dishes seasoned with fragrant spices.

You may ask yourself what other connection is there between Cameroon and Romania or Hungary? Well, the first connection is our friendship. The dishes we make at our dinners are a reflection of the strong bond that formed between us. Also, the similar way we think about food—the joy of sharing homemade dishes with friends and family– is a commonality. When I asked Rudi what was the place that felt closest to his home, Cameroon, he told me it was Hungary. He said that he’s been to many places around the world but that the people, the food, the passion, and the love in Hungary felt most like home to him.

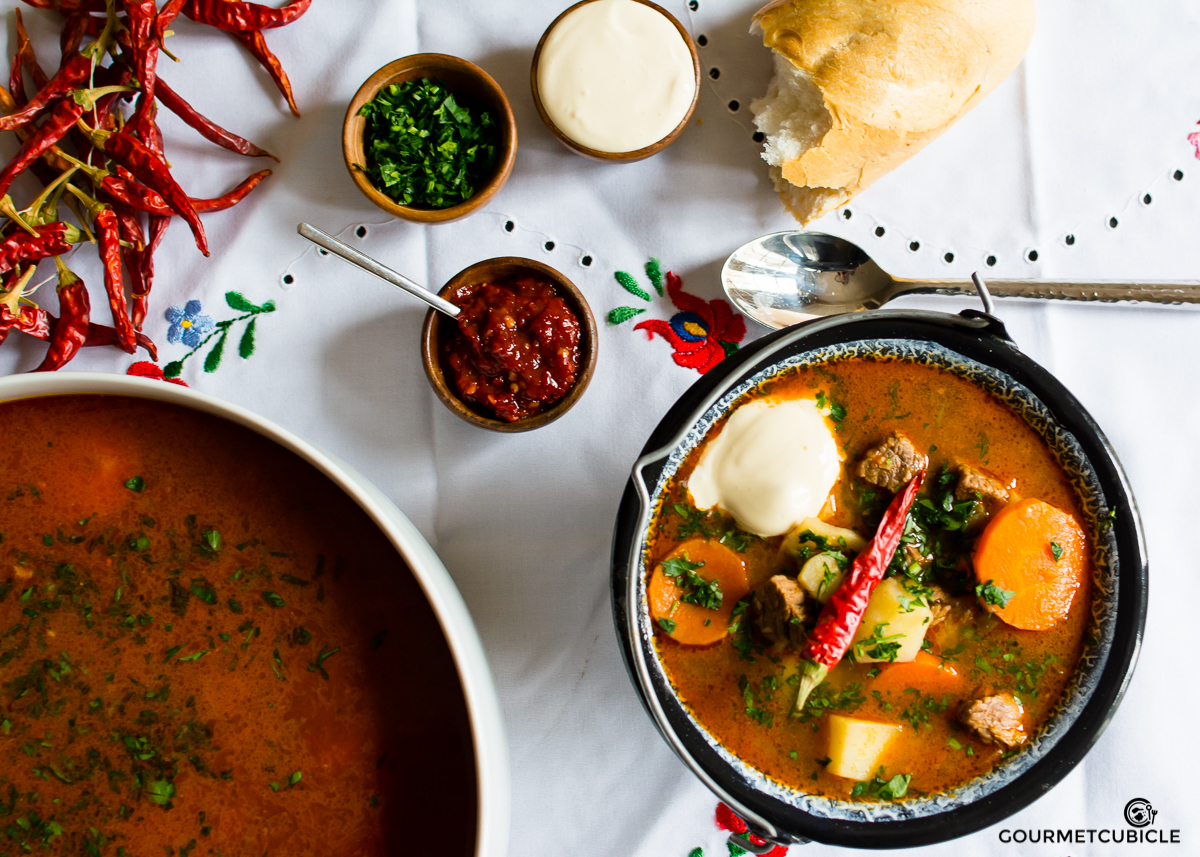
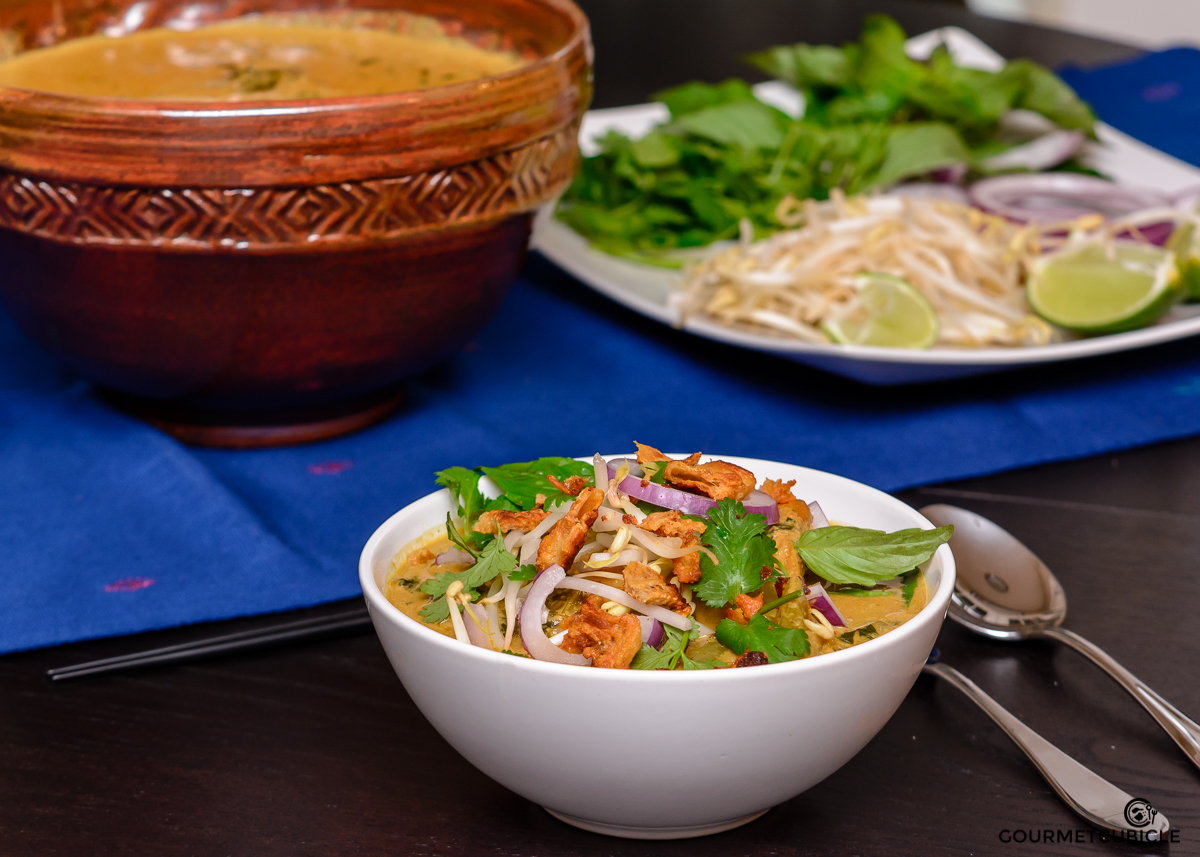
Gulyas —or goulash as it’s called outside of Hungary— is one of Rudi’s favorite Hungarian dishes. It’s also Hungary’s most celebrated dish. In the past, I posted my Traditional Hungarian goulash recipe on here, but there are so many variations of this delicious Hungarian staple dish, I’d have to write book to include them all. Bean goulash, or babgulyas as we call it in Hungary, is very similar to traditional goulash. In addition to beans, we also add smoked hock or some smoked sausage to the soup. It complements the beans so well! It’s a hearty and flavorful dish that is best shared with your loved ones!

Enjoy!


TRADITIONAL HUNGARIAN BEAN GOULASH (BABGULYÁS)


Serves 10-12
Prep time: 15 minutes
Cook time: 2.5 hours
Inactive time: 2 hours


Ingredients

  • 1 lb. dry kidney beans (cranberry or pinto beans)

  • 1-2 smoked pork hocks (or country ham bones and skin)

  • 8 cups chicken broth, warmed-up

  • ½ cup canola oil (or duck fat)

  • 1 medium-sized yellow onion, roughly chopped

  • 3-4 cloves garlic, finely chopped

  • 2 Roma tomatoes

  • 2 Anaheim peppers (or Hungarian wax peppers)

  • 1 ½ lbs. beef chuck

  • 2 Tbsp. Hungarian paprika

  • 1 tsp. freshly ground black pepper

  • 1 tsp. ground cumin

  • 1 tsp. dried marjoram

  • 2 dried bay leaves

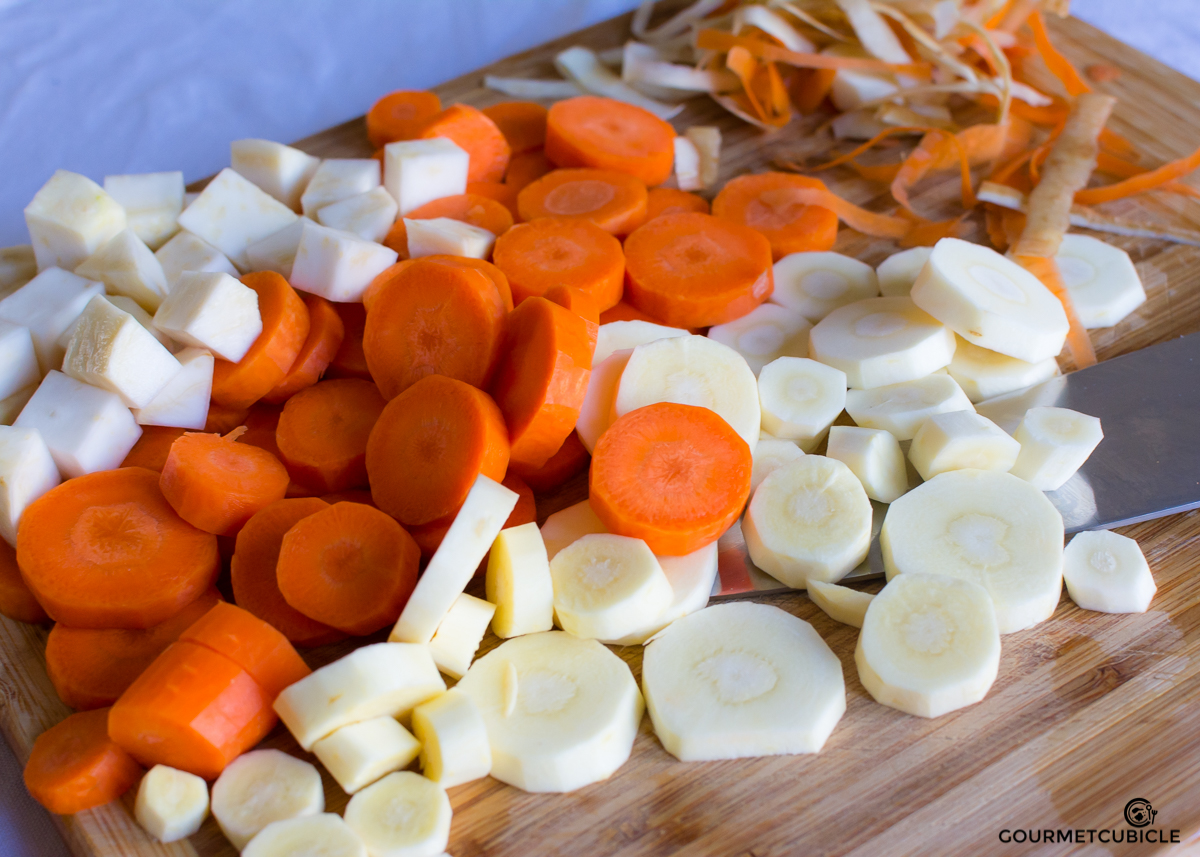
  • 2 carrots, cut into rounds

  • 2 parsley roots, cut into rounds

  • 1 celery root, cut into half inch cubes

  • ½ bunch fresh parsley leaves

  • kosher salt, to taste

  • sour cream

Instructions

  1. In a large bowl, cover the beans with 1-2 inches of cold water. Let them soak overnight.

  2. If the country ham bones or pork hock is too salty, soak them for a couple of hours.

  3. In a sauce pan, bring broth to a boil over high heat. Reduce the heat to low to keep the broth hot.

  4. In a large Dutch oven (12 quarts), heat oil or duck fat over high heat. When shimmering hot, add onions and sauté for 5-6 minutes. Stir often to avoid burning them.

  5. Add garlic, tomatoes, and peppers and cook for another 3 minutes. Stir occasionally.

  6. Add the beef to the mixture. Sprinkle with paprika, ground pepper, cumin, and marjoram. Mix well, until the beef is well coated. Cook for another 5 minutes.

  7. Pour in hot broth, add the pork hock, toss in bay leaves, and bring to a boil. Reduce heat to low and let the soup simmer for 1 hour, stirring occasionally.

  8. Add 2 cups of hot water and toss in the beans. Stir and cook for another half an hour.

  9. Add carrots, parsley roots, celery roots, parsley leaves, and salt. Adjust to medium heat and cook until the root vegetables are tender but firm; about 20-25 minutes.

  10. Remove from heat. Serve in a bowl with a dollop of sour cream on top and fresh bread on the side.

February 19, 2017 /Aurel Pop
beef, beans, Hungarian
Soup
3 Comments

Miso Ramen

July 10, 2016 by Aurel Pop in Main Dish, Soup

Ramen is one of the newest and hottest trends in the food business. A few years ago, people associated ramen with the salty, dehydrated noodles found in every convenience store. Some people still associate ramen with college fare. I recently asked my friend Nathan to join me in grabbing ramen for lunch. He immediately shot me a judgmental, condescending look and responded, “Hell no! I had enough of that shit in college.”

It took some effort to convince him that this newfangled ramen was indeed worth it, but eventually Nathan decided to trust me. Soon after we got to the shop he realized that true ramen isn’t really instant. On the contrary, it’s time consuming and rather tedious to prepare properly. Making ramen requires a lot of patience, but the end result is so rewarding and delicious that’s worth all the effort. Even Nathan – a hard core Texan - left the ramen shop looking as satisfied as if he had eaten two pounds of brisket.

When I was in Tokyo last June, I made it a mission to eat as much ramen as I possibly could. I also came up with a self-imposed rule not to go to the same ramen shop twice, no matter how good the ramen was. I thought this would be difficult, but it was actually rather easy. Even though I ate ramen twice a day, the sheer number of ramen styles made it easy to want to explore more. I couldn’t get enough of it. Fortunately, ramen shops were on almost every corner of the city. I remember eating at one that had a strict “no talking, no cell phone, no smoking” rule—all you could hear were people slurping hot, delicious ramen. It was amazing!

Ramen made its appearance in Japanese cuisine in the early 1900s, which is very recent compared to its ancient noodle relatives, soba and udon. Ramen was called shina soba, which means “Chinese soup,” until the mid-1900s. Eventually shina soba evolved into ramen.

A bowl of ramen, as we know it nowadays, consists of four basic elements: the broth, the tare, the noodles, and the toppings. The broth is generally made out of pork, chicken, or a combination of two. In some recipes (including mine) seafood like bonito and niboshi may be added to provide extra umami flavor to the broth. The tare is the seasoning—an umami-packed flavor essence—that generally determines the ramen type. The noodles play an important role in ramen as well. You’ll find thinner, curly noodles in clear broth ramen and thicker noodles in denser ramen like the tsukemen ramen. As far as toppings are concerned, it’s a matter of preference. Whenever I prepare ramen for friends, set up a station where everyone can build their own ramen. It usually contains meat or seafood (chashu pork, minced pork or shrimp), tamago (ramen egg), kamaboko (white and red fish cakes), fresh chopped vegetables (cabbage, bok choy, corn, spinach, etc), menma (fermented bamboo shots), wood-ear mushrooms, nori (seaweed), etc.

There are four basic types of ramen: shio (salt), miso (fermented soy beans), shoyu (soy sauce), and tonkotsu (pork bones). Each style is specific to different regions of Japan. If Tokyo has the best shoyu, Hakodate has the clear shio, Saporro has the cloudy miso, and Hakata has the intense tonkotsu. Out of all four styles, I personally prefer the miso and tonkotsu. I like intense flavors, and these two styles definitely have that. Miso is a bit saltier, whereas the tonkotsu has that intense pork flavor to it. Both of them are delicious, and I highly recommend that you try making them at home. The experience will be unforgettable. Here is your chance to try the miso ramen. Happy slurping!


MISO RAMEN


Serves 10-12
Prep time: 1 hour
Cook time: 14 hours
Inactive time: 12 hours


A word of warning/encouragement

Ramen is a complex dish that requires a lot of time and patience, so I recommend that you make it a fun weekend activity. It requires commitment, but the pay-off that accompanies making homemade ramen is on par with the effort. The sheer volume of instructions and components may be off-putting for some of you. I tried to keep the recipe as short and concise as possible, but unfortunately there’s nothing you can do about that; it’s the nature of ramen. Don’t let the time commitment scare you! There are also a lot of specialized ingredients in this recipe. Most Asian stores carry these ingredients, but some can even be purchased online. 


Ingredients

Chashu pork
*inspired by Kenji Lopez-Alt’s (Serious Eats) Chashu pork recipe

  • 3 lbs. slab pork belly, skin-on (about an inch thick)
  • 1 tsp. kosher salt
  • ½ tsp. freshly ground black pepper
  • ½ cup soy sauce
  • ½ cup mirin
  • ½ cup sake
  • 1 cup water
  • ½ cup sugar
  • 1 medium shallot, peeled and halved
  • 1 bunch of scallions (about 4-6 scallions)
  • 6 cloves garlic, crushed
  • 2-inch knob ginger, crushed

Broth

  • 1 lb. pork trotters
  • 5 lbs. pork neck
  • 1/2 lbs. pork trimmings (or fatback)
  • 2 large carrots, peeled and cut into ½ inch rounds
  •  1 medium yellow onion, peeled and cut in half
  • 10-12 garlic cloves
  • 3-inch knob ginger
  • 1 stick cinnamon
  • 1 whole star anise
  • 1 Tbsp. whole peppercorns
  • three 2-inch pieces kombu (dried kelp)
  • ¼ cup niboshi (dried sardines)

Tare (seasoning)

  • 1 cup white miso
  • 1 cup red miso
  • 2 Tbsp. tahini
  • 2 Tbsp. soy sauce
  • 2 Tbsp. mirin
  • 1 Tbsp. sesame oil
  • 1 tsp. chili oil, optional
  • 6-8 cloves garlic
  • 1 medium shallot
  • 2-inch knob ginger, peeled and crushed
  • 1 tsp. shichimi togarachi (Japanese spice)

Ajitsuke tamago (soft-boiled ramen egg)

  • 5 eggs, room temperature
  • ½ cup soy sauce (or use chashu marinade)
  •  ½ cup mirin (or use chashu marinade)

Aromatic oil (optional)

  • ½ cup lard
  • 1 shallot, finely chopped
  • 10-12 cloves garlic, crushed and finely chopped
  • 2-inch knob ginger, peeled, crushed and finely chopped

Toppings (to your liking)

  • ramen noodles
  • toasted sesame seeds
  • sesame oil
  • bok choy (or cabbage), chopped
  • scallions, finely chopped
  • wood-ear mushrooms, chopped
  • corn kernels
  • bamboo shots
  • nori

Instructions

Chashu pork

  1. Pre-heat oven to 275F (130C) degrees.
  2. Lay pork belly on a cutting board, skin side facing down. Season with salt and pepper.
  3. Roll belly lengthwise and secure with butcher twine.
  4. In a medium saucepan, mix soy sauce, mirin, sake, water, sugar, scallion, shallots, garlic, ginger. Stir to combine. Place pork belly in the saucepan—it won’t be completely covered with marinade.
  5. Cover saucepan with a lid left slightly ajar and transfer to oven. Cook for 1.5 hours.
  6. Turn pork belly and cook for another 1.5 hours. Remove from oven and let it cool. When completely cool, place in the refrigerator to rest overnight.
  7. Drain chashu and save marinade for soft-boiled eggs. Keep chashu pork refrigerated.
  8. Before serving ramen, slice chashu into thin rounds. Using a propane blowtorch, char the pork belly. If you don’t have a blowtorch, simply reheat chashu in broth before serving.

Broth

  1. Preheat oven to 400F (200C) degrees.
  2. Lay pork trotters and pork neck on parchment paper-lined baking pans. Place pans in the oven and brown pork for 30 minutes.
  3. Turn neck bones and trotters on the other side and brown for another 20 minutes. Remove from oven, and transfer the pork bones to a large 16-quart stockpot.
  4. Add fatback, carrots, onions, garlic, ginger, cinnamon stick, star anise, peppercorns, kombu, and niboshi. Fill stockpot ¾ full with water.
  5. Bring to a boil over high heat. When water reaches a rolling boil, reduce heat to the tiniest simmer. Cover and let the broth cook for 10-12 hours. Do not stir as it will cloud it.
  6. When done, carefully strain and discard solids.
  7. Reheat broth right before serving.

Tare (seasoning)

  1. In a food processor, combine all ingredients under Tare. Pulse until it reaches the consistency of a paste.
  2. Transfer to an airtight container and refrigerate.

Ajitsuke tamago (soft-boiled ramen egg)

  1. In a medium bowl, combine a quart of water with 2 cups of ice to make an ice bath.
  2. Fill a medium saucepan with 2-2 ½ inches of water and bring to a boil over high heat.
  3. Using a slotted spoon or wire mesh, carefully lower eggs into the boiling water.
  4. Cook for exactly 6 minutes and 30 seconds. Immediately remove eggs from the saucepan and place them in the ice-bath. This will stop the cooking process and allow the yolks of your eggs to stay silky and smooth. Let eggs rest for 2-3 minutes.
  5. Carefully peel eggs and place them in a mason jar.
  6. Pour mirin and soy sauce over them, or the leftover marinade from the chashu pork.
  7. Refrigerate overnight.
  8. Right before serving remove eggs from the marinade and cut them in half lengthwise. Discard marinade afterwards.

Aromatic oil (optional)

  1. In a small saucepan, heat lard over medium heat. Add shallots, garlic and ginger and cook for about 30 minutes, or until they start browning. Stir occasionally and make sure the garlic doesn’t burn.
  2. Strain and let the fat cool until it solidifies.

Assembly

  1. In a stainless steel skillet, heat 2 teaspoons of sesame oil over medium-high heat. Add chopped bok choy, and cook for 3 minutes, tossing occasionally. Season with a half teaspoon of ground pepper and remove from the heat. Set aside.
  2. In a large pot, bring water to a boil and cook ramen noodles according to the instructions on the package. Don’t overcook them. Drain and set noodles aside.
  3. Prepare ramen by adding 1 teaspoon of toasted sesame seeds, 2 tablespoons tare, and 1 teaspoon of aromatic oil to the bottom of the bowl.
  4. Add a few ladles of hot broth until the bowl is ¾ full.
  5. Using a whisk, mix the broth with the tare. Add noodles and bok choy to your liking.
  6. Top with your favorite toppings: scallions, wood-ear mushrooms, corn kernels, bamboo shots, etc.
  7. Add chashu pork, soft-boiled ramen egg, and a piece of nori to the ramen. Slurp and enjoy!

Notes

  • The unused broth can be stored in the freezer for months.
  • The tare will stay good for several weeks refrigerated.
  • Make sure the eggs used for the soft-boiled ramen eggs are at room temperature prior to boiling. Otherwise they will crack when submerged in boiling water.
July 10, 2016 /Aurel Pop
Japanese, pork, noodles, eggs
Main Dish, Soup
Comment

Traditional Hungarian Goulash (Gulyásleves)

March 02, 2016 by Aurel Pop in Soup

The time has arrived for me to post my very traditional beef goulash recipe. My first post on this blog was for Chicken Paprikash, another Hungarian staple. After trying it, many of my readers requested my goulash recipe. Goulash is the most famous Hungarian dish in the world. It’s one of Hungary’s national dishes -- the symbol of their country. And it is for a good reason. It’s a dish made with basic ingredients like meat, peppers and root vegetables elevated to perfection by the use of Hungary’s most famous spice: paprika. Goulash can be made with beef, pork or even chicken, but the traditional way of making it is with beef.

Speaking of traditions, goulash is usually made by men. Hungarian men take a lot of pride in making this dish. They are often cook-offs where the best Hungarian goulash cooks measure their skills. When I lived in Hungary, goulash was my go-to dish when I had a large group of friends over for dinner. Also, every time my friends and I went camping, I was the one responsible for making bográcsgulyás, which is a goulash made in a huge enamel cast iron or stainless steel cauldron, outdoors over wood fire. 

Making the dish also goes hand-in-hand with drinking pálinka, Hungary’s national drink. There is something about getting smoky while standing around a huge kettle of goulash that’s slowly cooking over a wood fire while sharing a bottle of homemade pálinka with your best friends that makes you feel fulfilled and happy. Stories starting flowing, and playful teasing and bantering follow. That’s what goulash is about: friends, laughter, drinks and flavorful food.

If you ever get to Hungary ask a local to cook goulash for you (preferably outdoors in bogrács). You’ll experience something beautiful, and you’ll get a good understanding of their culture, even if you aren’t able to understand their language. Hungarian is very unique, so don’t get too downhearted if you’re unable to pick it up right away. It’s unrelated to any other language in the world, and it’s rather difficult. A friend of mine, Erin, attempted to learn it after making a dumb bet (when she was drunk of course) with my other friend, Alex. She was so excited about learning Hungarian for about two weeks, after which she gave up.

Hungarians are the proudest people you will ever meet. Although only half-Hungarian, I identify with Hungarian culture. We take pride in our traditions, language, food, and drinks. Our food consists of simple dishes made with simple ingredients turned into delicious, fragrant and hearty dishes. Chicken paprikash (paprikás csirke), Pork stew (sertéspörkölt), and Beef goulash (marhagulyás) are just a few of our most famous dishes. The basic ingredients are the same: meat, onions, peppers, and paprika. Even the cooking technique is similar for all three of them -- sauté some onions, add a bunch of Hungarian paprika to it, add some meat, and follow with peppers. You basically make a stew.  From there it’s the final touch that makes a paprikash, paprikash and a goulash, goulash -- add sour cream for the former, and water and root vegetables for the latter.  

Hungarian paprika is the signature flavor in most famous Hungarian dishes. It is very different than let’s say Spanish paprika. Hungarian paprika is sundried, whereas its Spanish counterpart is slowly smoked over a wood fire.  As a result, the flavors differ significantly. Hungarian paprika is known for its rich, bittersweet, and intense red peppery flavor, whereas the Spanish one is more delicate and smoky. It’s worth the money to buy the Hungarian variety for this dish to get an authentic Hungarian flavor. Jó étvágyat!


TRADITIONAL HUNGARIAN GOULASH (GULYASLEVES)


Serves 10-12
Prep time: 15 minutes
Cook time: 2.5 hours
Inactive time: 2 hours


Ingredients

  • 4 Tbsp. pork lard (or bacon fat, or vegetable oil)
  • 1 large onion, roughly chopped
  • 1 ½ tsp ground caraway seeds
  • 2 tsp freshly ground black pepper
  • 2 ½ Tbsp. Hungarian paprika
  • 2 dried bay leaves
  • 2 cups low-sodium beef broth
  • 2 lbs. beef shoulder, cut into ½ inch cubes (chuck and shank are also good)
  • 5 cloves garlic, crushed and roughly chopped
  • 2-3 Roma tomatoes, diced
  • 2 Hungarian waxed peppers (or Anaheim peppers), deseeded and cut into half rings
  • ¾ lb. carrots (about 2-3 large carrots), peeled and cut into rounds
  • ½ lb. parsley roots (about 2-3 parsley roots), peeled and cut into rounds (or parsnips)
  • ½ lb. celery root (1 small celery root), peeled and cut into ½ inch cubes
  • 1 lbs. potatoes, peeled and cut into ½ inch cubes
  • 3-4 sprigs of fresh parsley leaves, tied together
  • 4-5 cups hot water
  • 1 ½ tsp wood smoked salt, optional
  •  ½ TBS kosher salt
  • sour cream, optional
  • ½ cup fresh parsley leaves, finely chopped

Instructions

  1. In a large cast iron Dutch oven, heat lard over medium-high heat. When the lard starts shimmering, add onions and cook for 8 minutes. Stir often so they don’t burn. If they start browning, add a tablespoon of water.
  2. Stir in caraway seeds, black pepper and bay leaves, and cook for 2 more minutes.
  3. Remove the pot from the heat, and sprinkle paprika all over the onions. Stir often! (Burnt paprika is bitter.)
  4. Return the Dutch oven to the fire. Add ½ cup beef broth, and cook for 5 minutes.
  5. Add beef cubes and garlic. Stir well until each piece is coated with paprika gravy. Reduce the heat to medium and cook for 2-3 minutes, or until the beef cubes start browning.
  6. Mix in tomatoes, peppers and the remainder of the broth (1 ½ cup). The broth should cover the meat and vegetables by an inch or two. If it doesn’t, add hot water.
  7. Reduce the heat to low, cover the Dutch oven, and let it simmer for an hour and a half.
  8. Add the root vegetables (carrots, parsley, celery, and potatoes) and the tied parsley leaves to the pot. Add 4-5 cups of hot water to cover by an inch or two.
  9. Season with salt, and bring soup to a boil over high heat. When it starts boiling, reduce the heat to medium, and cook for 30 minutes uncovered.
  10. Using a sieve, skim off the scum. Remove the parsley sprigs and the bay leaves and discard them. Taste and adjust saltiness.
  11. Serve goulash hot with fresh bread. You can add an optional dollop of sour cream to the top and sprinkle with chopped parsley.

Notes

  • I usually add the salt at the end when cooking with beef, so that it stays tender rather than becoming chewy.
  • Recently I discovered wood smoked salt at my local grocery store, so I used a bit to simulate the subtle smoky flavor that comes from traditional goulash. Historically, goulash was made on wood fire in a cast iron enamel cauldron. 

March 02, 2016 /Aurel Pop
Hungarian, beef, paprika, carrots, potatoes
Soup
2 Comments

Chicken Khao Soi

November 22, 2015 by Aurel Pop in Main Dish, Soup

I had never had khao soi prior to moving to the United States. As a matter of fact, Roni introduced me to it. It was right when we started dating that she told me about this insanely delicious Thai soup that I would love. She went on to explain that when she was backpacking in Thailand she went to Chiang Mai in the north almost exclusively to hunt the dish down in its native region. She kept going on and on about it, but honestly I just couldn’t wrap my head around it, until one day she took me to a Thai restaurant that she knew served a decent khao soi.

When I first tasted it I wasn’t that impressed. I think she got the vegetarian one, so it may have been that, but I recall thinking that the dish wasn’t anything special, or at least it wasn’t anything special to my sophisticated Eastern European palette. I think she got a bit offended by my indifference towards her favorite Thai dish, so she made it her mission to prove how good it was. She told me that there was another Thai place that was closed for remodeling at the time, but once it reopened she would take me there so I could have what she thought to be the closest to the khao soi in Chiang Mai.

After a few months the Thai place re-opened its doors so we went to check it out. As I was going through the menu I saw that their version of Khao Soi was actually made with chicken. It instantly got my attention. Funny thing is that I still didn’t order it anyway. I have this weird habit of not ordering what Roni does, even if it’s my favorite dish on the menu. The way I think about it is that I will taste it anyway if she’s ordering it so why not trying something else as well?

Well, my principle bit me in the ass this time. As soon as they brought out her khao soi I immediately knew I made a huge mistake. It looked so appetizing: fresh Thai basil, cilantro, bean sprouts and crisp red onions on top of this bright yellow fragrant soup. As she stirred it I saw noodles and a whole braised chicken leg which I thought I would surely get because Roni generally only eats white meat. I smelled it and was mesmerized by its curry fragrance. I managed to get a taste of it which finally led me to understand why she loved it so much and what a fool I was for not trusting her taste. To add to my misery, I didn’t end up getting the chicken leg, because apparently Roni’s dark chicken meat rules don’t apply when it comes to khao soi. 

I played it cool, finished my dish and said that I could make a better khao soi at home anyway. She challenged me to prove it, which lead me to come up with this recipe. I experimented with several recipes I found online, but none of them seemed good enough, so I created my own version. Most importantly, Roni—who has had many versions of the real deal in Thailand--loves my recipe. In fact I just watched her polish off the last bowl of leftovers. Gin Hai Aroy! 


Chicken Khao Soi


Serves 8
Prep time: 25 minutes
Cook time: 60 minutes


Ingredients

Curry paste

  • 4 dried guajillo chilies (or pasilla chilies)
  • 2 medium shallots, roughly chopped
  • 6 cloves garlic, crushed and roughly chopped
  • 2 inches ginger, crushed and roughly chopped
  • 2-4 Thai chilies, roughly chopped (amount depends on your desired spice level)
  • 1/2 cup cilantro stems, roughly chopped
  • 1 1/2 TBS ground coriander seeds
  • 2 tsp turmeric powder
  • 2 tsp garam masala
  • 1 TBS red curry paste

Soup

  • 2 1/2 lbs skin-on chicken leg quarters, bone in (about 4 whole legs or 4 thighs and 4 drumsticks)
  • 1 tsp kosher salt
  • 1 tsp freshly ground black pepper
  • 2 TBS vegetable oil
  • 28oz coconut milk (2x14oz cans)
  • 3 1/2 cups low sodium chicken broth
  • 1 tsp clam juice
  • 1 tsp fish sauce
  • 2 TBS soy sauce
  • 1/2 TBS palm sugar (or brown sugar), optional
  • 1 cup pickled mustard greens, roughly chopped 
  • 1/4 cup cilantro leaves, finely chopped
  • 1 medium lime juiced (about 3 TBS fresh lime juice)
  • 1 lb egg noodles
  • 1 TBS kosher salt

Garnish

  • bean sprouts
  • Thai basil leaves
  • red onions, sliced
  • cilantro leaves
  • lime wedges
  • crispy chicken skin

Instructions

  1. In a small sauce pan bring 2 cups of water to a boil over high heat. Place the dried chilies in the pan and using a spoon submerge them under the boiling water. Cover the pan with a lid, remove from heat and let the chilies soak.
  2. Using paper towels pat the chicken legs dry. Make sure you don’t miss a spot otherwise you risk burning yourself with splattering hot oil.
  3. Remove the skin from the chicken legs. For best results use a paper towel to grab the skin (that way it won’t slip out of your hand) at the bottom of the thigh and pull upwards.
  4. Set skin and chicken aside on a large tray and sprinkle with salt and pepper on both sides.
  5. Add oil to a large and deep stainless steel frying pan. Place chicken skin in the oil and heat the pan over medium-high heat. When the oil starts shimmering reduce the heat to medium and cook the skin for about 5 minutes. Turn on the other side and cook until it becomes brown and crispy.
  6. Transfer the skin to a paper towel lined plate and set aside.
  7. You should have enough fat in the pan, but if it’s running low add a tablespoon or two of vegetable oil. Raise the heat to high until the grease easily slides across the pan. 
  8. Carefully place the chicken legs in the pan and sear them for about 10 minutes on each side.
  9. While the chicken is searing, transfer the chilies from the hot water to a food processor removing the stems in the process. Keep 1/3 cup of soaking liquid. Discard the rest.
  10. Add the rest of the ingredients under Paste to the food processor. Puree until it reaches the consistency of a smooth paste, about 2-3 minutes. Set aside.
  11. When the chicken developed a nice brown sear on each side, transfer to a bowl and set aside.
  12. Add the curry paste to the hot pan and cook for 5 minutes stirring occasionally. Pour in coconut milk, chicken broth, clam juice, fish sauce, soy sauce, and sugar. Stir well to combine and bring to a boil.
  13. Place the chicken and juices from the bowl into the boiling sauce. Reduce heat to low and let it simmer for 25 minutes.
  14. Add pickled mustard greens, cilantro and lime juice. Give it a last stir, cover and cook for 5 more minutes. Remove from heat and set aside. It’s done!
  15. Fill a large pot halfway with water. Add a tablespoon salt and bring water to a boil over high heat. Add pasta and cook per the instructions on the package. It usually takes about 3-5 minutes to cook egg noodles so be careful not to overcook them.
  16. When the noodles are done, drain them and discard the water.
  17. Time to prepare the bowls for serving. Divide the noodles and place them in large soup bowls. Using a large spoon or ladle transfer soup and chicken on top of the noodles. Serve hot.
  18.  Add the toppings of your choice. Using your hands crush the chicken skin into bite sizes and sprinkle on top of the soup.

Notes

  • For a vegetarian version replace chicken with tofu, vegetables or a mix of the two and the chicken stock with low sodium vegetable broth. Also, replace the clam juice and fish sauce with vegetarian options.
  • Palm sugar, red curry and pickled mustard greens can be purchased at most Asian stores.
  • I prefer using air chilled chicken, especially when pan frying it. The regular one has a high water content and will splatter hot oil when placed in a hot pan.
November 22, 2015 /Aurel Pop
chicken, curry, Thai, spicy
Main Dish, Soup
3 Comments

Chilled Sour Cherry Soup

June 08, 2015 by Aurel Pop in Appetizer, Soup, Dessert

Sunshine has finally arrived to Texas! I am so happy to be leaving the rainy month of May behind and enjoy everything that typical hot Austin summers have to offer: sunbathing in Zilker Park, dipping in the cold and refreshing Barton Springs, weekend getaways to Hamilton Pool and the Hill Country, Blues on the Green, and paddle boarding on Town Lake. As great as all of these may sound, I know that by September I'll be fed up with the heat, but until then I want to live the summer to its fullest. 

Summer in terms of food should be about light and refreshing dishes and this delicious sour cherry soup is one them. It may sound odd at first as it's not that common anywhere aside from Hungary, but I promise that its tart taste and creamy texture will blow your socks off.

In my Zserbó Cake post I mentioned that my grandparents, Tatus and Iolika, had an amazing orchard in their backyard with an impressive number of cherry trees. During the hot summer days my grandma would always make us- my cousins, my sister and I- huge pots of cold soups. Cold fruit soups were our favorite type. She would alternate the sour cherries with pears, quince or currants so we wouldn't get bored of the same taste.

20150606-cherry soup2.jpg

In Hungary this soup is called meggyleves and it's served mostly during the hot summer months, but it's not unheard of it to be served warm during the colder months of the year. I prefer it cold. You can taste it before it cools down and decide which one you like better. Making this soup is very easy as it requires little effort. As kids, our contribution to this soup was to pick, wash and then pit the cherries. We hated doing this because we had to pit buckets full of cherries for not only the soup but also for preserves and compote. Fortunately nowadays it's easy to find pitted sour cherries so the dirty work has been taken care of for you by machines.

I'm not sure in which category to put this summer delicacy, because in Hungary we'd eat it either for lunch or dinner, before or after the main dish. Is there a thing called appetizer-dessert? If not I’m coining the term. Enjoy!


Chilled Sour Cherry Soup


Serves 8-10
Prep time: 10 minutes
Cook time: 25 minutes


Ingredients

  • 2 jars sour cherries in syrup (12 oz each) (or 2 lbs. fresh or frozen pitted sour cherries and 3 cups cherry juice)
  • 1/2 lemon, peeled
  • 7 cups water
  • 5 TSB sugar
  • 1/2 tsp kosher salt
  • 6 whole cloves
  • 1 stick cinnamon
  • 4 cardamom pods
  • 1 star anise
  • 1 two-inch vanilla bean pod (or 1 tsp vanilla extract)
  • 1.4 oz vanilla pudding powder
  • 1 tsp starch (potato or arrowroot)
  • 8 oz heavy cream (or sour cream)
  • 1/2 cup roasted slivered almonds
  • 6 fresh mint leaves, chopped 

Instructions

  1. In a large sauce pan combine cherry syrup from the jars (or 3 cups juice), water, lemon peel, sugar, salt, cloves, cinnamon, cardamom, anise and vanilla.
  2. If using fresh cherries you should add them as well. If using jarred or frozen sour cherries, hold off on putting them in for a bit. Usually the jarred ones are already cooked in syrup, so if you boil them now they'll be mushy by time the soup is ready. Same for the frozen cherries- they are usually blanched.
  3. Bring sauce pan to a boil over medium high heat. Stir and boil for about 15 minutes for the spices to become fragrant. You should be able to smell the cinnamon, cloves and anise if you leaned over the pan. 
  4. While the spiced mixture is boiling, combine vanilla pudding powder and starch in a small mixing bowl. Slowly pour the cream of your choice and whisk vigorously for about 3 minutes. Make sure there aren't any lumps in the mixture. 
  5. Remove spices (cloves, cardamom, cinnamon and star anise) and lemon peel from the sauce pan using a sieve and discard them. Reduce the heat to medium. Taste the soup and adjust sweetness. If you follow the recipe the soup will be on the tart side, but if you prefer it sweeter you can add more sugar. You can make it even more tart by adding freshly squeezed lemon juice. 
  6. Temper the dairy mixture by transferring one ladle at a time of the hot soup from the sauce pan into the mixing bowl. You want to slowly raise the temperature of the cream, otherwise it will curdle when added to the hot soup. Once tempered, pour the dairy mixture into the pot and stir to combine. 
  7. If using jarred or frozen cherries now is the time to add them to the soup. Stir and cook until the soup becomes thick and creamy, about 5-6 minutes. 
  8. Increase the heat to medium-high, bring the soup to a boil and remove the pan from the heat. You're done!
  9. Chill the soup for about an hour in the refrigerator. Sprinkle almonds and mint right before serving.

NOTES

To get the vanilla beans out of the pods split the pod in half lengthwise then scrape the beans out of the pod halves with the back of your knife using firm pressure. 
If the soup  ends up lumpy or the dairy curdled, remove the sour cherries from the soup and set them aside. Using an immersion blender mix the soup until the lumps are gone. Put the cherries back in the soup.

June 08, 2015 /Aurel Pop
Hungarian, summer
Appetizer, Soup, Dessert
3 Comments
  • Newer
  • Older

Copyright ©2017 Aurel Pop & gourmetcubicle. All rights reserved. Don't steal, ask.