gourmetcubicle

Tech by day. Cook by night.

The food blog of an engineer. Whether you're a tech nerd like me who wants to eat homemade meals and experiment with reproducing that amazing restaurant dish you ate, or a seasoned cook who wants to find inspiration for your next meal, you're in the right place.

  • home
  • blog
  • about
  • recipes
  • pantry essentials
  • contact

Miso Ramen

July 10, 2016 by Aurel Pop in Main Dish, Soup

Ramen is one of the newest and hottest trends in the food business. A few years ago, people associated ramen with the salty, dehydrated noodles found in every convenience store. Some people still associate ramen with college fare. I recently asked my friend Nathan to join me in grabbing ramen for lunch. He immediately shot me a judgmental, condescending look and responded, “Hell no! I had enough of that shit in college.”

It took some effort to convince him that this newfangled ramen was indeed worth it, but eventually Nathan decided to trust me. Soon after we got to the shop he realized that true ramen isn’t really instant. On the contrary, it’s time consuming and rather tedious to prepare properly. Making ramen requires a lot of patience, but the end result is so rewarding and delicious that’s worth all the effort. Even Nathan – a hard core Texan - left the ramen shop looking as satisfied as if he had eaten two pounds of brisket.

When I was in Tokyo last June, I made it a mission to eat as much ramen as I possibly could. I also came up with a self-imposed rule not to go to the same ramen shop twice, no matter how good the ramen was. I thought this would be difficult, but it was actually rather easy. Even though I ate ramen twice a day, the sheer number of ramen styles made it easy to want to explore more. I couldn’t get enough of it. Fortunately, ramen shops were on almost every corner of the city. I remember eating at one that had a strict “no talking, no cell phone, no smoking” rule—all you could hear were people slurping hot, delicious ramen. It was amazing!

Ramen made its appearance in Japanese cuisine in the early 1900s, which is very recent compared to its ancient noodle relatives, soba and udon. Ramen was called shina soba, which means “Chinese soup,” until the mid-1900s. Eventually shina soba evolved into ramen.

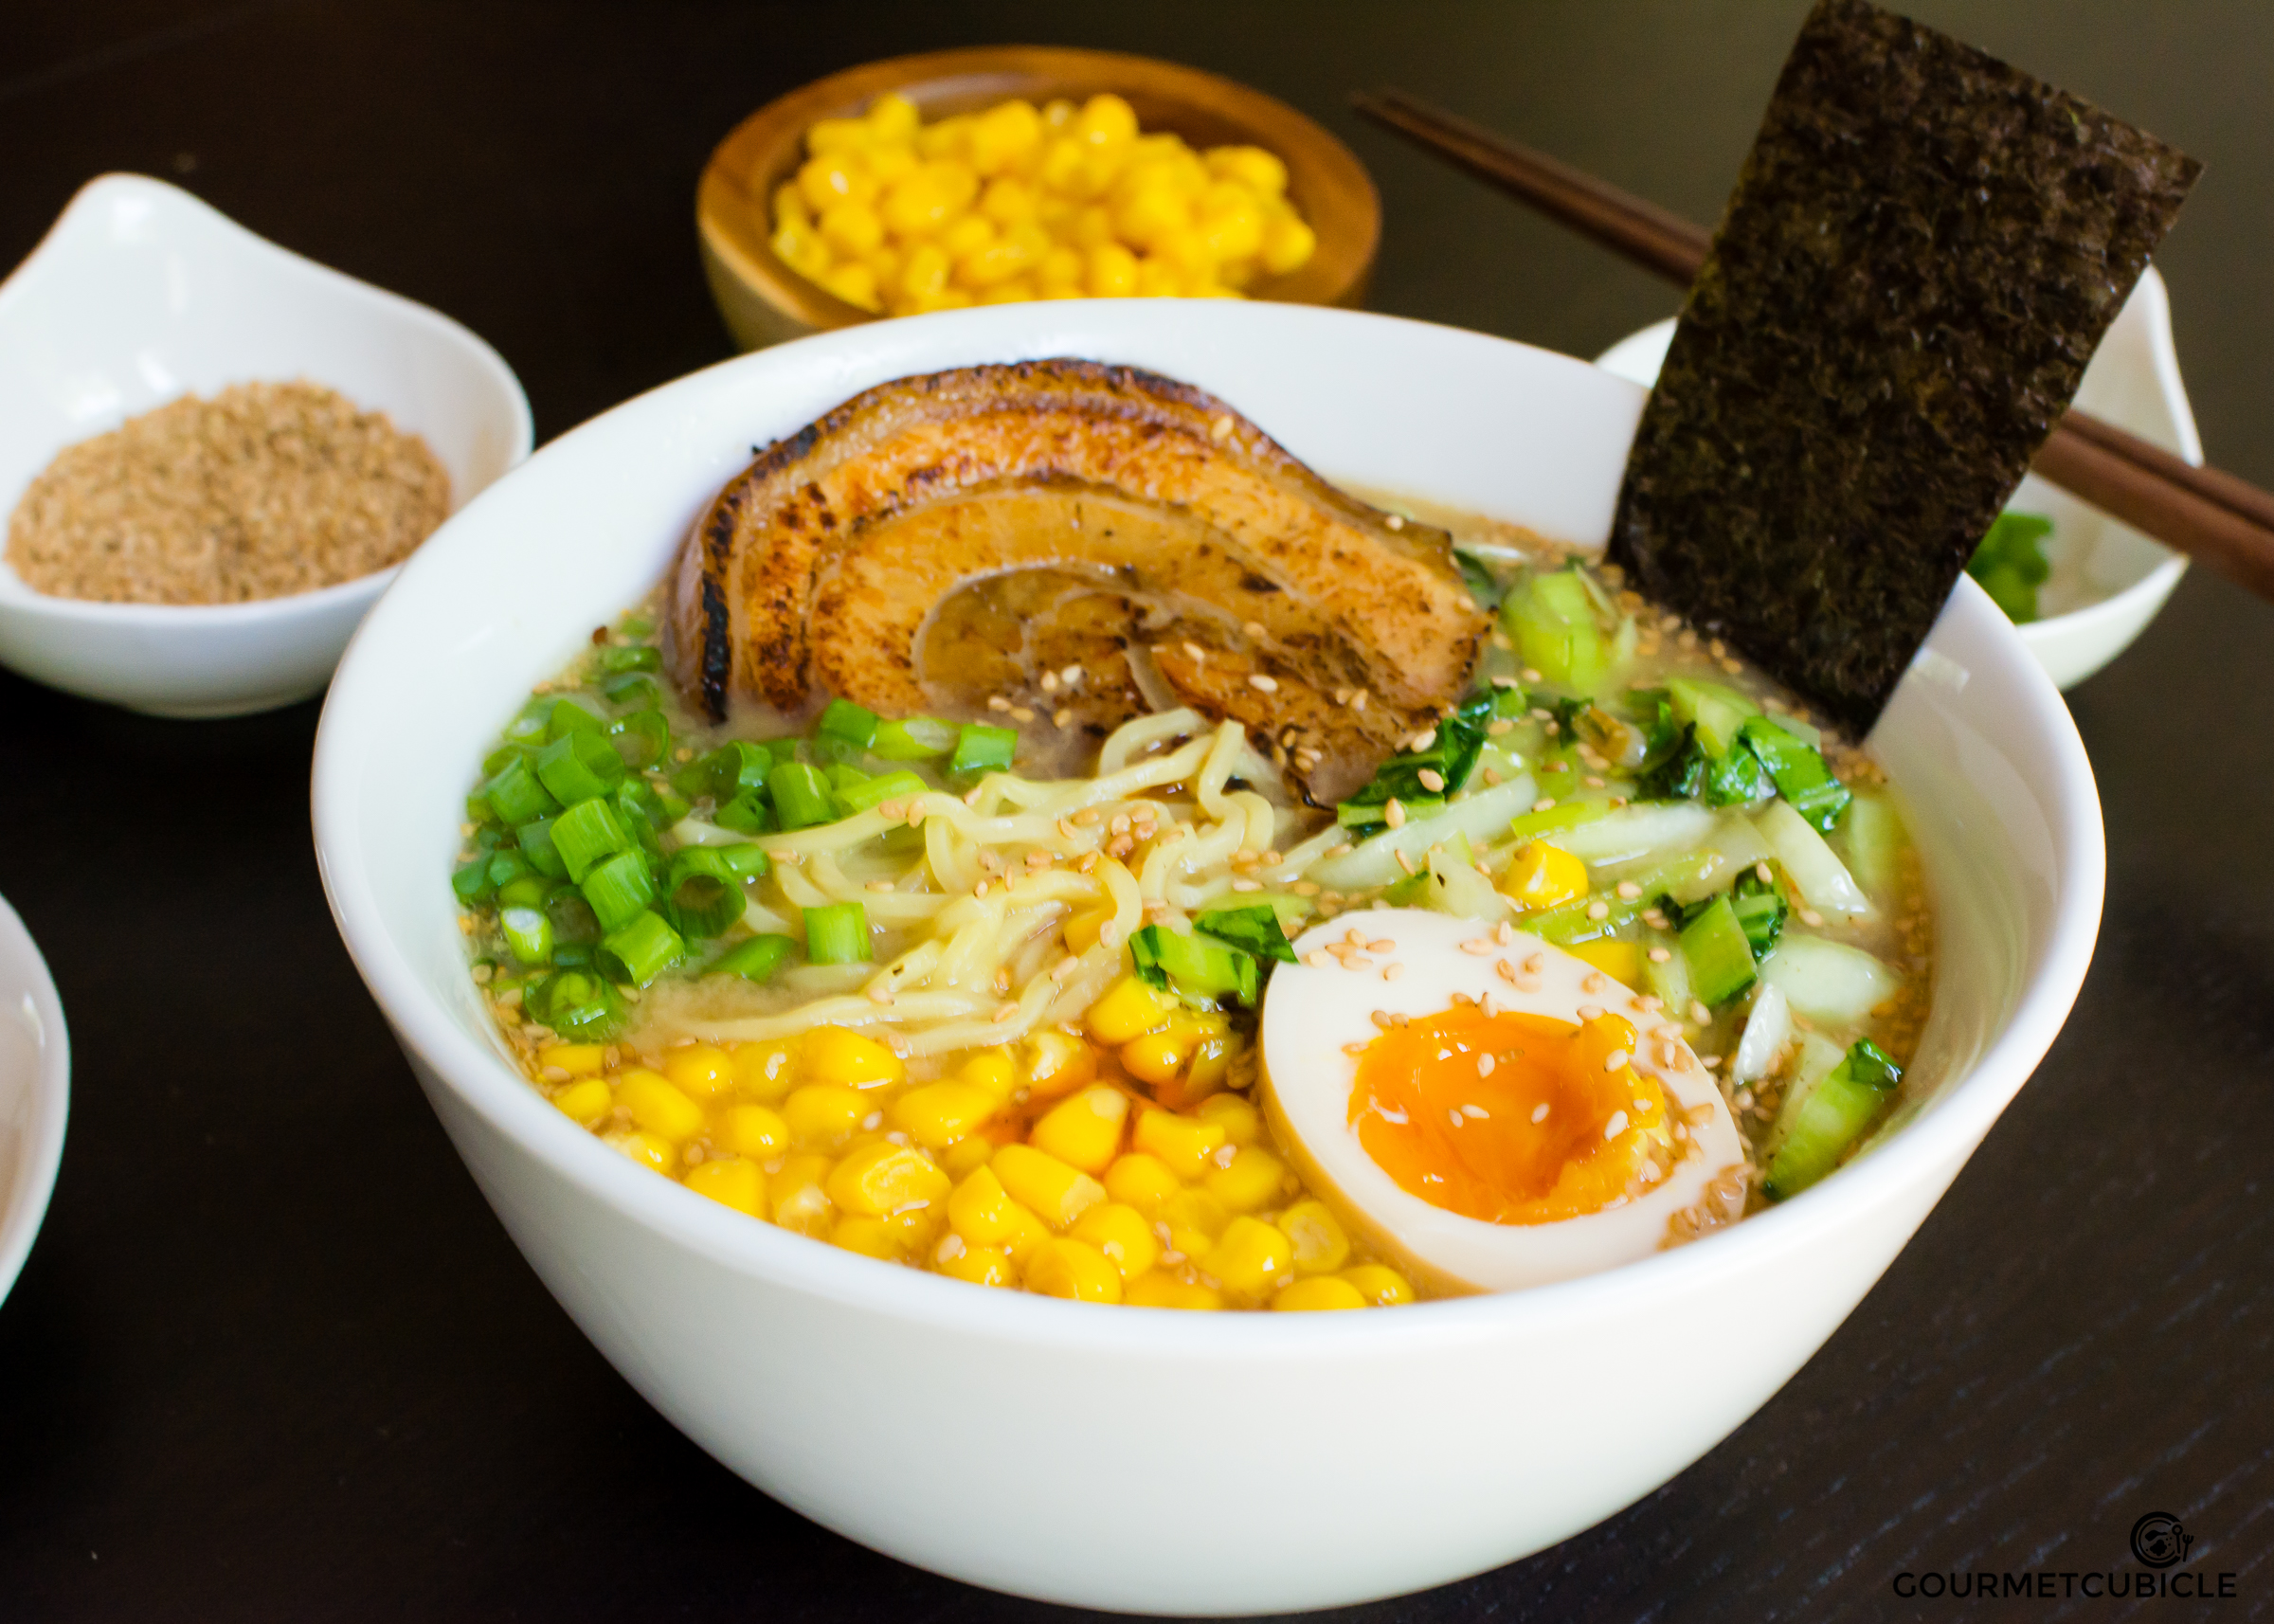
A bowl of ramen, as we know it nowadays, consists of four basic elements: the broth, the tare, the noodles, and the toppings. The broth is generally made out of pork, chicken, or a combination of two. In some recipes (including mine) seafood like bonito and niboshi may be added to provide extra umami flavor to the broth. The tare is the seasoning—an umami-packed flavor essence—that generally determines the ramen type. The noodles play an important role in ramen as well. You’ll find thinner, curly noodles in clear broth ramen and thicker noodles in denser ramen like the tsukemen ramen. As far as toppings are concerned, it’s a matter of preference. Whenever I prepare ramen for friends, set up a station where everyone can build their own ramen. It usually contains meat or seafood (chashu pork, minced pork or shrimp), tamago (ramen egg), kamaboko (white and red fish cakes), fresh chopped vegetables (cabbage, bok choy, corn, spinach, etc), menma (fermented bamboo shots), wood-ear mushrooms, nori (seaweed), etc.

There are four basic types of ramen: shio (salt), miso (fermented soy beans), shoyu (soy sauce), and tonkotsu (pork bones). Each style is specific to different regions of Japan. If Tokyo has the best shoyu, Hakodate has the clear shio, Saporro has the cloudy miso, and Hakata has the intense tonkotsu. Out of all four styles, I personally prefer the miso and tonkotsu. I like intense flavors, and these two styles definitely have that. Miso is a bit saltier, whereas the tonkotsu has that intense pork flavor to it. Both of them are delicious, and I highly recommend that you try making them at home. The experience will be unforgettable. Here is your chance to try the miso ramen. Happy slurping!


MISO RAMEN


Serves 10-12
Prep time: 1 hour
Cook time: 14 hours
Inactive time: 12 hours


A word of warning/encouragement

Ramen is a complex dish that requires a lot of time and patience, so I recommend that you make it a fun weekend activity. It requires commitment, but the pay-off that accompanies making homemade ramen is on par with the effort. The sheer volume of instructions and components may be off-putting for some of you. I tried to keep the recipe as short and concise as possible, but unfortunately there’s nothing you can do about that; it’s the nature of ramen. Don’t let the time commitment scare you! There are also a lot of specialized ingredients in this recipe. Most Asian stores carry these ingredients, but some can even be purchased online. 


Ingredients

Chashu pork
*inspired by Kenji Lopez-Alt’s (Serious Eats) Chashu pork recipe

  • 3 lbs. slab pork belly, skin-on (about an inch thick)
  • 1 tsp. kosher salt
  • ½ tsp. freshly ground black pepper
  • ½ cup soy sauce
  • ½ cup mirin
  • ½ cup sake
  • 1 cup water
  • ½ cup sugar
  • 1 medium shallot, peeled and halved
  • 1 bunch of scallions (about 4-6 scallions)
  • 6 cloves garlic, crushed
  • 2-inch knob ginger, crushed

Broth

  • 1 lb. pork trotters
  • 5 lbs. pork neck
  • 1/2 lbs. pork trimmings (or fatback)
  • 2 large carrots, peeled and cut into ½ inch rounds
  •  1 medium yellow onion, peeled and cut in half
  • 10-12 garlic cloves
  • 3-inch knob ginger
  • 1 stick cinnamon
  • 1 whole star anise
  • 1 Tbsp. whole peppercorns
  • three 2-inch pieces kombu (dried kelp)
  • ¼ cup niboshi (dried sardines)

Tare (seasoning)

  • 1 cup white miso
  • 1 cup red miso
  • 2 Tbsp. tahini
  • 2 Tbsp. soy sauce
  • 2 Tbsp. mirin
  • 1 Tbsp. sesame oil
  • 1 tsp. chili oil, optional
  • 6-8 cloves garlic
  • 1 medium shallot
  • 2-inch knob ginger, peeled and crushed
  • 1 tsp. shichimi togarachi (Japanese spice)

Ajitsuke tamago (soft-boiled ramen egg)

  • 5 eggs, room temperature
  • ½ cup soy sauce (or use chashu marinade)
  •  ½ cup mirin (or use chashu marinade)

Aromatic oil (optional)

  • ½ cup lard
  • 1 shallot, finely chopped
  • 10-12 cloves garlic, crushed and finely chopped
  • 2-inch knob ginger, peeled, crushed and finely chopped

Toppings (to your liking)

  • ramen noodles
  • toasted sesame seeds
  • sesame oil
  • bok choy (or cabbage), chopped
  • scallions, finely chopped
  • wood-ear mushrooms, chopped
  • corn kernels
  • bamboo shots
  • nori

Instructions

Chashu pork

  1. Pre-heat oven to 275F (130C) degrees.
  2. Lay pork belly on a cutting board, skin side facing down. Season with salt and pepper.
  3. Roll belly lengthwise and secure with butcher twine.
  4. In a medium saucepan, mix soy sauce, mirin, sake, water, sugar, scallion, shallots, garlic, ginger. Stir to combine. Place pork belly in the saucepan—it won’t be completely covered with marinade.
  5. Cover saucepan with a lid left slightly ajar and transfer to oven. Cook for 1.5 hours.
  6. Turn pork belly and cook for another 1.5 hours. Remove from oven and let it cool. When completely cool, place in the refrigerator to rest overnight.
  7. Drain chashu and save marinade for soft-boiled eggs. Keep chashu pork refrigerated.
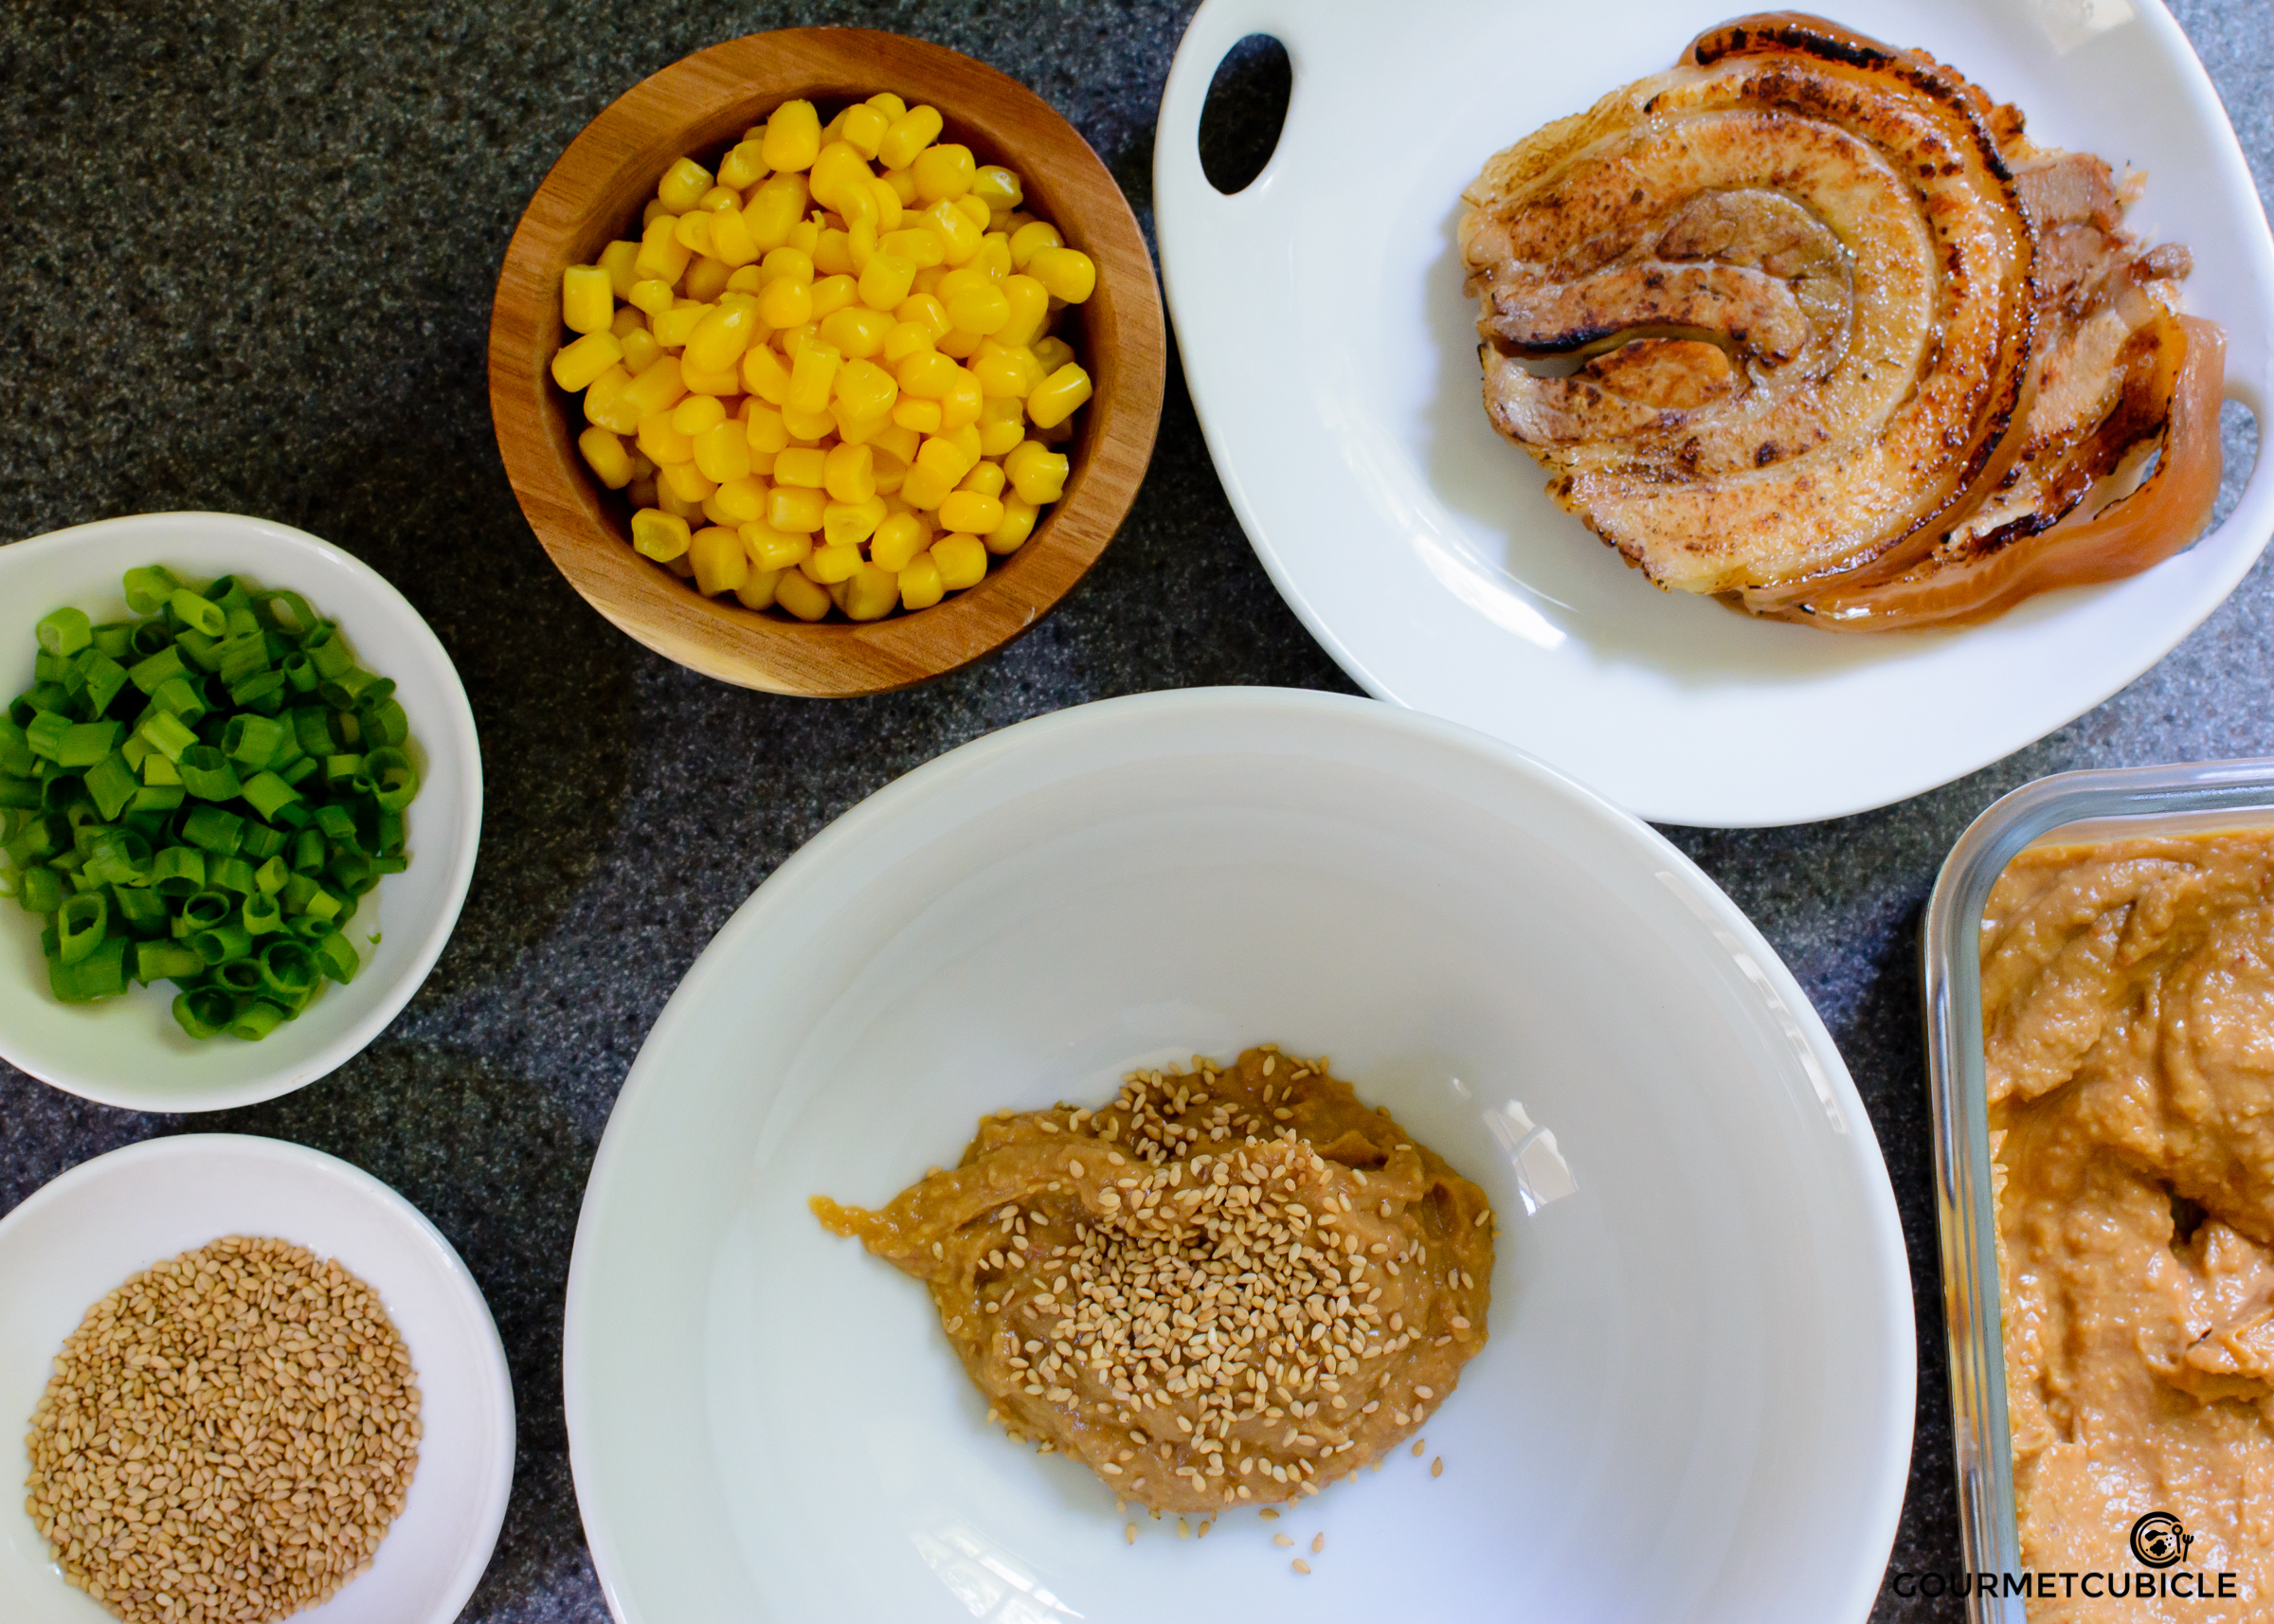
  8. Before serving ramen, slice chashu into thin rounds. Using a propane blowtorch, char the pork belly. If you don’t have a blowtorch, simply reheat chashu in broth before serving.

Broth

  1. Preheat oven to 400F (200C) degrees.
  2. Lay pork trotters and pork neck on parchment paper-lined baking pans. Place pans in the oven and brown pork for 30 minutes.
  3. Turn neck bones and trotters on the other side and brown for another 20 minutes. Remove from oven, and transfer the pork bones to a large 16-quart stockpot.
  4. Add fatback, carrots, onions, garlic, ginger, cinnamon stick, star anise, peppercorns, kombu, and niboshi. Fill stockpot ¾ full with water.
  5. Bring to a boil over high heat. When water reaches a rolling boil, reduce heat to the tiniest simmer. Cover and let the broth cook for 10-12 hours. Do not stir as it will cloud it.
  6. When done, carefully strain and discard solids.
  7. Reheat broth right before serving.

Tare (seasoning)

  1. In a food processor, combine all ingredients under Tare. Pulse until it reaches the consistency of a paste.
  2. Transfer to an airtight container and refrigerate.

Ajitsuke tamago (soft-boiled ramen egg)

  1. In a medium bowl, combine a quart of water with 2 cups of ice to make an ice bath.
  2. Fill a medium saucepan with 2-2 ½ inches of water and bring to a boil over high heat.
  3. Using a slotted spoon or wire mesh, carefully lower eggs into the boiling water.
  4. Cook for exactly 6 minutes and 30 seconds. Immediately remove eggs from the saucepan and place them in the ice-bath. This will stop the cooking process and allow the yolks of your eggs to stay silky and smooth. Let eggs rest for 2-3 minutes.
  5. Carefully peel eggs and place them in a mason jar.
  6. Pour mirin and soy sauce over them, or the leftover marinade from the chashu pork.
  7. Refrigerate overnight.
  8. Right before serving remove eggs from the marinade and cut them in half lengthwise. Discard marinade afterwards.

Aromatic oil (optional)

  1. In a small saucepan, heat lard over medium heat. Add shallots, garlic and ginger and cook for about 30 minutes, or until they start browning. Stir occasionally and make sure the garlic doesn’t burn.
  2. Strain and let the fat cool until it solidifies.

Assembly

  1. In a stainless steel skillet, heat 2 teaspoons of sesame oil over medium-high heat. Add chopped bok choy, and cook for 3 minutes, tossing occasionally. Season with a half teaspoon of ground pepper and remove from the heat. Set aside.
  2. In a large pot, bring water to a boil and cook ramen noodles according to the instructions on the package. Don’t overcook them. Drain and set noodles aside.
  3. Prepare ramen by adding 1 teaspoon of toasted sesame seeds, 2 tablespoons tare, and 1 teaspoon of aromatic oil to the bottom of the bowl.
  4. Add a few ladles of hot broth until the bowl is ¾ full.
  5. Using a whisk, mix the broth with the tare. Add noodles and bok choy to your liking.
  6. Top with your favorite toppings: scallions, wood-ear mushrooms, corn kernels, bamboo shots, etc.
  7. Add chashu pork, soft-boiled ramen egg, and a piece of nori to the ramen. Slurp and enjoy!

Notes

  • The unused broth can be stored in the freezer for months.
  • The tare will stay good for several weeks refrigerated.
  • Make sure the eggs used for the soft-boiled ramen eggs are at room temperature prior to boiling. Otherwise they will crack when submerged in boiling water.
July 10, 2016 /Aurel Pop
Japanese, pork, noodles, eggs
Main Dish, Soup
Comment

Deviled Eggs

January 06, 2016 by Aurel Pop in Appetizer

Happy New Year gourmetcubicle readers! 2016 is finally here. Put everything related to 2015 behind and start over. It’s a new year, meaning that you’re free to set new goals and resolutions for yourself. It’s the perfect time to do it. It’s a known fact that the success rate of resolutions made while intoxicated during a NYE party don’t have a high success rate, so if you did that, my advice is for you to go and revise them. Be honest with yourself, because at the end of the day, you’re not fooling anyone other than yourself.

I made an extensive list of resolutions that I broke down into 5 different categories: health, personal, travel, passion (aka gourmetcubicle) and career. I don’t think that it’s a good idea to share my personal ones, nor the ones related to my career, but I’m more than happy to share the rest. I’ll start with gourmetcubicle and I'll come back to the rest in my future posts. I tried to make my goals simple and achievable, but challenging enough to keep me going. I value a strong foundation over anything else and even though it takes longer to take baby steps, organic growth combined with good planning are always the fastest way to success. So without further ado, I present you with gourmetcubicle’s resolutions for 2016:

  • Keep posting once a week
  • Keep the “Cooking with Friends” series rolling
  • Improve photography with emphasis on props
  • Increase exposure on social media (double the number of Instagram followers)
  • Attend events and seminars for established bloggers

Only 5 goals you may ask yourself? Well I could think of a lot more, but the point is that I want to be able to stay focused on all 5 categories (health, personal, travel, passion and career) with 5 goals related to each. That’s 25 goals to focus on and it takes a lot of discipline not to get sidetracked. Gourmetcubicle is my hobby so it wouldn’t be fair to turn it into something more than that as for right now.

Anyway before I bore you too much with resolutions, I will go ahead and move on to today’s recipe: Deviled Eggs. They are the perfect party food: flavorful, easy to make and no-fuss to pick up and chow down on. What’s really great about them from a cook’s perspective is that they require low effort to prepare a bunch (for example 10 eggs will yield 20 deviled eggs).

I’m not sure where the English name originates from, but I will assume it’s due to the use of Tabasco sauce in the American version. In Hungarian they are called Casino Eggs (Kaszinótojás) and in Romanian simply Stuffed Eggs (Oua umplute). They are slightly different from the variations I’ve tasted here in the U.S. in that both in Hungary and Romania they are covered with a thick and heavy mayo based sauce. For the sake of the most commonly mentioned of all resolutions (eat healthier) I decided to skip the sauce.

In Romania, the filling often contains egg yolks, mustard, mayo, and a fair amount of chicken liver pate. It’s an acquired taste, which I personally love, but I know it’s not that well received here in the U.S. I will eventually post that recipe as well, but for now you’ll have to settle for this vegetarian variation with mushrooms and cornichons. In the recipe I recommended kewpie mayo which is a traditional Japanese mayo that I find a lot less heavy and greasy. Kewpie mayo reminds me more of homemade mayo both in color and consistency. If you can’t find any in stores, just make your own mayo. It will make a huge difference. I also sprinkled crunchy bacon bits on them, a trick I learned from a  fellow blogger friend of mine, Mike. Enjoy!


DEVILED EGGS


Yields 24-28 pieces
Prep time: 30 minutes
Cook time: 20 minutes


Ingredients

  • 12-14 large eggs, pasture raised
  • 1 TBS olive oil
  • 1/4 cup finely chopped shallots (about 1 medium-sized shallot)
  • 1/3 lb cremini mushrooms, washed and finely diced
  • 1/2 tsp freshly ground black pepper
  • 1/4 cup dry vermouth (or dry red wine)
  • 1/3 cup cornichons, finely diced
  • 1/3 cup kewpie mayo (or homemade mayo)
  • 1 TBS plain yogurt
  • 1 tsp dijon mustard
  • 2 tsp lemon juice
  • 1/2 tsp chili flakes
  • 1/2 tsp white pepper
  • 1/2 tsp kosher salt
  • thinly sliced jalapeño or serano, for garnish (optional)
  • chives, for garnish 
  • crispy bacon, for garnish (or croutons) (optional)

Instructions

  1. Place eggs in a single layer in medium saucepan. Fill the pot with cold water to cover the eggs well over an inch. Bring to a boil over medium high heat, reduce the heat to medium and cook for 15 minutes.
  2. In a stainless steel skillet, heat oil over medium-high heat until it starts shimmering. Add shallots and sauté for 2 minutes stirring frequently to avoid burning them.
  3. Carefully add vermouth and cook until it thickens, about 2 minutes. Add mushrooms and continue cooking for 5 more minutes stirring occasionally. If it becomes too dry add a tablespoon of water.
  4. Season with black pepper and give it a last stir. Set aside to cool down.
  5. When the eggs are done, drain the water from the pot and run under cold tap water until they are cool enough to be handled. Crack the eggshells, gently roll them on the counter and peel the eggs. 
  6. Slice the eggs in half lengthwise and scoop the yolks into a medium bowl. Set egg whites aside.
  7. Using a fork, finely crumble the egg yolks. Add mayo, yogurt, mustard, mushroom sauté and lemon juice. Mix well. Season with salt, pepper and chili flakes. Taste, adjust seasoning and stir.
  8. Using a piping bag or a teaspoon disperse the egg filling into each egg white half. Sprinkle with crispy bacon bits (or croutons for vegetarian version) and chives. Optionally add a drop of Sriracha sauce and a thin slice of hot pepper.

Notes

  • CAUTION! Adding vermouth to the skillet may cause an open flame. Do not panic as it will die out as soon as the alcohol evaporates (matter or seconds) but stand back a bit when adding it.
  • To clean mushroom, fill a quarter of a bowl with cold tap water. Drop mushrooms into the bowl. Submerge each one and then lift them out of the water with your hands. Place them on a paper towel and let them dry.
January 06, 2016 /Aurel Pop
eggs, mushrooms, vegetarian, glutten-free
Appetizer
1 Comment

Cauliflower Soufflé

November 15, 2015 by Aurel Pop in Breakfast/Brunch, Main Dish

As I was going through my recent posts I realized that I talked about our Eastern European trip only briefly. I mentioned how awesome Budapest was and how getting back into the groove of working sucked, but never mentioned the time we spent with my parents in Romania, or the Tokaj trip we took with my friends from Hungary. So many stories come to my mind that I'm having a hard time choosing one to start with.

20150708-cauliflower_souffle1.jpg

Although the wine tasting in Tokaj happened earlier on our vacation I’ll talk about it in a future post as I feel like the road trip with my parents is more relevant to this recipe. 

As I mentioned before, Roni and I spent an entire week with my parents doing a road trip from my home town of Satu Mare to the spectacular Transfagarasan road, also known as Ceausescu's folly. We drove through Turda and Cluj and stopped for a night each in Sibiu, Bran and Timisoara. It was probably the most time I have spent with my parents since I was a teenager. It felt so good bonding again, sharing funny stories and just spending time together. It reminded me of my childhood when my dad used to take me on his business trips around Romania. It was fascinating to see in person the mountains, rivers, gorges and lakes that I read about in books or learned in my geography class. Because of my father’s fear of flying, he’d always choose to drive even though it sometimes took him days to get to places. We would drive on these crazy winding roads in the Carpathian Mountains and admire the scenery on the Danube’s Canyon Road as we passed the Iron Gates gorge. It was insane!

I wanted Roni to experience all the emotions that I experienced as a kid. I wanted her to see how breathtaking and beautiful my country is. And she did- she was amazed by its beauty, simplicity and hospitality.

It was a lot of fun, but also frustrating at times mostly because of my father, who has a really unique way of doing road trips and sightseeing. In my father’s book, a road trip is to drive from a starting point A to a final destination B with minimal stops in between. Stops are only allowed when the gas is running low or the driver (in this case, my dad) had to use the restroom. No other events are important enough to warrant a stop. Also, there are priority levels when it comes to restroom stops. Roni and I found out that we were in the lowest possible bracket when it took my dad an hour and several passed gas stations to finally stop so we could use the restroom. He’d either “forget” about the much needed bathroom break or find the gas stations to be not up to his standards. It was comical in many ways but it took a lot effort on both my father and my side not to get in an argument. Fortunately, my mom was there to bring peace and harmony when it was needed.

Overall the road trip was superb. We saw everything we planned to see and more. The most memorable sights were the colorful trees along the Transfagarasan road, the charming city of Sibiu with its many cute cafés, the Bran Castle (aka Dracula’s Castle), and the pleskavita (Serbian burger) I ate in Timisoara, my college town, that took me back to the good old days. Romania is absolutely beautiful, a fairy tale-like place where time seems to have stopped. It is a rough uncut diamond that will shine again, once the new generation of young intellectuals will bring a much-needed change in mentality.

I’ve had this recipe in the queue for quite sometime now, but until now I didn’t find the right opportunity to post it. Cauliflower has always been our family's favorite vegetable, even though my father would argue with that. My mom Rodica, makes a killer cauliflower soup as well as cauliflower soufflé, fried cauliflower and even a cauliflower spread. This recipe is very close to my mom's, although she doesn't add sautéed onions and garlic to hers. She also separates the egg whites from the yolks and beats them. I guess that would be the proper way of making a soufflé, but the minimal difference in flavor and texture doesn’t justify the effort in my opinion. Pofta buna!


CAULIFLOWER SOUFFLÉ


Serves 4
Prep time: 25 minutes
Cook time: 1 hour 15 minutes


Ingredients

  • 1.5 lbs cauliflower florets (about 1 medium sized cauliflower)
  • 1/2 cup plain breadcrumbs
  • 1/4 cup freshly grated parmesan cheese (plus more for topping)
  • 1/2 tsp sweet paprika (Spanish or Hungarian)
  • 1/2 tsp kosher salt
  • 3 TBS unsalted butter
  • 1 shallot, finely chopped (about 1-2 TBS)
  • 1 clove garlic, finely chopped (about 1/2 TBS)
  • 1/4 tsp ground nutmeg
  • 1 tsp ground white pepper
  • 1/2 tsp chili flakes
  • 1/2 cup whole milk
  • 4 eggs, pasture raised
  • 1 cup gouda cheese, shredded
  • 1/2 tsp ground black pepper
  • salt, to taste
  • smoked paprika, optional
  • fresh lemon juice, optional 

Instructions

  1. Fill a large pot halfway up with water and one tablespoon salt. Bring it to a boil over high heat. Add cauliflower florets and cook for about 15-20 minutes, or until they can be pierced with a knife (al dente).
  2. In the meantime, in a bowl combine breadcrumbs, parmesan, paprika and 1/2 tsp kosher salt. Using a fork, whisk them together.
  3. Coat the bottom and sides of a 9"x5" deep baking pan with a tablespoon butter. Pour in half the breadcrumb mixture and shake the pan to create an even layer on the bottom. Some crumbs will stick to the sides of the pan as well.
  4. Drain the cauliflower, set aside and let it cool. 
  5. In a medium sized sauce pan, heat the remaining 2 tablespoons of butter over medium heat. When it starts to foam add the shallots, stir and cook for 3-4 minutes.
  6. Add the garlic, nutmeg, white pepper and chili flakes and continue cooking for another 3 minutes, stirring occasionally.
  7. Pour in 1/3 cup milk, raise the heat to high and bring to a boil, about 3 minutes. Remove the sauce from the heat and set aside to let it cool down.
  8. Preheat the oven to 400F (200C).
  9. In a large bowl, crack the eggs open and beat them until they become foamy. Add the rest of the milk, 3/4 cup gouda cheese, black pepper and a pinch of salt. Using a whisk mix them together. 
  10. Add the cauliflower to the egg mixture and slowly mix in the milk and shallot concoction.
  11. Pour egg and cauliflower mix into the baking pan. Sprinkle the top with the rest of the breadcrumbs and gouda. I usually grate some parmesan as well for that nutty flavor.
  12. Place the pan in the oven and bake for 30 minutes. Raise the temperature to 420F (215C) and cook for another 10-15 minutes or until the top of the soufflé is golden brown.
  13. Remove from the oven and let it cool a bit before serving. Cut into inch thick slices. Serve as is or for an extra zing, sprinkle with fresh lemon juice and smoked paprika. 
November 15, 2015 /Aurel Pop
cauliflower, eggs, cheese, vegetarian
Breakfast/Brunch, Main Dish
Comment

Pork Belly and Oyster Mushroom Potato Hash

August 24, 2015 by Aurel Pop in Breakfast/Brunch

The time has come for me to post a heartier and manlier dish here on gourmetcubicle. As of late, I committed to getting back in shape by losing the extra weight I gained during my business trip. I picked up running again and, for the first time since college, I started lifting weights. Getting enough exercise has never been a concern of mine though, as I've always been active, either playing soccer in Zilker Park or volleyball on various leagues around town. The biggest challenge for me when it comes to losing weight is to hold back from eating so much. I severely lack discipline in the kitchen.

I love carbs. It doesn't matter if it's pasta, fresh crispy breads or starches, I embrace them all. I like to blame my weakness for carbs on the Romanian and Hungarian food culture. Bread and potatoes are two things that are never missing from the dining table. Abundance is the word that best describes both these cuisines. You'll never walk out of the house of a Romanian or Hungarian feeling hungry or anything short of being completely full. 

20150720-pork_belly_potato_hash2.jpg

It all comes down to our culture of hospitality, and Romanians take hospitality extremely seriously. We greet our guests and visitors with fresh baked bread and salt. It's a tradition that dates back to before Christianity and it is seen as a symbol of acceptance and kindness. But why two simple things like bread and salt, you may ask? Well, bread was the main source of food representing the wealth of the fields for the peasants, whereas salt, for a long time in history, was one of the most expensive and valuable assets in trading.

Fun Fact: the word companion, which is defined as a person or animal one shares significant time with, comes from Latin and has at its roots the words com- meaning "with" in English, and panis, which is "bread".

20150720-pork_belly_potato_hash4.jpg


Moving on to our recipe today, this is a dish so versatile that you can serve it for breakfast, brunch or even dinner. It is a savory, flavorful and filling dish, easy enough to be prepared even by a beginner cook. The pork belly can be substituted with bacon if that's something that is more accessible, and the brussels sprouts can be replaced by broccoli florets of roughly chopped cabbage. Enjoy!


PORK BELLY AND OYSTER MUSHROOM POTATO HASH


Serves 4
Prep time: 10 minutes
Cook time: 45-50 minutes


Ingredients

  • 1 lb pork belly, cut into 1/2 inch pieces 
  • 1/2 tsp black pepper, freshly ground
  • 1/2 tsp kosher salt
  • 2 TBS sunflower seed oil (or peanut)
  • 1 yellow onion, roughly chopped
  • 2-3 jalapeños, sliced (remove seeds and membrane for milder version)
  • 1 1/2 lbs medium potatoes, unpeeled and diced into 1 inch pieces
  • 1 tsp kosher salt
  • 1 tsp black pepper, freshly ground
  • 1 tsp smoked paprika
  • 3/4 lb brussels sprouts, cleaned and halved
  • 4-5 green onions, roughly chopped
  • 1 lb oyster mushrooms, rinsed
  • 1 TBS unsalted butter
  • 1/2 medium lemon juiced (about 1-2 TBS fresh lemon juice)
  • 1/4 cup fresh parsley, finely chopped
  • 4 eggs, pasture raised
  • 1/4 cup fresh parsley, finely chopped (for garnish)
  • 1 tsp smoked paprika (for garnish)
  • salt, to taste

Instructions

  1. Sprinkle the pork belly with salt and pepper.
  2. Heat one tablespoon oil in an oven proof cast iron or stainless steel skillet over medium-high heat. When the oil is shimmering, add pork belly and cook for about 10 minutes until the bits become crispy and golden brown. Stir occasionally.
  3. Remove the pork bites from the pan and transfer them to a paper towel lined plate or a wire rack. Add the rest of the oil to the skillet.
  4. Preheat oven to 400F (200C) degrees.
  5. Add onion to the skillet carefully. Be careful not to toss it in because you risk getting burned by the splattering oil. Cook for 3 minutes. Add jalapeños and cook for another 2 minutes. Add potatoes and sprinkle with salt, pepper and one teaspoon smoked paprika. Continue cooking for 5 more minutes stirring every now and then. Add the brussels sprouts. Cook for 10 minutes and then add green onions, mushrooms, butter, lemon juice and quarter cup parsley (half of the total amount). Cook for 5-7 more minutes. Toss and stir occasionally. 
  6. Remove skillet from the heat. Toss in the pork belly bits and gently stir. Crack the eggs on top of the hash and place the skillet in the oven. Cook for 10-15 minutes until the eggs are cooked to your favored consistency. 10 minutes baking will yield a runny egg (my favorite) whereas 15 minutes will get the egg cooked all the way through.
  7. Sprinkle with the rest of the parsley and smoked paprika. Taste and adjust saltiness. Serve hot.
August 24, 2015 /Aurel Pop
potatoes, brussels sprouts, bacon, mushrooms, eggs
Breakfast/Brunch
Comment

Potato and Leek Rösti with Poached Eggs

July 20, 2015 by Aurel Pop in Breakfast/Brunch

This week I'm going to show you how to make one of my favorite brunches. It's a vegetarian dish that can be served either as a side dish or on its own with a dollop of sour cream. It also can easily be turned into something more filling, by adding smoked salmon and poached or fried eggs to it. 

I love weekends so much especially when I don't have to travel. Not only because I get to relax, but mostly because I get to spend a lot of time around the kitchen cooking. Another important aspect of the weekends is that I can cook and eat my breakfast in my pajamas without having to fully wake up. I don't enjoy talking early in the morning, at least not until I get to eat. Roni also gets grumpy without having food or coffee first thing in the morning. For the sake of everyone in Austin, we try not to leave our house without eating or drinking coffee, and take out the grumpiness on each other. 

Although I named this dish rösti, which is a Swiss dish, I found inspiration for it during my time in Hungary. Over there it's called either tócsni or lepcsánka depending on which region you visit and who you ask. It is very similar to the traditional rösti, but Hungarians sometimes add flour and eggs to the concoction. I prefer it without flour as it makes me feel better about eating healthier.

I made a few modifications of course, namely I added leeks and parsley to the potatoes. I like bold flavors and find potatoes alone to be a bit bland. If you don't like leeks, you can substitute them for onions or carrots. Same goes the parsley- use spinach or kale instead if that's what you prefer. Dare to improvise and try different combos until you find your favorite. As for me, this is my favorite. Jó étvágyat!


POTATO AND LEEK RÖSTI WITH POACHED EGGS


Serves 2-4
Prep time: 15 minutes
Cook time: 40 minutes


Ingredients

  • 1 large leek, cleaned and finely chopped
  • 8-10 cremini mushrooms
  • 2 lbs Russet potatoes, peeled and grated
  • 1 cup fresh parsley, finely chopped
  • 1 jalapeño, deseeded and finely chopped
  • 1/2 TBS kosher salt
  • 1/2 TBS, black pepper, freshly ground
  • 1 tsp kosher salt
  • 1 TBS olive oil
  • 1 TBS butter, unsalted
  • 1 TBS olive oil
  • 8-10 tomatoes on the vine
  • 1/2 tsp black pepper, freshly ground
  • 1/2 tsp kosher salt
  • 1 TBS butter, unsalted
  • 1/2 TBS butter, unsalted
  • 2-4 eggs, pasture raised
  • kosher salt, to taste
  • 1 TBS white vinegar
  • 2 oz. smoked salmon (optional)
  • 1 TBS crème fraîche (or sour cream)(optional)

Instructions

  1. Clean the leek by cutting and discarding the dark green woody leaves and the root end. Clean, chop it finely.
  2. Clean the mushrooms by trimming the dry tip of the stem.
  3. In a medium bowl combine the grated potatoes, leeks, parsley and jalapeño. Sprinkle half tablespoon salt and mix well until the mixture is evenly coated with salt. Set aside and let it sit for about 5-10 minutes.
  4. Handful by handful, squeeze the potato and leek mixture to get rid of the starchy and salty water. Sprinkle half tablespoon of freshly cracked black pepper, one teaspoon salt, and one tablespoon of olive oil and stir until everything is well mixed together and evenly coated. 
  5. Heat one tablespoon butter in a non-stick skillet over medium heat. When the butter melts and starts foaming, scatter the potato mixture over the skillet. Using a spatula, gently press molding it into a 1/2-3/4 inch pancake. Cook for about 10-15 minutes, shaking skillet occasionally, until edges are golden brown.
  6. Meanwhile, heat a medium sized skillet over medium heat. Drizzle with one tablespoon olive oil. When the oil is shimmering, add the mushrooms and tomatoes to the pan. Sprinkle with a pinch salt and pepper. Let them cook while you flip and cook the other side of the rösti, shaking the pan every now and then. 
  7. Cover the skillet with an inverted large plate. Flip rösti onto the plate. Add another tablespoon of butter to the skillet and let it melt. Once the butter starts foaming, slide the rösti back into the skillet, cooked side up. Cook for another 10-15 minutes until the bottom becomes golden brown. While it is cooking, using a silicone brush, spread half tablespoon butter on the top of the rösti.
  8. Remove the tomatoes and mushrooms from the heat and set aside until you're ready to serve it.
  9. In the meantime, poach or fry the eggs, whichever you prefer.
  10. Poaching may be more challenging if you’ve never done it before. If poaching, fill a medium non-stick pan with about 2 inches water. Heat the water over medium heat. Add one tablespoon white vinegar and a pinch of salt and bring water to a simmer. Crack eggs one by one into a espresso cup and slide them into the simmering water. The vinegar in the water will prevent the egg whites from spreading. Turn heat to minimum, cover the pan and let the eggs poach for about 4 minutes. When done, remove with a sieve.
  11. Once the rösti is ready, slide it on a cutting board or a large plate. Cut in four and serve with smoked salmon and poached eggs on top and a side of roasted tomatoes and mushrooms. You can add a dollop of creme fresh or sour cream to the top, too. Enjoy!

Notes

  • To clean leek, use a pairing knife to slice it lengthwise starting from about 1/4 of inch from the root up to the leaves. Rotate the leek, and slice it again starting from the root. Fan the leeks open and place them under cold running water. Rinse out any dirt or sand until the leeks are clean.
  • To clean mushroom,  fill a quarter of a bowl with cold tap water. Drop mushrooms into the bowl. Submerge each one and then lift them out of the water with your hands. Place them on a paper towel and let them dry. Never clean mushrooms by rinsing them under running tap water, as the flavors will be washed away as well.
  • I love fresh black pepper, so I usually add more than half tablespoon to the potato and leek mixture.
July 20, 2015 /Aurel Pop
vegetarian, potatoes, leeks, eggs
Breakfast/Brunch
Comment
  • Newer
  • Older

Copyright ©2017 Aurel Pop & gourmetcubicle. All rights reserved. Don't steal, ask.