PEI Mussels with Lemongrass Coconut Curry
The next few weeks are going to be crazy. I'm doing a round the world trip within 3 weeks. I'll be leaving Austin later today and will fly to Hungary and Romania for a week, then to Singapore, then to Japan and then finally back home. Usually I prepare ahead of time, but for some reason this time I'm not fully packed yet and my flight is today.
I know I'll miss Roni, Popsi and Austin, but I can't wait to see my family and friends. Last time I was home it was in February 2014. That's almost a year and a half ago. I miss my parents, my sister, my grandma and her amazing food and I miss my grandfather, Bunu, who unfortunately passed away last July. It was the most painful thing that I have ever experienced. He had a mild form of Alzheimer's which within weeks turned into an aggressive one and took him away from us. Seeing him stuck in bed, frustrated that he couldn't control his body and mind any longer, made me cry like never before. It broke my heart that this once handsome and strong man who achieved everything he had on his own was now a skinny old man, waiting to be fed, shaved and taken care of, ravaged by this cruel disease. I could tell from the look in his wise bright blue eyes that it was painful for him, too.

Bunu and I had a special relationship. He was very stubborn, and the only person that he listened to was me. He loved me immensely and always mentioned how proud he was of what I achieved in life. According to him, we shared similar life stories, although I think his is far more impressive than mine. At the age of 14 he left the village he lived in, Dumbrava, Romania, hoping to find a job in Satu Mare so that he could go to high school, which only existed in bigger cities. It was right after WWII and Romania was ravaged by the war and exploited by communist Russia.
He managed to find a job as an apprentice at a grocery store and after a year he returned to his home town to visit his family. He saved all the money he made and then used it to buy himself a set of new clothes and presents for his parents. When my great grandmother saw him, she didn't recognize him at first. "Who are you looking for young man," she asked Bunu when he stopped in front of the house. "It's me, Lotica," he replied. She started crying tears of joy as she was so proud of her son. He left the little village as a poor boy and a year later he returned as a handsome, well-dressed man. My grandpa would later become the store manager at one of the few grocery stores that existed in the city during Ceausescu's communist regime. Everyone loved him because he would always help the poor with obtaining sugar or oil, which were rationed during those days.

This specific recipe has nothing to do with my grandfather. My upcoming trip just made me so nostalgic for the days I spent with him on his maroon bench admiring his beautiful garden.
The inspiration for this recipe actually came from one of my business trips to California earlier this year. I hope that this upcoming trip across two continents will also give me new inspiration for future posts. This dish is refreshing, fragrant, and bursting with flavors. Mussels may seem like an intimidating dish to pursue, but it’s really quite easy and quick once you clean them up. Use fresh baguette to soak up all that tasty curry sauce. Enjoy!
PEI MUSSELS WITH LEMONGRASS COCONUT CURRY
Serves 4
Prep time: 10 minutes
Cook time: 25 minutes

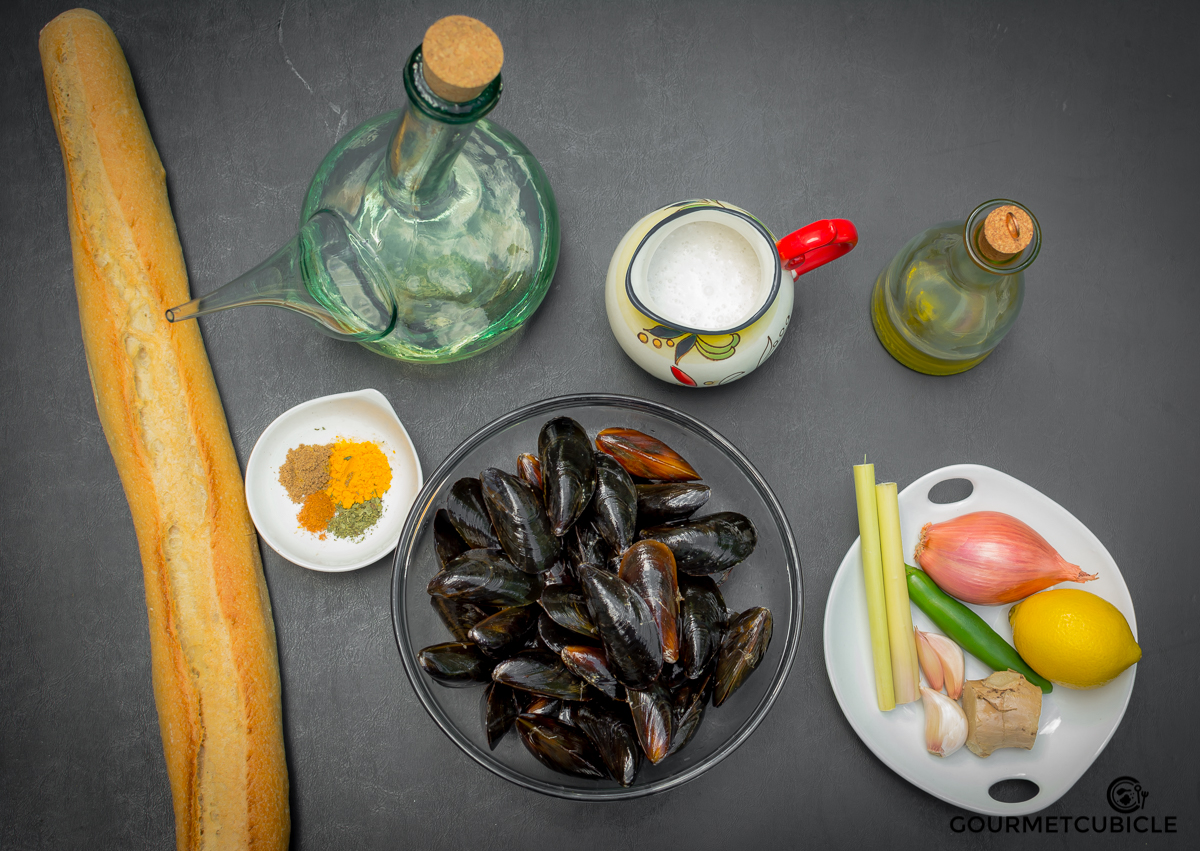
INGREDIENTS
- 2 TBS olive oil
- 2 small shallots, finely minced
- 2 cloves garlic, crushed and finely chopped
- 1 1/2 inches ginger root, crushed and finely chopped
- 1 serrano pepper, sliced
- 1 stalk (about 8 inches) lemongrass, trimmed and finely chopped
- 1 tsp turmeric
- 1/2 tsp dried curry leaves, crumbled
- 1/2 tsp hot chili powder
- 1 tsp black pepper, freshly ground
- 1 tsp coriander, ground
- 1 cup dry white wine
- 1/2 medium lemon, juiced (about 1-2 TBS fresh lemon juice)
- 1 cup coconut milk, unsweetened
- 1 tsp fish sauce
- salt, to taste
- 2 lbs mussels, scrubbed, rinsed and debearded
- 1/4 cup fresh cilantro, chopped
- 1/4 cup fresh cilantro, chopped (for garnish)
- 1 French baguette
INSTRUCTIONS
- In a deep skillet heat up oil over medium-high heat. When the oil is shimmering add the shallots and sauté for 2 minutes. Add garlic, ginger, serrano pepper and lemongrass and cook for another minute or two. Sprinkle with spices (turmeric, curry leaves, chili powder, black pepper and coriander) and pour wine and lemon juice in the skillet. Bring to a boil and let it simmer for 2 minutes.
- Reduce the heat to medium. Add coconut milk and fish sauce. Cook for about 5-6 minutes. Taste the sauce and adjust seasoning to your liking.
- Add the mussels, stir well and immediately cover with a well fitting lid. Cook for 5-6 minutes until mussels open. Remove from the heat, add fresh cilantro, gently stir mussels making sure each one gets coated with curry sauce.
- Discard the mussels that aren't open. Serve in a bowl with a ladle of curry sauce and fresh cilantro. Use fresh or toasted baguette for dipping the curry sauce.
NOTES
I found this guide for cleaning mussels to be very helpful. When cleaning and debearding the mussels, discard the ones that stay open after you touched them or knocked against another mussel. It means it's dead and you should not eat it.