gourmetcubicle

Tech by day. Cook by night.

The food blog of an engineer. Whether you're a tech nerd like me who wants to eat homemade meals and experiment with reproducing that amazing restaurant dish you ate, or a seasoned cook who wants to find inspiration for your next meal, you're in the right place.

  • home
  • blog
  • about
  • recipes
  • pantry essentials
  • contact

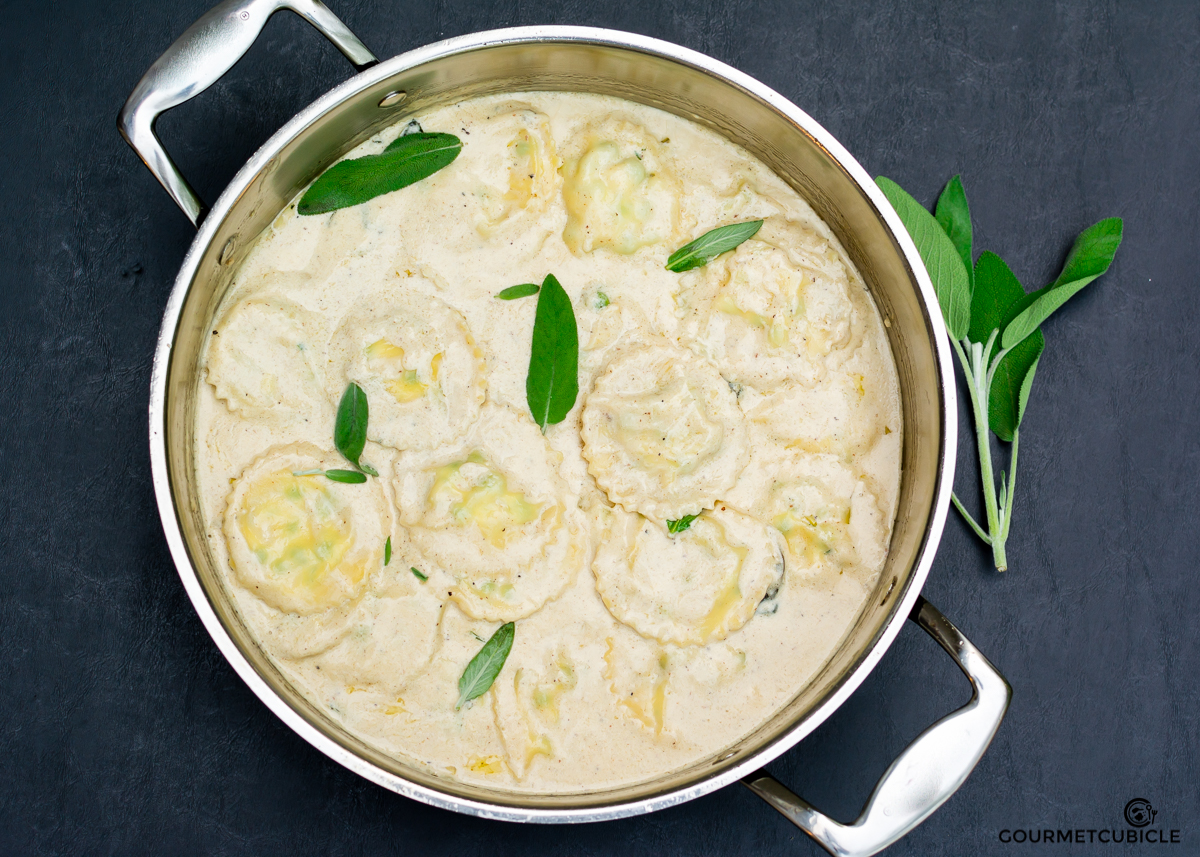
Spaghetti and Venison Meatballs With Marinara Sauce

December 30, 2016 by Aurel Pop in Main Dish

Hello lovely readers! Aurel here again. Sorry I ignored you for the last couple of months, but I was working on my other passion project: pop-up dinners. I’m happy to be back developing recipes, photographing food, and writing again though. My editor and good friend is back too, cleaning up and making sense out of my writing. I don’t know if I have ever mentioned her on here, but she’s the reason why my writing has improved so significantly and actually makes sense rather than being a collection of ideas scattered on paper. Anyhow, welcome back Amy!

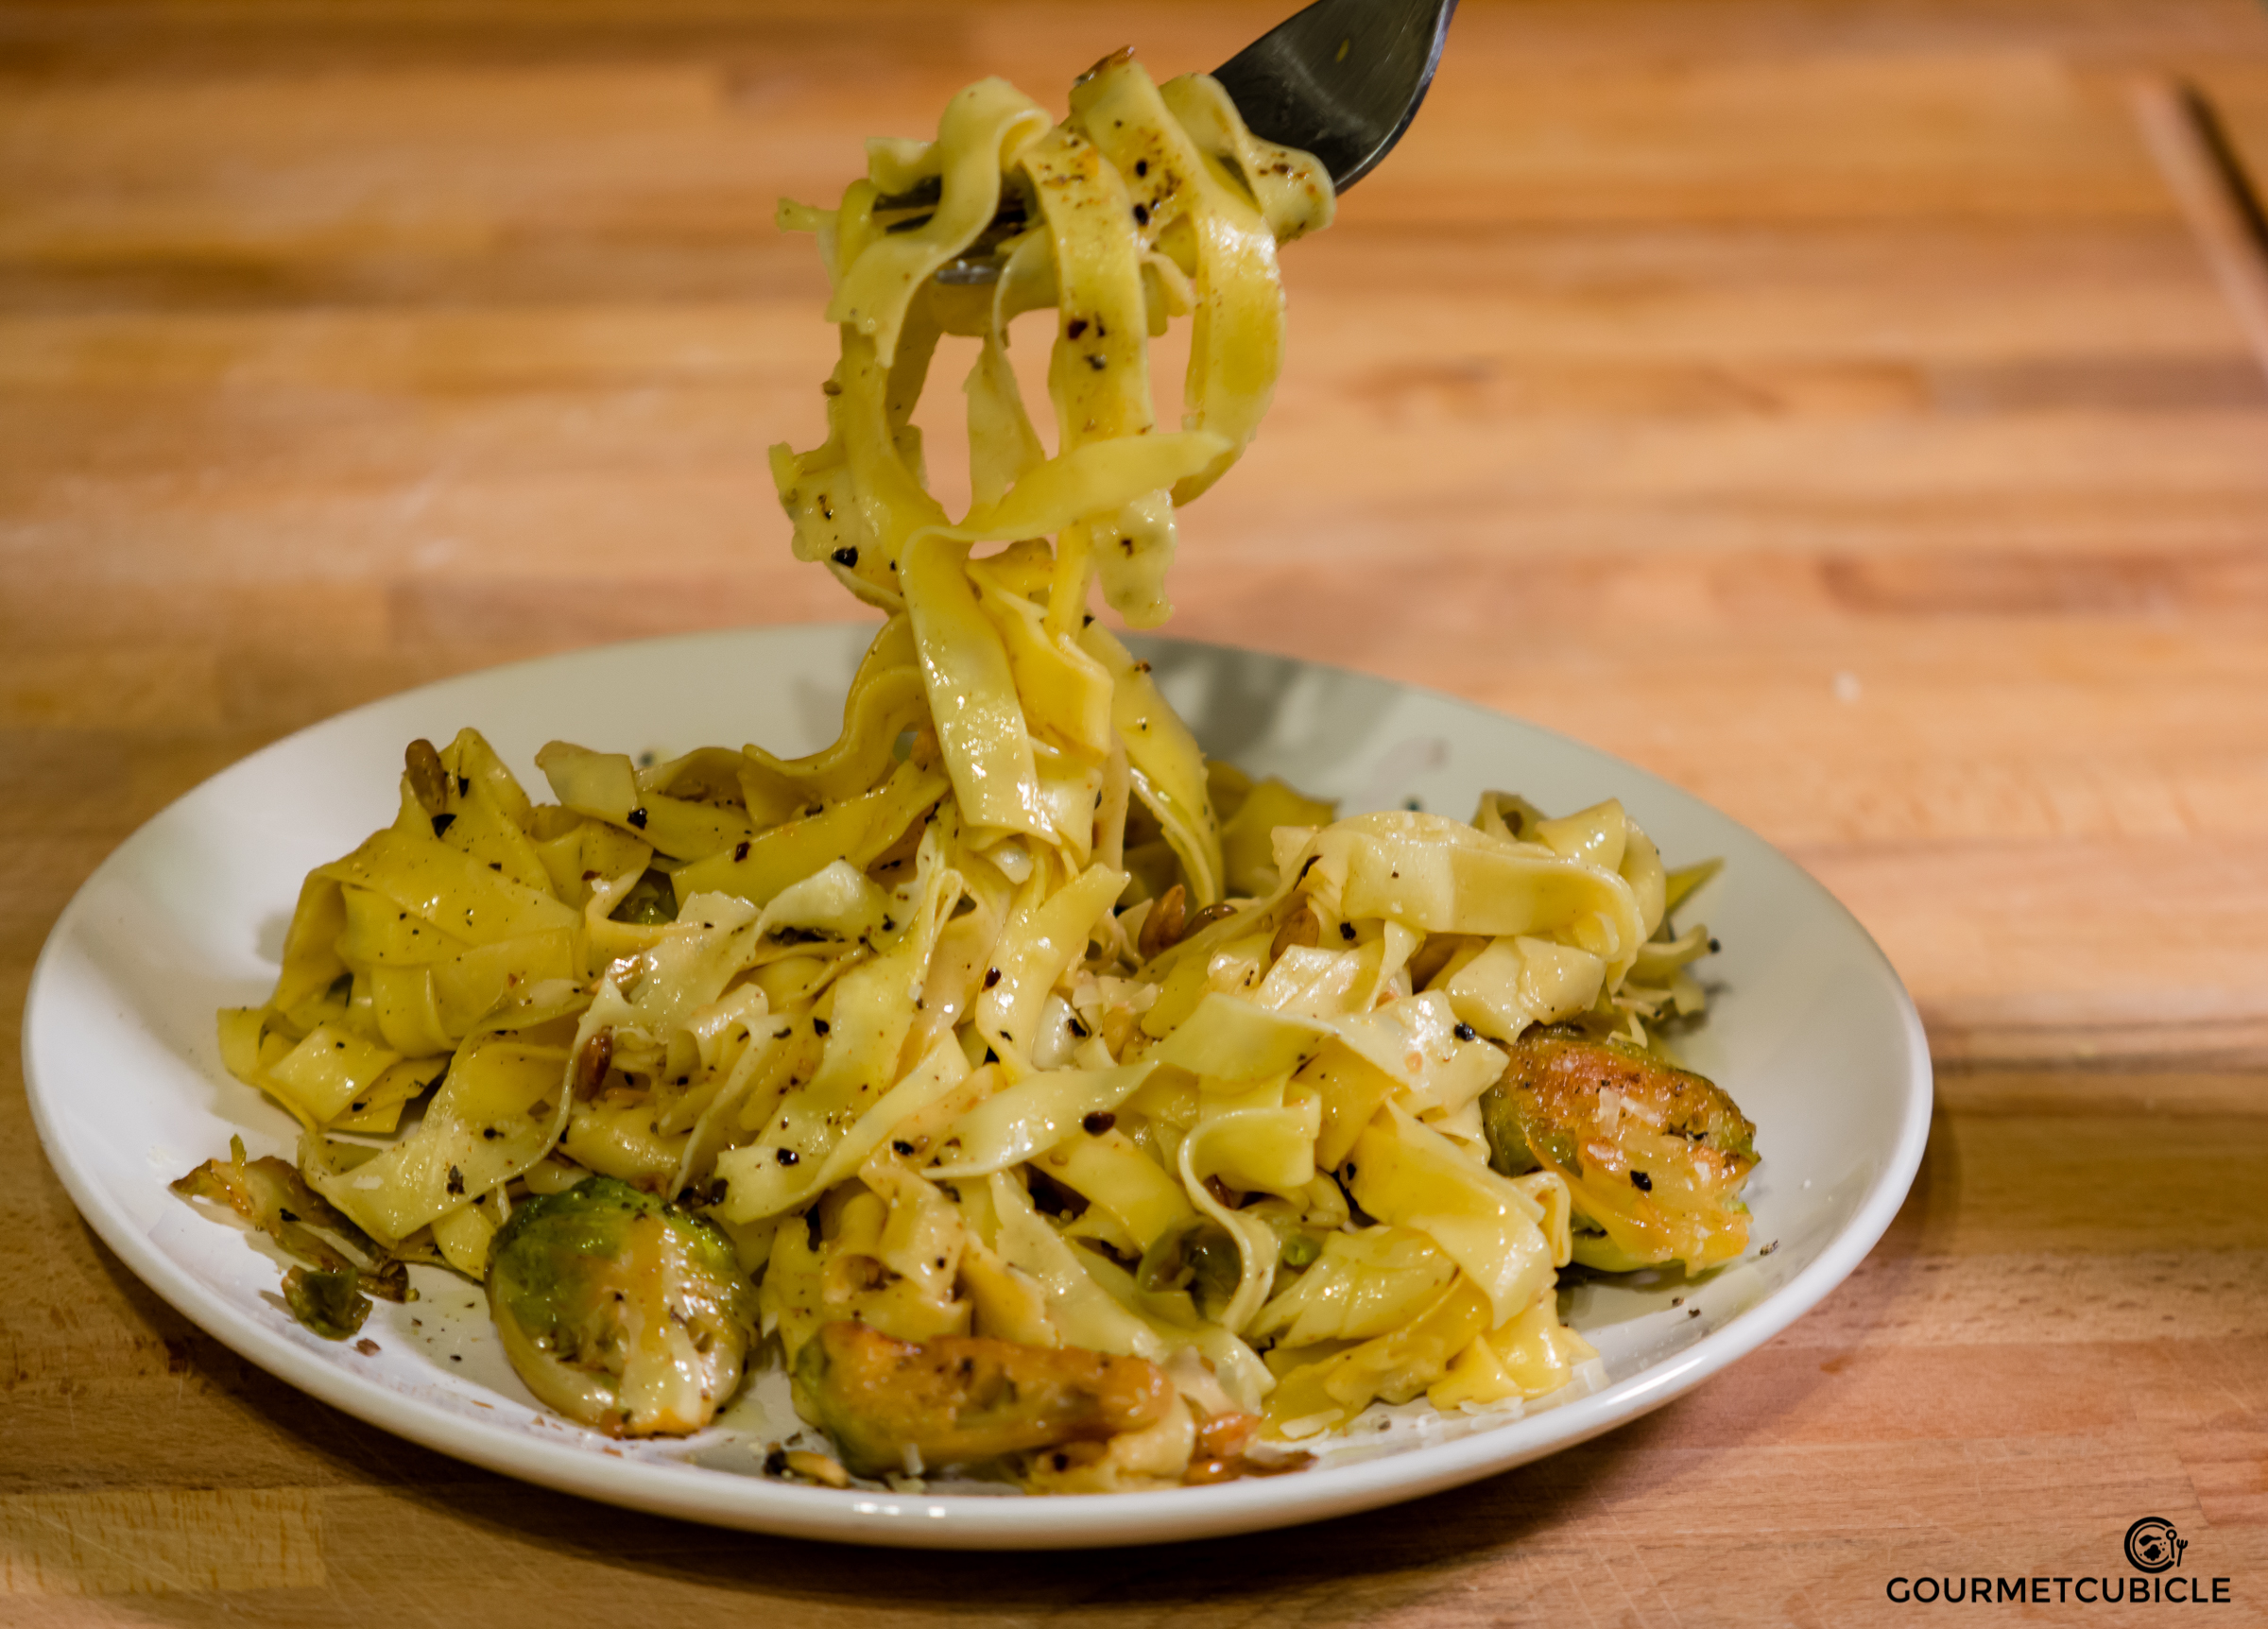
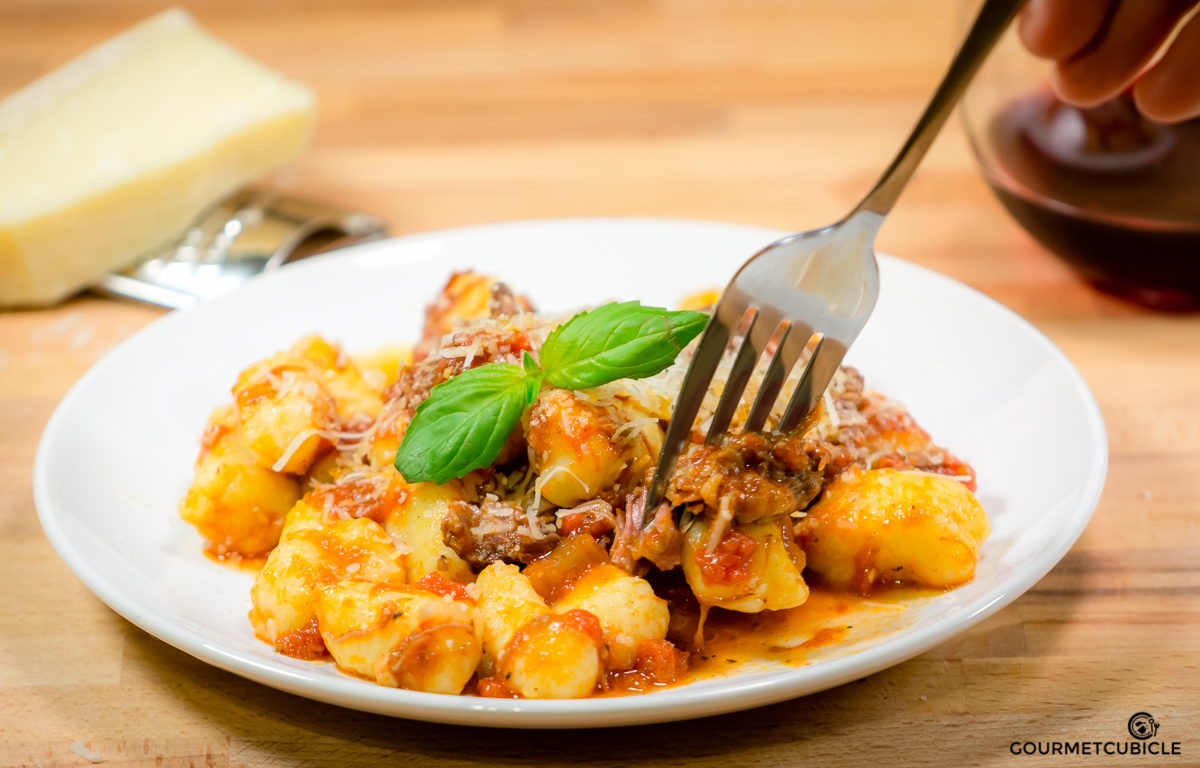
I’ve been working on my own version of an Italian favorite: spaghetti and meatballs. I’ve had this recipe perfected for quite some time but never gotten around to photo-documenting it until now.

Spaghetti and meatballs is a dish that you can’t possibly go wrong with, whether you’re cooking for your significant other, your family, or your friends. It’s really not all that hard to make, but you have to do it right. The key is to use fresh ingredients for everything: pasta, sauce, and meatballs. If you really need to cut corners (and we all do sometimes), do it with the pasta. I use store-bought pasta 6 out of 10 times myself. No biggie! But, for god’s sake, please don’t buy the premade marinara sauce. It takes longer to make homemade marinara, but you can make a big batch at once and then freeze it. You will taste the difference; it’s not just a myth!

I truly believe that spaghetti and meatballs is one of the most accessible dishes to new home cooks. Everybody loves it: kids, adults, elderly, men, women, and even dogs. Last time I made meatballs, I accidentally dropped one, and my dog Popsi devoured it within a second. I’ll put that one down as a strong sign of approval.

venison_meatballs-0285.jpg

Anyway, I can’t emphasize enough how glad I am to be back. I’m looking forward to sharing my cooking adventures with you in 2017. I plan to kick off the New Year by sharing stories about my recent pop-up dinners.

Happy New Year Y’all!


SPAGHETTI AND VENISON MEATBALLS WITH MARINARA SAUCE


Yields about 25 meatballs and 5 cups of sauce
Prep time:  25 minutes
Cook time: 90 minutes
Inactive time: 75 minutes


Ingredients

Marinara sauce

  • 3 Tbsp. olive oil
  • ½ cup finely chopped shallots (about 3 medium-sized shallots)
  • ½ cup chopped celery (about 3-4 celery stalks)
  • ½ cup chopped carrots (about 2 medium-sized carrots)
  • ½ cup dry red wine
  • 1 ½ Tbsp. finely chopped garlic (about 3-4 garlic cloves)
  • 2 28oz. cans whole San Marzano tomatoes
  • ½ cup vegetable broth
  • 2 inches Parmesan rind
  • 4 anchovy filets (jarred/canned)
  • 1 tsp. dried oregano
  • 2 tsp. kosher salt
  • 1 tsp. freshly ground black pepper
  • ½ cup chopped fresh basil leaves (about 12-15 leaves)

Meatballs

  • 1 lb. ground venison
  • 1 lb. ground beef chuck (preferably 70/30)
  • 1 medium-sized shallot, finely chopped
  • 3 cloves garlic, finely chopped
  • ½ cup fresh parsley, finely chopped
  • ¼ cup bread crumbs
  • 1 egg
  • ½ cup freshly grated parmesan cheese (or pecorino romano)
  • 1 tsp. kosher salt
  • 1 tsp. freshly ground black pepper
  • 2 Tbsp. olive oil

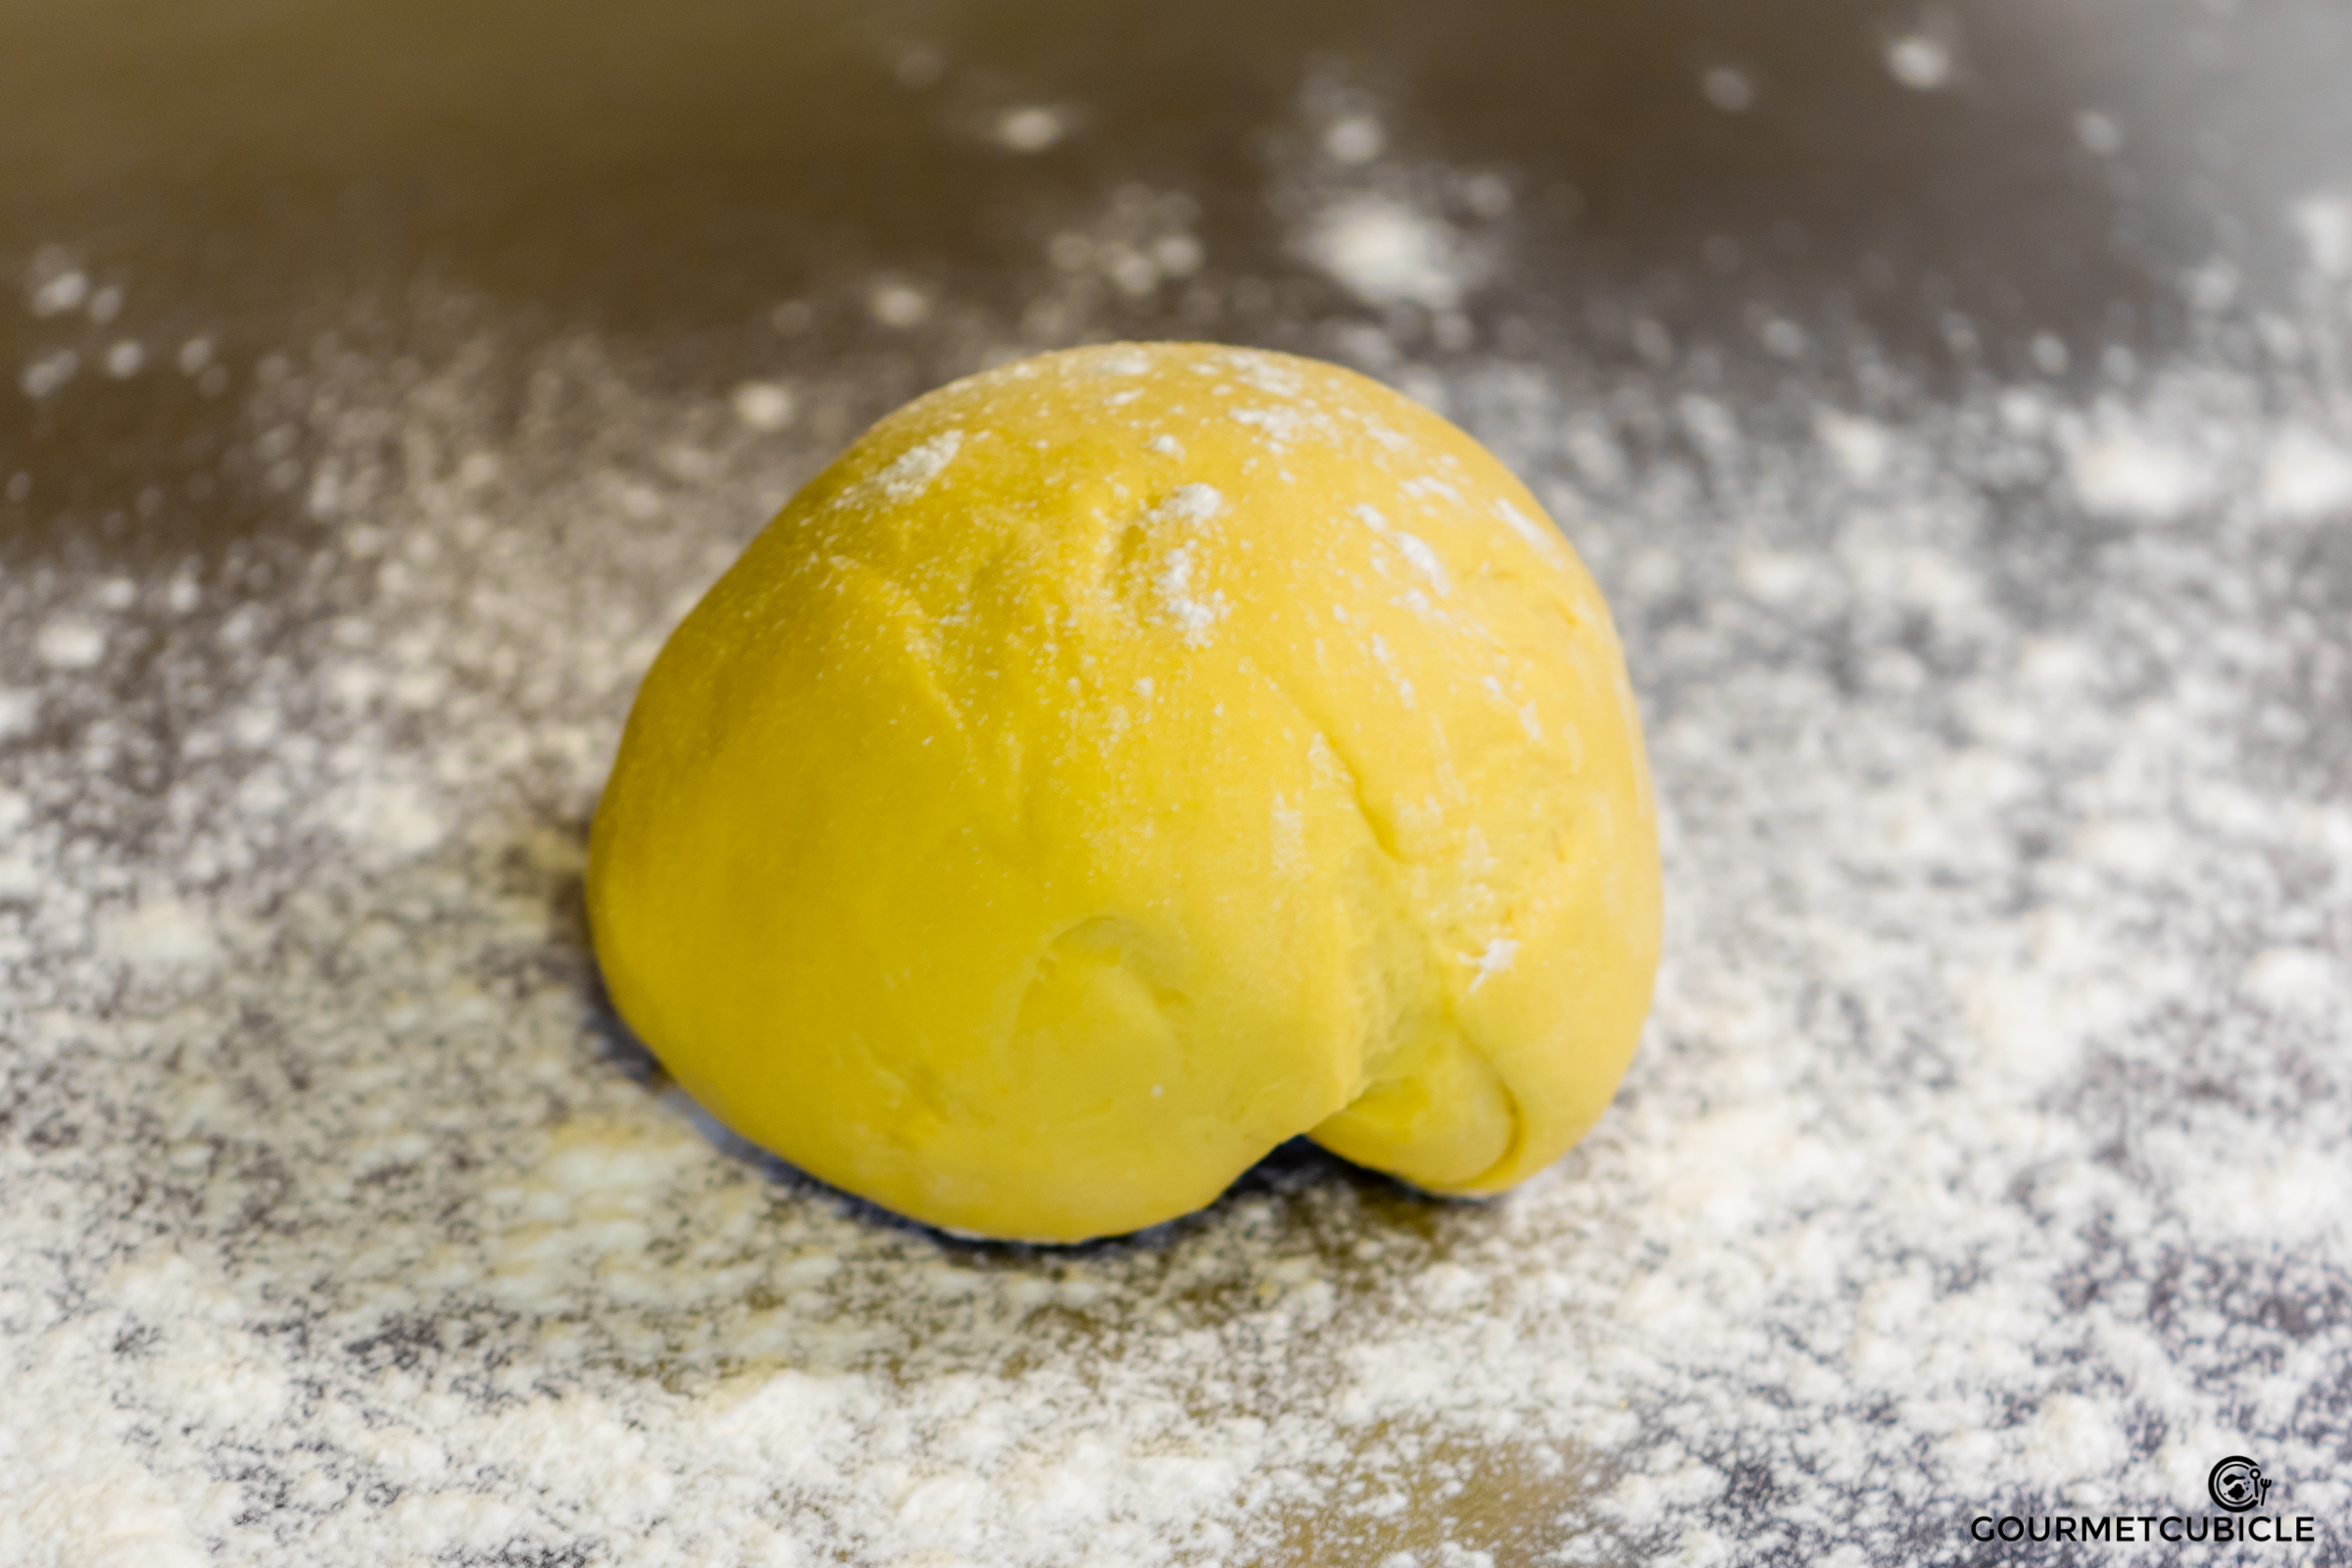
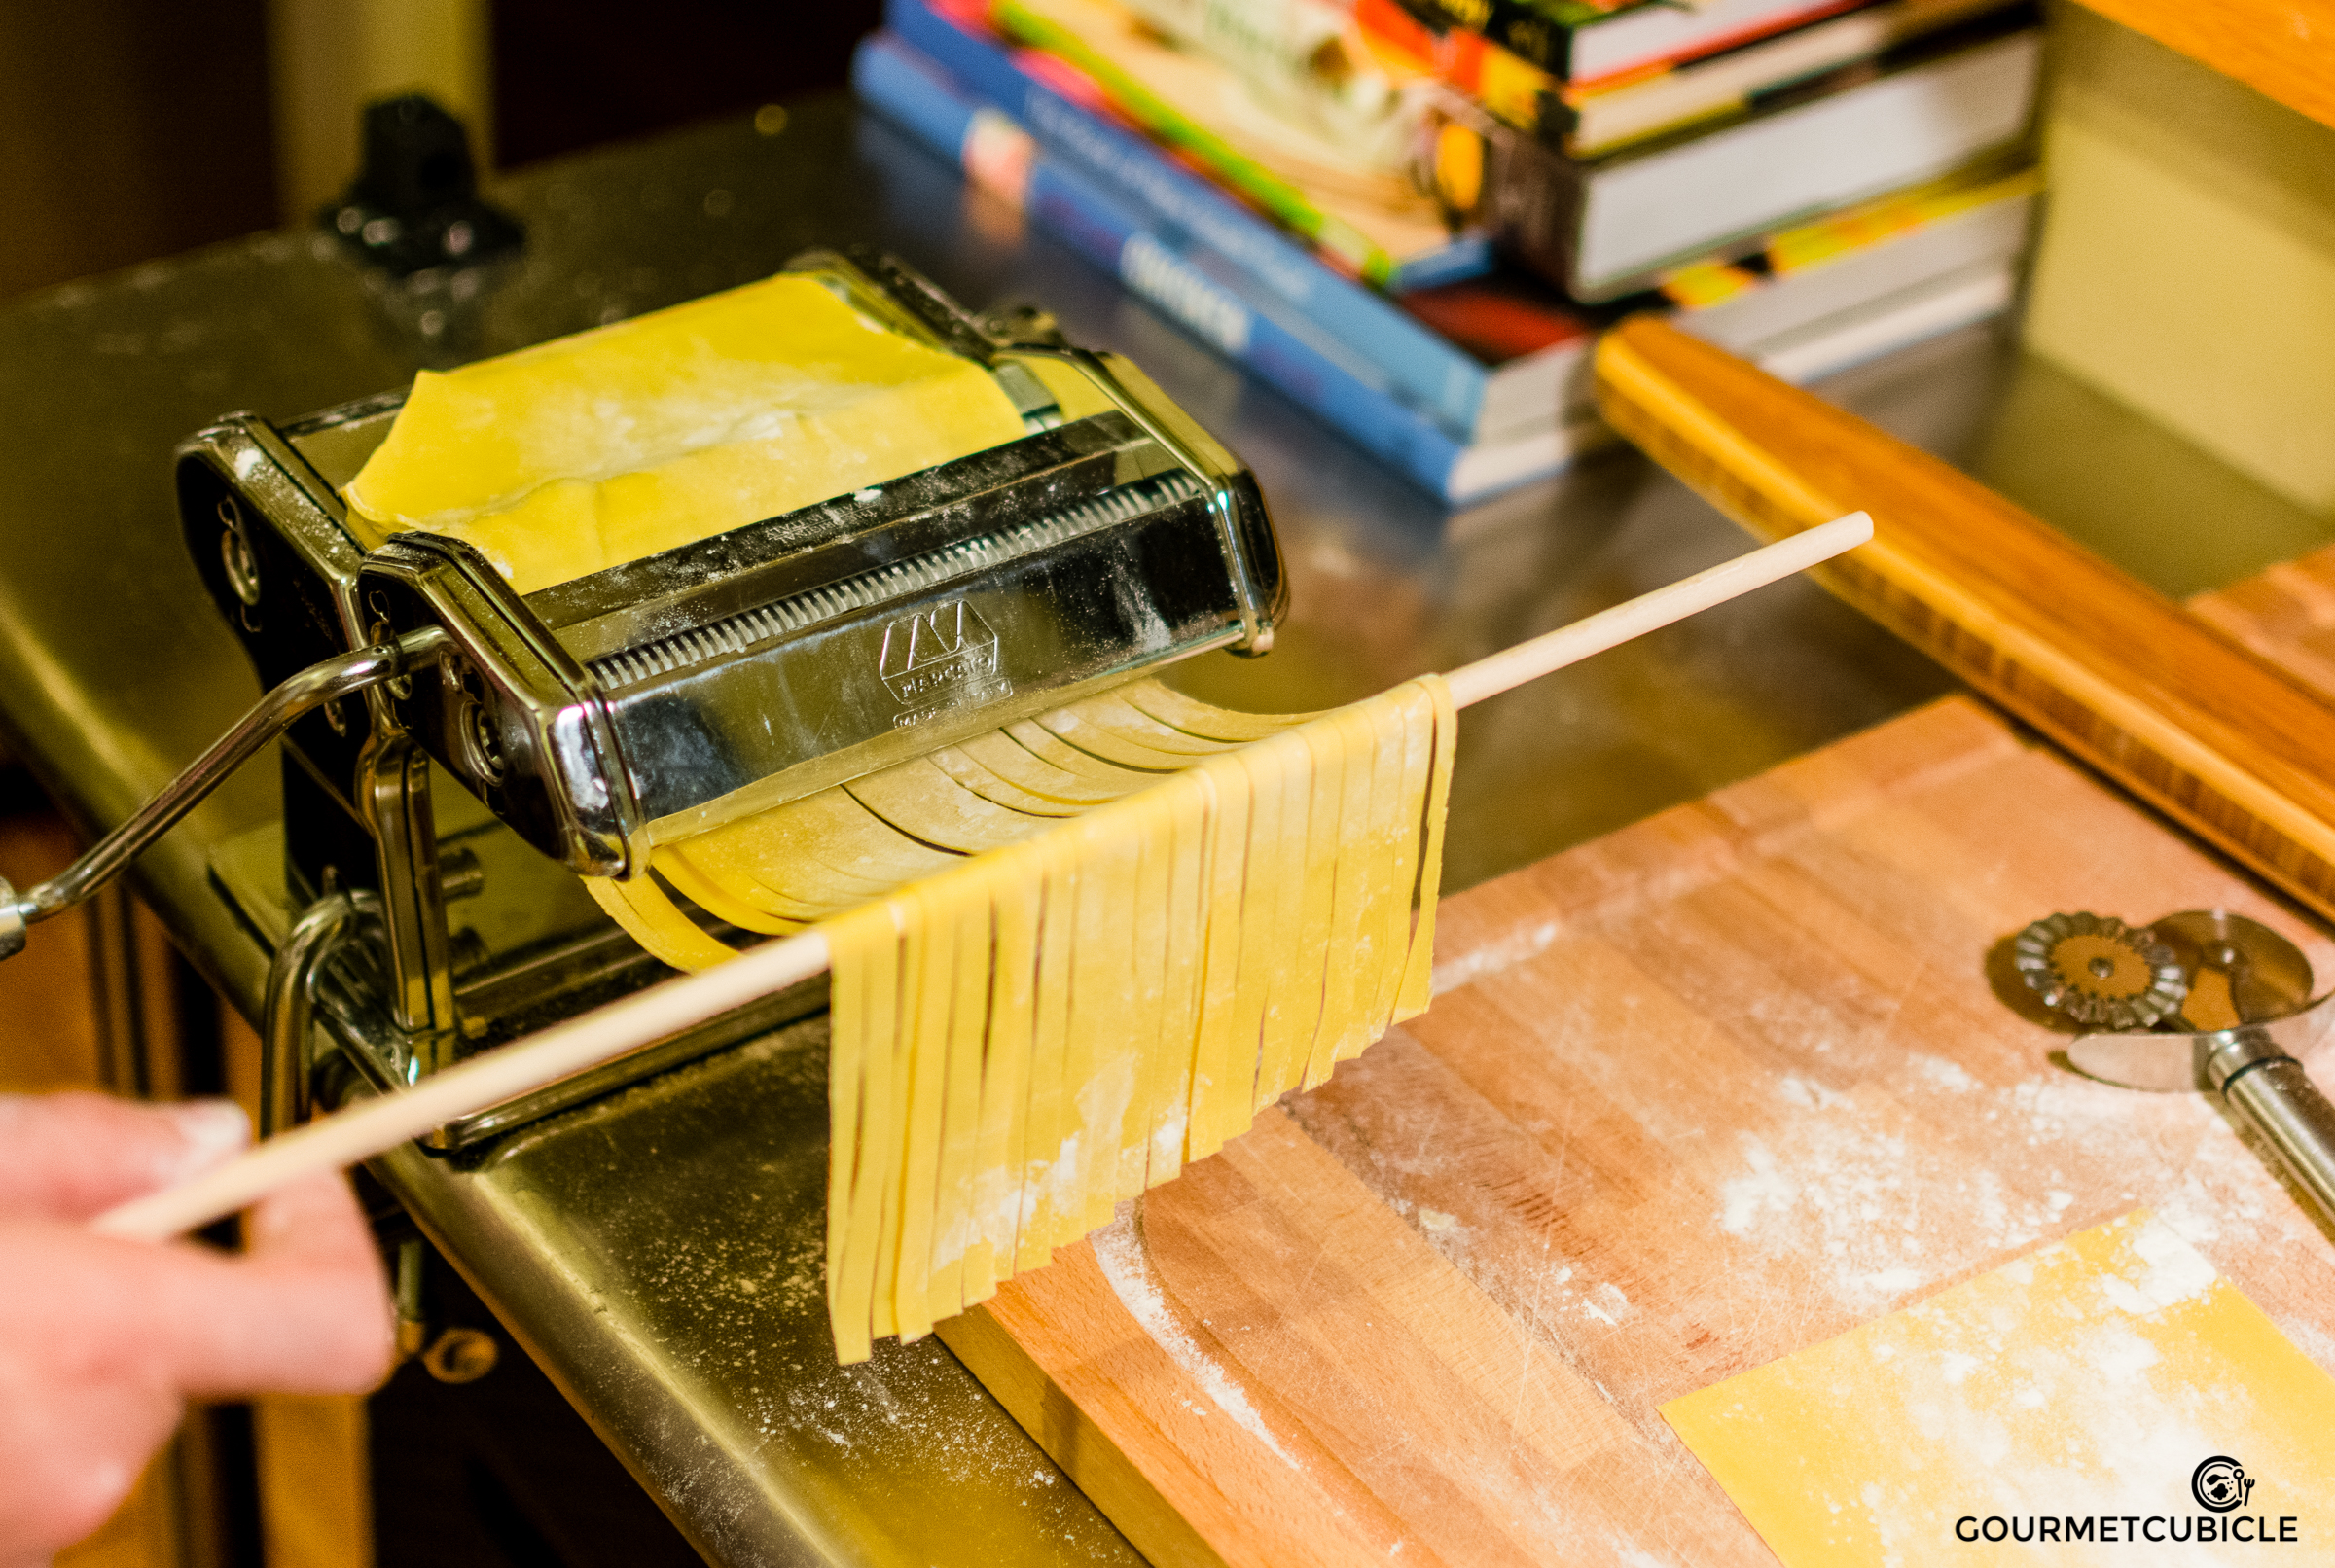
Spaghetti (for homemade pasta see recipe here)

  • 1 lb. spaghetti
  • 2 Tbsp. kosher salt
  • 1 Tbsp. unsalted butter

Instructions

  1. Preheat oven to 400F (200C) degrees.
  2. Heat 3 tablespoons olive oil in a large sauce pan over medium-high heat. When the oil easily slides across the pan, add shallots, celery, and carrots (called soffritto in Italy and mirepoix in France). Sauté for 5 minutes, stirring occasionally to avoid burning the vegetables.
  3. Pour red wine and let the alcohol evaporate -- this is called deglazing. Toss in garlic, stir, and cook for another 3 minutes.
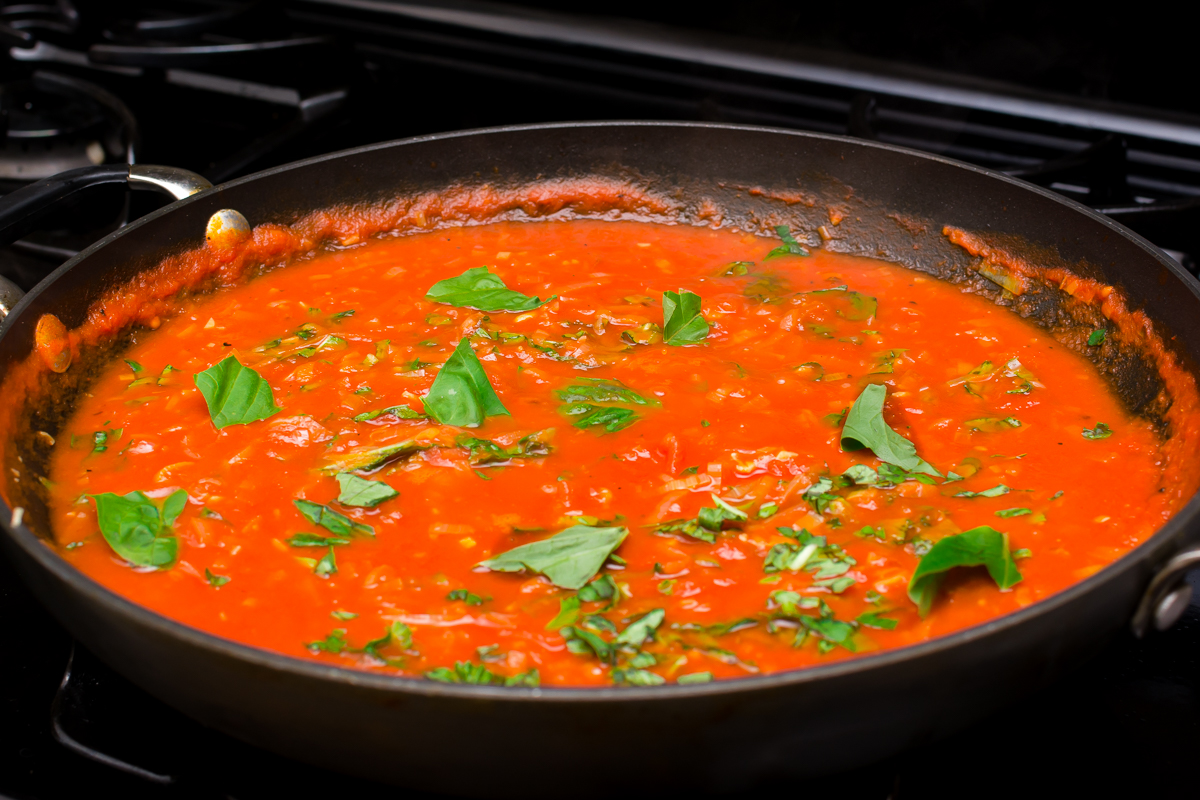
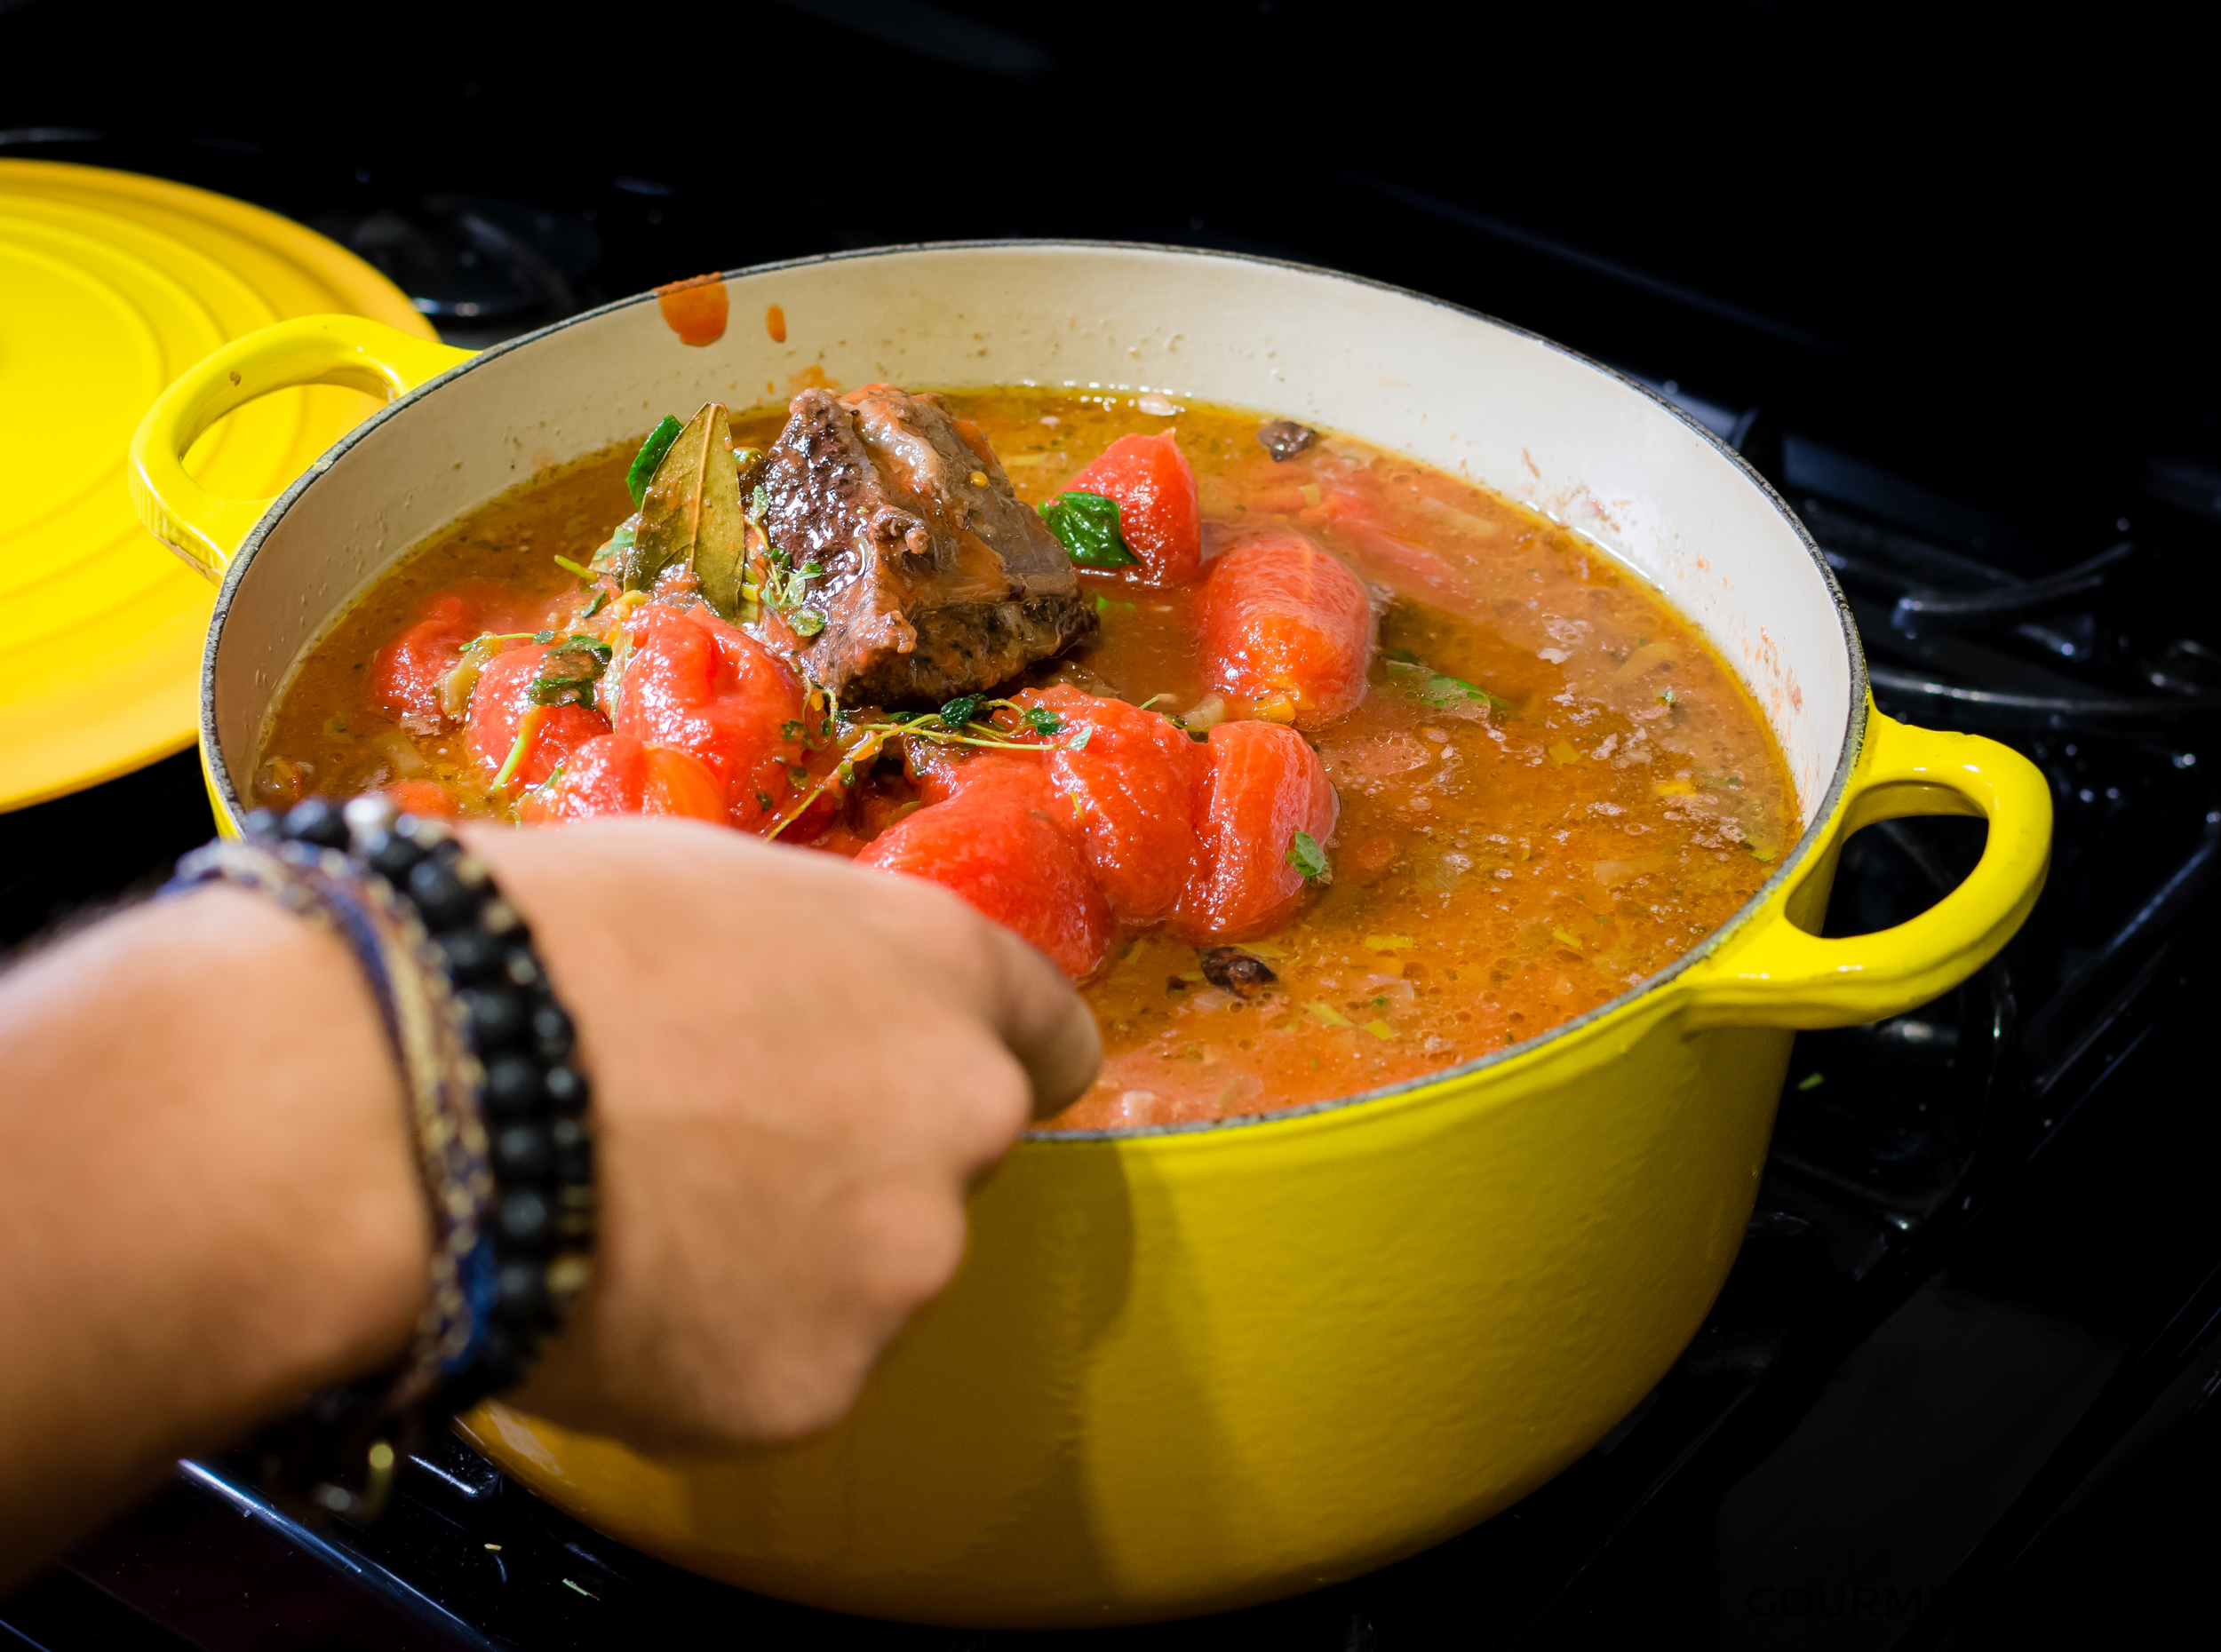
  4. Add San Marzano tomatoes, broth, Parmesan rind, anchovies, oregano, salt, and pepper. Stir to make sure that everything is well mixed.
  5. Bring the sauce to a boil. Reduce the heat to low, cover the pan, and let the sauce gently simmer (it will bubble very slowly) for 45 minutes.
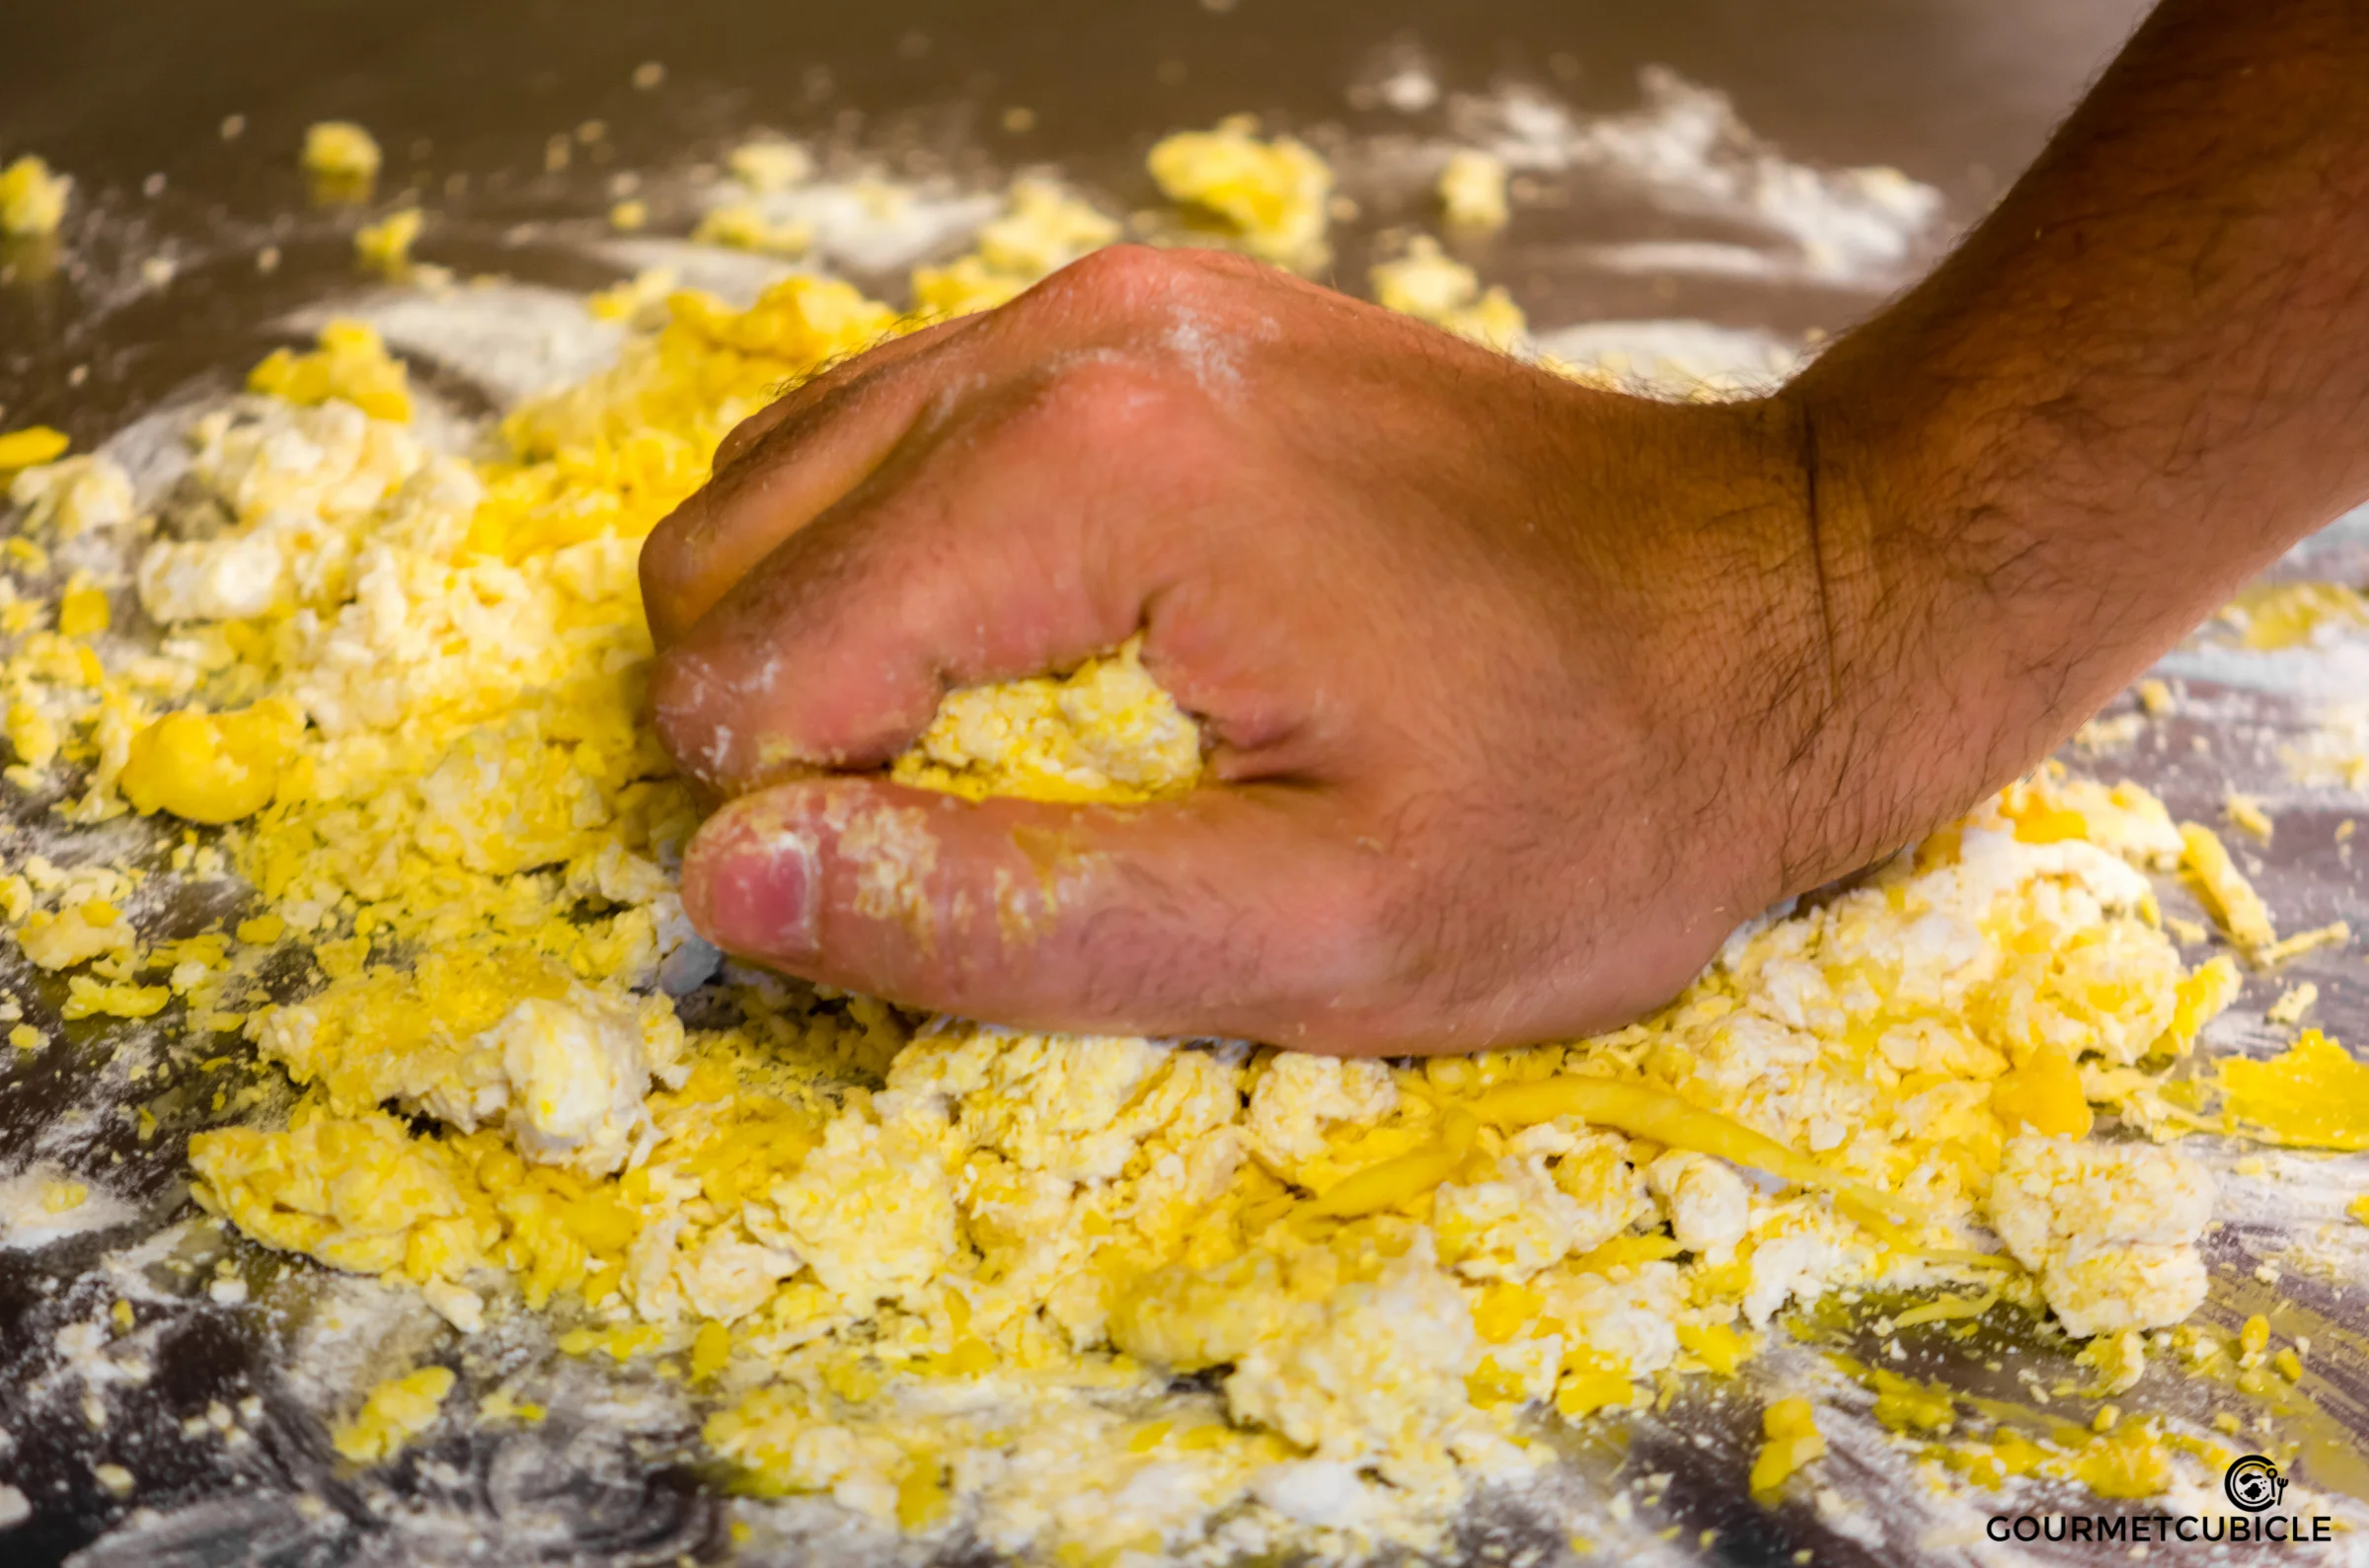
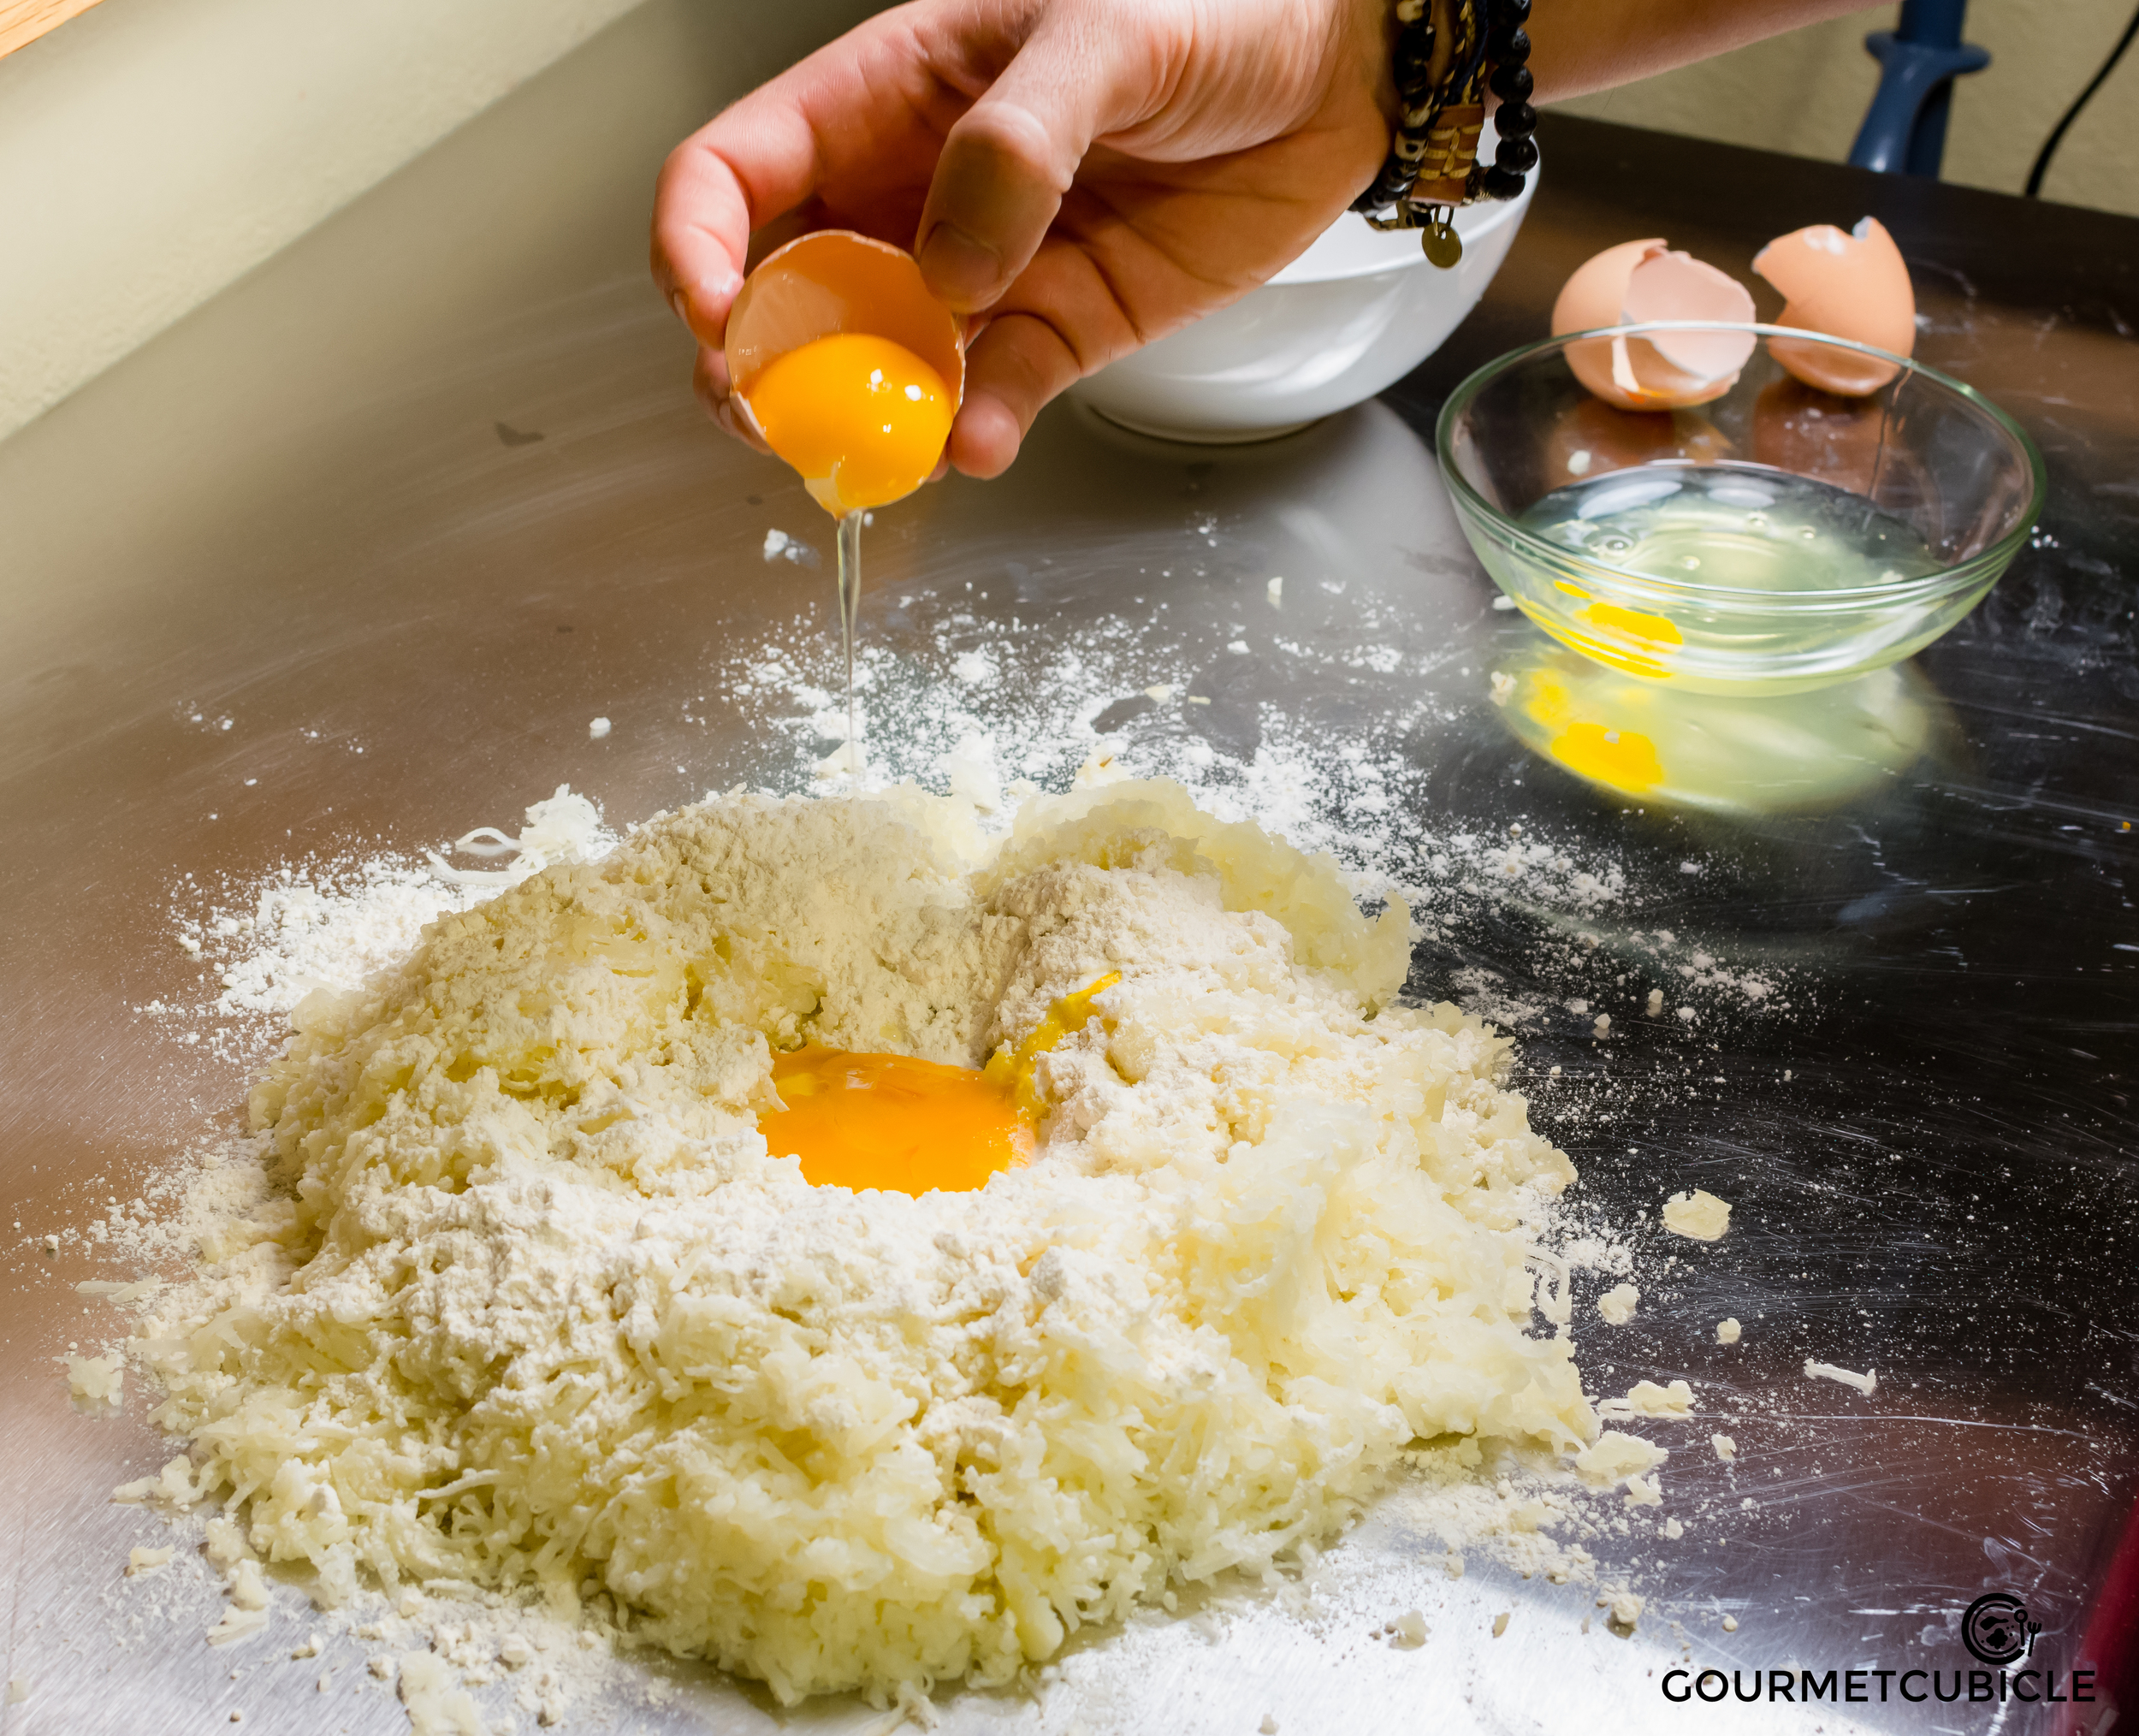
  6. Meanwhile, in a large mixing bowl, combine all meatball ingredients. Mix them all together using your hands. 
  7. Shape the venison mixture into small balls (golf ball-sized), and place them on a cookie sheet lined with parchment paper. Bake for 20 minutes.
  8. After 20 minutes, remove meatballs from the oven and transfer to a plate. Add juice from meatballs to the marinara sauce.
  9. Remove the lid from the sauce, add basil, and simmer uncovered for an additional 30-40 minutes. Then add the meatballs to the sauce, and stir well. You’re almost done!
  10. In a large pan, bring generously salted water to a boil over high heat. Cook the spaghetti for 8-10 minutes or until al dente (follow the instructions on the spaghetti box or bag if unsure). Drain the pasta, reserving one cup of starchy water.
  11. Heat one tablespoon of butter in a large pan over high heat. When the butter is melted, add the water and spaghetti. Toss and add a few ladles of marinara sauce and meatballs. Mix until the pasta is evenly coated.
  12. Serve hot with grated parmesan and chopped parsley or basil on top.

December 30, 2016 /Aurel Pop
beef, Italian, pasta, tomato, meat
Main Dish
Comment

Creamy Tomato Sauce with Prawns

October 18, 2015 by Aurel Pop in Main Dish

I tried to stay way from writing on my blog during our trip to Europe, but as it turns out, I just can’t do it. I miss it too much. Developing, testing, tweaking and writing recipes are now part of my everyday life ever since gourmetcubicle launched back in April. It does, however, feel refreshing not to do the cooking for a while, but instead just enjoying that of others. It’s great being on a food journey where I don’t have to care about shopping for ingredients, cooking, taking photos, and documenting recipes, but instead just relaxing, finding inspiration, discovering new flavors and thinking about how to integrate them into my dishes.

Roni and I are on a vacation around Eastern Europe and even though we’ve been here for less than a week, it has been very eventful. The trip started not so great when we found out that our flight from Austin to Chicago was delayed to the point that there was no way we would catch our connection to Berlin, where we had planned a full day layover to explore the city. I was already dreaming of the delicious Turkish doner kebabs that you can buy from street vendors and the crispy pork knuckles they serve with sauerkraut and potatoes in the traditional beer gardens. Both of us were pretty disappointed to say the least, but we did a great job at not letting that ruin the start of the trip

The good news about this whole re-routing was that we arrived to Budapest a half day earlier than planned. That meant more time to introduce Roni to the great city of Budapest. Budapest is amazing- beautiful architecture, great food, lots of friendly people and of course old friends. We stayed at the home of Erika and Pista along with their three daughters. They are Roni’s childhood friends, or rather her Hungarian family, as she likes to call them. They did everything in their power to give us the famous Hungarian hospitality and abundance. Erika cooked traditional Hungarian dishes every day and baked amazing cakes, which made Roni very happy. Every morning she prepared platters of cheeses, cured meats and homemade jams. We had bowls of fresh grapes, pears, apples and plums for snacks. We all dined together every night sharing our travel stories and childhood memories. Hearing the girls talk about how they used to break the child lock on the cable box to watch Tales from the Crypt, shave their arms to their parents’ horror, and play games involving eating disgusting concoctions of toothpaste, salsa, mustard and any other condiment they could find was very entertaining. The image that Roni had always painted of her young self was that of a shy and innocent little girl so these stories added a new insight into her childhood. Great times filled with laughter and joy!

Budapest is a must-see in Europe. The city, the people and the food are all top notch. A few years ago the Hungarian food scene had a revival and the fine dining culture has since blossomed. Good food always existed in Hungary, but it was mainly based on hearty Hungarian staples like pörkölt, paprikás, roasts, goulash and creamy soups. Beer, wine and the national spirit, pálinka, were the preferred drinks, with whiskey coke being considered a cocktail. The pride that Hungarians have in their food significantly slowed down the development of quality and affordable ethnic restaurants. But things have started to change, and I think this has to do with all the foreigners who have moved to Budapest and brought new interesting ingredients and flavors with them. Budapest has become a bit of a melting pot where Mexican, Asian, Indian, and Russian dishes have made their way into the otherwise very conservative cuisine here.

As far as Italian cuisine is concerned, I think it’s the most widespread of all cuisines around the globe. I haven’t been to a country that didn’t have at least one Italian restaurant. It doesn’t matter if you’re in Hungary, Singapore, Peru or Japan, you’ll most likely find a pasta Bolognese or Carbonara to eat. i think that the main reason for that is that Italian dishes are filling and easy to make, not to mention how delicious they are. You don’t have to be a kitchen-guru to be able to prepare a simple Cacio e pepe or Spaghetti Pomorodo.

As for today’s recipe, this Creamy Tomato Sauce with Prawns is one of those easy to make Italian dishes that will leave your dinner guests impressed.  In half an hour you can fix an easy, healthy and flavorful sauce that is infinitely better than that canned salty artificially flavored junk that you find in stores. Some of them may taste good, but once you take a look at the list of ingredients you’ll be shocked by the amount of sugar (or rather, corn syrup) and salt they contain. By making your own pasta you are in control of the ingredients. You know exactly how much of each ingredient goes into it and you can adjust them to your own taste. Enjoy!


Creamy Tomato Sauce with Prawns


Serves 4
Prep time: 10 minutes
Cook time: 35-40 minutes


Ingredients

  • 1 lb prawns, peeled and deveined
  • 1 tsp black pepper freshly ground
  • 1/2 tsp kosher salt
  • 2 TBS oil (sunflower, canola or peanut oil)
  • 1 TBS unsalted butter
  • 1 tsp hot sauce (Cholula or Tobasco)
  • 1 leek, finely chopped
  • 1 medium shallot, finely chopped
  • 2 garlic cloves, crushed and chopped
  • 1/2 cup dry white wine
  • 1 can (15 oz) diced tomato (preferably San Marzano)
  • 2 cups stock (chicken or vegetarian)
  • 2 anchovy fillets, optional
  • 2 TBS tomato paste
  • 1/2 tsp red chili flakes
  • 8-10 fresh basil leaves, roughly chopped
  • 1 TBS sugar
  • 1/4 cup Parmesan cheese, freshly grated
  • 1/2 cup heavy cream
  • 1-2 tsp fresh lemon juice, optional (or lime)

Instructions

  1. Place clean shrimp in a bowl and sprinkle with 1/4 teaspoon salt and 1/2 teaspoon pepper. Toss to make sure the shrimp are evenly coated.
  2. In a large skillet heat the butter and 1 tablespoon oil over medium high heat. When the butter starts foaming add shrimp and hot sauce. Cook for 3 minutes stirring occasionally to make sure the shrimp cook evenly on each side. 
  3. Transfer shrimp to a plate and set aside. 
  4. Add the rest of the oil to the pan and heat until the it easily slides across the pan. Add leeks and shallots and cook for 5 minutes, stirring occasionally. Add garlic and cook for another minute or so.
  5. Pour in white wine and cook for 3-5 minutes until the wine starts to evaporate.
  6. Add diced tomato and stock and cook for 5 minutes, stirring occasionally.
  7. Add anchovies, tomato paste, chili flakes, basil and the rest of the salt and pepper to the skillet and reduce the heat to medium-low. Cover with a lid and let it simmer for 15 minutes. Stir occasionally. 
  8. Add sugar and parmesan cheese and stir well.
  9. Pour in heavy cream and stir. Crank up the heat to medium-high. Bring to a boil (about 1-2 minutes) then immediately remove from the heat. Taste to adjust seasoning.
  10. Mix in the shrimp, sprinkle with lemon juice and give it a final stir. Serve with capellini, spaghetti or linguini.

Notes

  • Use only the white part of the leek. For instruction on how to clean leek check out my Creamy Leeks with Pan Roasted Chicken recipe.
October 18, 2015 /Aurel Pop
pasta, sauce, Italian, creamy, shrimp
Main Dish
Comment

Homemade Green Pea and Ricotta Ravioli with Creamy Sage Sauce

September 26, 2015 by Aurel Pop in Main Dish

The best part about being part of Roni’s family is that we often get together for dinners. Food is what brings people together. Great stories and ideas are born at the table. It always makes me happy when Rachel and Rick invite us over for a big ol' family get-together. It reminds me of my family back home. Before my sister and I grew up and moved away from Romania to pursue our dream jobs, every Sunday we had lunch together with my parents. It was either just the four of us or the whole family with grandparents, uncles and cousins once a month or so. Before my grandparents on my father’s side passed away, Sunday family lunches or dinners happened even more often. Sometimes we’d go to Buna for lunch and to Jolika for dinner. It was great because somehow it always turned into a cooking competition between my two amazing grandmothers, Jolika and Buna.

They both cooked good food but each one of them had their own style. Jolika, my Hungarian grandma, loved to cook hearty comfort food. She preferred pork over chicken and used sour cream in basically everything. Her food was the definition of traditional Hungarian cuisine. Buna on the other hand, has a more refined style and doesn’t shy away from fresh vegetables, although sometimes even she can go crazy with the pork and sour cream. I can’t wait for Roni to try Buna’s specialty - Cornmeal Stuffed Cabbage Rolls

A few couple of weeks ago Roni’s family celebrated Rosh Hashanah, the Jewish New Year. Although I don’t really know much about Jewish holidays, I love that I get to learn about Jewish culture and traditions. I think I mentioned it before, but the fact that I was raised in a Catholic/Protestant/Orthodox family makes me a…well, I don’t even know what, but definitely a Christian. Roni being Jewish adds to the already many religious holidays that my family traditionally observes, making the entire month of December a Winter Holiday marathon in our house.

Back to Rosh Hashanah. I decided to make ravioli. Initially I wanted to make a chorizo sauce, but was politely reminded that pork isn’t exactly kosher to eat during Jewish holidays. Which is funny because Roni eats bacon at the same pace at which a fat kid eats candy. There’s a good chance she was probably even eating bacon while telling me not bring pork to Rosh Hashanah. Anyway, being under self-imposed pressure to coming up with something cool, I went through my notes and I found one saying “sage sauce for ravioli - A Chef’s Table”.  I quickly browsed through all the episodes that I watched, even checked the internet, but unfortunately couldn’t find any reference to sage sauce. I'm not sure what made me write that down, but it sounded good.

Homemade ravioli may sound scary to some and I’m not going to lie to you and say it’s easy, because it’s not. But it’s not rocket science either. It’s easier than baking for sure. So why would you make it, you may ask? Because it’s rewarding and fun to make, not to mention, that it tastes a thousand times better than store-bought ravioli. It’s like tasting a good craft beer after drinking Bud Light your whole life (crazy Americans with your light beers). If you are concerned about the amount of butter and cream the sauce contains just sprinkle it with a good olive oil, sea salt and fresh cracked pepper instead. The subtle taste of the lemon zest and the tart juice will bring that refreshing element to this creamy meal. Buon appetito!


Homemade Green Pea and Ricotta Ravioli with Creamy Sage Sauce


Serves 4-6 people (about 30-35 ravioli)
Prep time: 60 minutes
Cook time: 30 minutes
Inactive time: 25 minutes


Ingredients

Pasta Dough (same as for Tagliatelle)

  • 1/2 lb "00" flour 
  • 2 whole eggs, pasture raised
  • 2 egg yolks, pasture raised
  • 1/4 tsp salt
  • 1 TBS olive oil, extra-virgin
  • 1/2 cup "00" flour, for kneading and rolling
  • 1 TBS salt, for cooking the ravioli

Filling

  • 10 oz ricotta cheese
  • 1/2 TBS fresh lemon zest (1/2 medium sized lemon)
  • 3 tsp fresh lemon juice (1/2 medium sized lemon)
  • 1 cup green peas (fresh or frozen)
  • 1/2 tsp kosher salt
  • 1/2 tsp ground white pepper
  • 1/4 cup freshly grated parmesan
  • 1 1/2 TBS fresh basil leaves, finely chopped (about 8-10 basil leaves)

Creamy Sage Sauce

  • 5 TBS butter
  • 20 fresh sage leaves
  • 1/2 cup dry white wine (must be dry)
  • 1 tsp salt
  • 1/2 tsp ground white pepper
  • 3 tsp lemon juice (1/2 medium sized lemon)
  • 1 1/2 cup heavy cream
  • 3 tsp lemon juice (1/2 medium sized lemon)
  • 1/4 cup parmesan cheese
  • 1/2 cup pasta water
  • freshly ground black pepper, to taste

Instructions

  1. Start with the pasta. In the center of your work station (preferably a large wooden cutting board) pile up a half pound of flour. Keep the rest nearby.  Make a “well" in the center and pour in the eggs and the yolks. Add salt and one tablespoon olive oil and beat the mixture lightly with a fork. Using your fingertips, gradually start incorporating the flour into the egg mixture. Gradually work the dough together until all the flour is mixed in. The dough should be sticky to touch (not to your fingers) and it should hold together. Depending on the size of the eggs, you may need to hydrate your dough if it is too dry by adding a few teaspoons of water.
  2. Knead the dough using the palms of your hand, until the dough becomes smooth and elastic, about 5 minutes. Make a ball out of the dough, sprinkle flour, wrap ball in plastic, and let it rest in the refrigerator for at least half an hour.
  3. While the dough is resting prepare the filling. In a medium bowl mix all the ingredients for the filling. Using a wooden spoon or a spatula stir until all ingredients are well combined. Cover bowl with a plastic wrap and refrigerate.
  4. Remove the dough from the refrigerator and divide it in 4-5 equal parts. Slightly drizzle water over a kitchen towel and cover the small dough balls. You will work with one at a time, so the damp towel will keep them from drying out. 
  5. Take the first piece of dough, flatten it with your hands so that it is 1-inch thick and sprinkle with a little flour on both sides. Using a pasta maker, roll out the dough. Start with the thickest setting and work your way to setting number 6. (1.5 mm)
  6. To stretch the pasta into a sheet, roll it through the pasta maker on the rest of the settings, going down one level at a time (from thick to thin), rolling it through about 2 or 3 times on each level. The more you run it through the machine, the silkier your pasta will be. If the dough starts sticking at any point, sprinkle flour on it. 
  7. Once you have your sheet of pasta finished, cut into 2.5-3 inch-wide strips if using a ravioli stamp. If you opt to use a cutter instead of a stamp, leave the sheet as is for now because you will fold it over the filling in the next step.
  8. Place a tablespoon of filling one inch apart from each other along the center of a dough strip if using a stamp, or over the lower half of your pasta sheet if using the folding method. Brush with water the second strip or top half of the dough to moisten it. It will help with sealing the ravioli.
  9. Gently pat the dough down around the filling to make sure that they aren't any air pockets and the ravioli is sealed. 
  10. Firmly press ravioli stamp until it cuts through the dough. If using ravioli cutter, cut into even squares. Place the ravioli on parchment paper and sprinkle with flour. Repeat process until you finish the rest of the dough.
  11. Bring a large pot of water and one tablespoon salt to a boil over medium-high heat.
  12. While the water comes to a boil, prepare the creamy sage sauce. In a large deep skillet melt butter over medium-high heat. When completely melted add sage leaves and fry them for about 1 minute until the butter and sage leaves turn brown. Immediately add white wine and stir. Season with salt and pepper and cook for 4-5 minutes. 
  13. Pour in the cream, stir and bring again to a boil, about 2 more minutes. Add lemon juice and parmesan cheese and stir well. Reduce the heat to low and let it simmer while you cook the ravioli. Stir occasionally to make sure the sauce doesn't burn.
  14. When the water in the pot starts boiling place ravioli in the water and cook for 3-5 minutes depending on the thickness of the pasta you used. When cut, the ravioli should show no starchy line in the middle. 
  15. Using a sieve or a slotted spoon transfer the the ravioli from the pan to the creamy the sage sauce. When all the pasta is cooked and in the skillet, scoop half cup pasta water and pour it in the skillet. Dispose the rest of the pasta water.
  16. Crank up the heat to medium. Toss well until all the ravioli is coated in the creamy sauce. Bring to a boil and remove from the heat, about 2-3 minutes. Taste the sauce and adjust seasoning.

Notes

  • When making the dough, make sure that you don't use cold eggs straight from the refrigerator. Let them sit at room temperature at least 10 minutes prior to using them.
  • When using the pasta maker, run the dough through the largest setting at least 4-5 times, folding it in half after each roll.
  • For more restaurant-like thin ravioli work your way up to setting 7. Number 7 will yield a very thin sheet (about 1.3 mm) making it more delicate to work with. On the up side, the time it will take to cook will be less (2-3 minutes).
  • Folding the sheets in half is a quicker method than cutting the sheets into strips. I got used to the strips method, but either will work fine.
September 26, 2015 /Aurel Pop
pasta, ricotta, green pea, creamy, sage, Italian
Main Dish
3 Comments

Homemade Tagliatelle Cacio e Pepe with Brussels Sprouts

July 31, 2015 by Aurel Pop in Main Dish

I know a lot of people get nervous when it comes to making homemade pasta, but I've never been intimidated by it. This may come off as cocky, but believe me, it's actually quite simple to make pasta. It consists of four basic ingredients: flour, eggs, olive oil (or water) and salt. Nothing else. It's not like baking or bread making where you have to be super precise, pay attention to the hydration of the dough and all that jazz. 

Making pasta was one of my favorite pastimes with my Hungarian grandmother Jolika. She made pasta quite often (that was the only option during the communist regime, as the stores didn't sell such things). Most of the times she made either a traditional Hungarian type of pasta stuffed with prune preserves called derelye (coming soon, I promise) or a thinner variation of the well-known angel hair pasta which she used in her homemade chicken noodle soup. The process is the same as with any other type of pasta. It doesn't matter if you're making tagliatelle, spaghetti, ravioli or linguini you will have to knead, rest, roll, cut and dry the pasta. Five steps and you're done.

Preparing homemade pasta from scratch can be time consuming and exhausting. Nowadays though the process is overly simplified by all the available tools and gadget. Kitchen mixers and pasta machines can be found in a lot of households, but even if you don't have any of these tools, you can still make it happen the old school way. I don't own a mixer, so I have to knead the dough by hand which I actually like doing even though it can be tough on your arms. It gives me a better feel for the consistency of the dough which lets me adjust it by adding water or an extra egg when too dry, or flour when too wet. 

When Jolika used to make it, she had to roll out the dough with a rolling pin and then cut it with a very sharp knife. I mentioned in one of my previous posts that whenever she was making pasta she would give me a tiny piece of dough to practice rolling with my own mini rolling pin. It actually helped me a lot, as I still remember what the right consistency for the dough needs to be.  Another important thing that I learned from Jolika was to use the right type of flour. Even in Hungary, when making tészta (pasta), we always used nullás liszt "0" which, as you may already have guessed, is the "00" flour. One day I'll have a kid and I'll do the same thing as Jolika did when I was a child

The inspiration for this recipe came from an episode of Anthony Bourdain's No Reservation. It's the Sicily episode where he's going to this cute little trattoria and eats what "could be the greatest thing in the history of the world" according to him. When I heard this, I already knew what dinner was going to be the next day. I know that brussels sprouts aren't normally part of this dish, but they were in season and cheap when I came up with this recipe last fall, so I tossed them in. As for the lemon and sunflower seeds, I took a tip from a Bon Appétit Foodcast podcast (How to Make a Killer Summer Pasta episode) that suggested adding a bit of acid and nuts or seeds to elevate the taste of the pasta. Buon appetito!


HOMEMADE TAGLIATELLE CACIO E PEPE WITH BRUSSELS SPROUTS


Serves 2-4
Prep time: 60 minutes
Cook time: 30 minutes
Inactive time: 30 minutes


Ingredients

  • 1/2 lb "00" flour 
  • 2 whole eggs, pasture raised
  • 2 egg yolks, pasture raised
  • 1/4 tsp salt
  • 1 TBS olive oil, extra-virgin
  • 1 TBS water (if needed)
  • 1/2 cup "00" flour, for kneading and rolling
  • 1 1/2 TBS salt, for boiling the pasta
  • 2 TBS butter, unsalted
  • 2 thai chilis
  • 2 cloves garlic, crushed and finely chopped
  • 1 lb brussels sprouts, cleaned and halved
  • 1 TBS olive oil, extra-virgin
  • 1 TBS black pepper, freshly ground
  • 1 cup Pecorino Romano (or Parmigiano-Reggiano), freshly grated
  • 1/4 cup sunflower seeds, toasted
  • 1/2 lemon

Instructions

  1. Start with the pasta. In the center of your work station (preferably a large wooden cutting board) heap up a half pound of flour. Keep the rest nearby.  Make a “well" in the center and pour in the eggs and the yolks. Add salt and one tablespoon olive oil and beat the mixture lightly with a fork. Using your fingertips, gradually start incorporating the flour into the egg mixture. Gradually work the dough together until all the flour is mixed in. The dough should be sticky and it should hold together. Depending on the size of the eggs, you may need to hydrate your dough if it is too dry by adding one tablespoon of water.
  2. Knead the dough using the palms of your hand, until the dough becomes smooth and elastic, about 5 minutes. Make a ball out of the dough, sprinkle flour, wrap ball in plastic, and let it rest in the refrigerator for at least half an hour.
  3. Remove the dough from the refrigerator and divide it in 5-6 equal parts. Slightly drizzle water over a kitchen towel and cover the 5-6 small dough pieces. You will work with one at a time, so the damp towel will keep them from drying out. 
  4. Take the first piece of dough, flatten it with your hands so that it is 1-inch thick and sprinkle with a little flour on both sides. Using a pasta maker, roll out the dough. Start with the thickest setting and work your way to the desired thickness. For tagliatelle I usually stop at the 5 setting.
  5. To stretch the pasta into a sheet, roll it through the pasta maker on the rest of the settings, going down one level at a time, rolling it through about 2 or 3 times on each level. The more you run it through the machine, the silkier your pasta will be. If the dough starts sticking at any point, sprinkle some flour on it. 
  6. To cut the noodles, run your pasta sheet through whichever cutting attachment you prefer, running it through in the same way as when you stretched out the sheets.
  7. Once the noodles are cut, hang them to dry over a pasta hanger or place them on parchment paper and sprinkle with flour.
  8. Bring a large pot of generously salted water (one and a half tablespoons of salt) to a boil. 
  9. While the water is getting hot, heat butter in a deep skillet over medium-high heat. When the butter is melted and starts foaming, add chilis and garlic. Stir and cook for 2-3 minutes. Add brussels sprouts and cook for 10-15 minutes, stirring occasionally. Transfer the brussels sprouts from the pan to a plate and set aside. 
  10. In the same skillet that you used for the sprouts, heat one tablespoon of olive oil until it slides easily across the skillet. Toss in cracked pepper and roast for 2-3 minutes. Add the brussels sprouts back into the skillet and remove from the heat.
  11. When the water in the pot is boiling drop in tagliatelle and cook for 2-3 minutes at most. Fresh pasta takes a lot less time to cook. Save one cup of pasta water and then, drain the pasta using a colander. Shake off excess water and add pasta to the skillet with the brussels sprouts.
  12. Stir, add the pasta water and cook for about 2-3 more minutes until the pasta is al dente. Remove from heat and add the cheese.
  13. Toss well until pasta is evenly coated. Before serving, squeeze half a lemon all over the pasta and sprinkle toasted sunflower seeds on top. 

Notes

  • When using the pasta maker, run the dough through the largest setting at least 4-5 times, folding it in half after each roll.
  • When making tagliatelle, I recommend that you don't go higher than setting number 5-6 on the machine as your pasta will be too thin and will break easily. Also the texture is not going to be the same.
  • Make sure you don't burn the garlic as it will become bitter.
July 31, 2015 /Aurel Pop
pasta, vegetarian, brussels sprouts, Italian
Main Dish
Comment

Slow Cooked Oxtail and Short Rib Ragù With Homemade Gnocchi

June 04, 2015 by Aurel Pop in Main Dish, Side Dish

Today is my favorite day of the year- it's my birthday! I'm turning 32 which feels great, but scary at the same time. I'm getting old. It feels like it was not long ago that I left my hometown of Satu Mare, Romania to move to college to Timisoara. The first year was perhaps the best year out of the five that I spent there. I lived with three of my best friends from high school: Ovi, George and Cristi. We were a crazy bunch, but somehow we always stayed out of trouble even thought we often towed the line.

Ovi and Cristi played backgammon (Table in Romanian) every single night. Sometimes I would wake up in the morning and they would still be in the kitchen playing. They kept a running score and after a year, the score of the sets was something ridiculous like four hundred and something to four hundred and something. This may not seem to be a lot at first glance, but let me clarify that each set consisted of a best-of-eleven series. The funniest part wasn't even that, but the amount that they bet: 5 RON (less than 50¢).

20150525-pasta_sauce2.jpg

George and I weren't into board games or gambling, but we were obsessed with this computer game called Football Manager. We'd spend most of our free time playing it. I think the most we played in one sitting was twenty-something hours. The boys didn't really know how to cook so I was responsible for feeding our crew. In exchange, they would wash the dishes (dishwashers are not common in Romania), clean the house and run errands. It was a pretty sweet deal for me, because I loved cooking. 

The all-time favorite dish in our house was a bolognese pasta that I made with fresh vegetables, ground meat, and lots of cheese. Not parmesan though because it was way too expensive for our broke-college-student taste. We always served this with cheap wine that we either bought from Recaș, a winery close to Timisoara, or from the tiny convenience store next to our apartment for the equivalent of $1 for 2 liters.

This oxtail and short rib recipe is a lot different though. It is without a doubt the most time consuming of all of my recipes. I make it only once or twice a year and that's not because of the time it takes to cook, but mostly because it yields so much ragù that we stock up our freezer with leftovers. 

Next week, I'll go on a three-week long business trip. First, I'll head to Hungary for a conference where I will be presenting, and then to Singapore to help a customer get a system up and running. Although very exhausting I love these kinds of trips. I enjoy traveling to new places, and even though I've been to both Hungary and Singapore before, I managed to get the return ticket with a two-day layover in Tokyo. I've never been there before, but based on what Anthony Bourdain keeps mentioning in his shows, Tokyo is the food mecca where chefs want to retire and die.

One of the reasons I decided to make this hearty dish now, in the middle of the summer, is this trip. I wanted to stock up the freezer for Roni for when I'm gone. She hardly ever cooks, but now with my blog up and running, she does it even less often. When I'm not at home to make food she will eat tacos for breakfast, lunch and dinner seven days a week. Although I don't mind her eating tacos, I don't want the crew at El Tacorrido to get false hopes that she was back to eating there every day only to get heartbroken again when I return. 

This is a recipe you must try. I know it's a lot of time that you will need to sacrifice in order to make it, but it's worth it. Once you taste it you'll understand what I'm talking about. Words can't describe how delicious this dish is. It's a hearty piece of heaven, the perfect dish for a dinner with friends and family. Open a bottle of good red wine, share stories about your old college shenanigans, and have great laugh. After all that is what food should be about: love, friendship and joy.


Slow Cooked Oxtail and Short Rib Ragù With Homemade Gnocchi


Serves over 20
Prep time: 30 minutes
Cook time: 7 hours
Inactive time: 6 hours


Ingredients

Ragù

  • 3 TBS unsalted butter
  • 1 lb oxtail
  • 2 lbs beef short rib, bone in
  • 1/4 cup olive oil
  • 1 big yellow onion, finely chopped
  • 1 leek, cleaned and finely chopped
  • 4 celery stalks, finely chopped
  • 4-5 carrots, finely chopped
  • 7 cloves garlic, crushed and minced
  • 2 TBS unsalted butter
  • 1/2 TBS black pepper, freshly ground
  • 1 1/2 cups whole milk
  • 2 cups dry red wine
  • 1 cup beef stock
  • 1 1/2 TBS dried oregano
  • 1 tsp nutmeg, ground
  • 1 star anise, whole
  • 3 dried bay leaves, whole
  • 3 big cans (32 oz) San Marzano tomatoes 
  • 1 cups beef stock
  • 4 sprigs fresh thyme
  • 1 bunch fresh basil, finely chopped
  • 2 inches of parmesan rind
  • 7 anchovy fillets
  • 1 TBS olive oil
  • 1/2 cup parmesan, freshly grated
  • 2 tsp black pepper, freshly ground
  • salt, to taste

Gnocchi

  • 2 pounds russet potatoes
  • 2 1/2 TBS salt
  • 1 1/2 cups "00" flour
  • 2 egg yolks

Instructions

Ragù

  1. In a large-heavy bottomed deep skillet melt 3 tablespoons butter over medium high heat. When the butter starts foaming (don't wait any longer otherwise it will brown and then burn) place the short ribs and oxtail in the pan and brown the meat for about 3-4 minutes on each side. Do not overload the skillet with the short ribs and oxtail. You risk reducing the heat in the pan to the point where the meat will not brown and will become greasy. Instead, work in batches if you have to.
  2. Remove the meat from the pan and set aside. Add olive oil to the same skillet and scrape off the burnt pieces of meat. Toss in chopped onions, leeks, celery and carrots (mirepoix) and sauté, stirring occasionally, until the onions become translucent, about 10-12 minutes. Add crushed garlic and cook for another 5 minutes.
  3. In the meantime take a large cast-iron dutch oven and melt the rest of the butter over medium heat. Add the browned meat and season with half tablespoon freshly cracked black pepper. Add milk and let it cook while you take care of the mirepoix and wine reduction.
  4. When the mirepoix is tender pour it over the meat and milk mixture. In the same skillet that you used to brown the meat and sauté the mirepoix add wine and bring to a boil over medium-high heat. Add oregano, nutmeg, black pepper, anise and bay leaves and reduce the heat to medium. Simmer for about 5-7 minutes.
  5. Pour the wine mixture into the dutch oven and add one cup beef stock. The milk, mirepoix, wine and beef broth mixture should cover the meat by 1-2 inches. If not add more stock to completely cover the meat. Reduce the heat to medium-low, cover the dutch oven and simmer for an hour. 
  6. Remove the lid from the dutch oven and pour in the San Marzano tomatoes. Set the heat to medium-high and bring mixture to a boil. Add the rest of the beef stock, thyme, basil and Parmesan rind, reduce the heat to low and let the sauce gently simmer (it will bubble very slowly). Cover the dutch oven and cook for about 4-5 hours. Every half an hour or so check the sauce, gently stir and make sure nothing is burned and stuck to the bottom. It shouldn't be the case if you're simmering it on low heat and using a cast-iron dutch oven, but check it just in case. You don't want to burn your sauce after spending so much time and money on the ingredients. 
  7. After 4-5 hours the meat should already be falling off the bones. Remove the bones and discard them. Add the anchovy fillets. You're almost there. Set the burner to minimum heat, stir in the parmesan cheese and simmer uncovered for another hour. If you're making the gnocchi, now it's the right time to start preparing it.
  8. Add olive oil to a medium size skillet, add gnocchi and sauce to your liking, and bring to a simmer over medium-high heat. Sprinkle with freshly grated parmesan cheese and serve hot.

Gnocchi

  1. Put potatoes in a large saucepan and cover with cold water by 2 inches. Add a tablespoon of salt and bring to a boil over high heat. Reduce to a simmer (medium heat) and cook potatoes for 15-20 minutes depending on the size. When pierced with a fork the potatoes should feel very tender.
  2. Drain potatoes and run them under cold tap water. Remove peel (they should slip off easily) and pass them through a potato ricer, food mill or grater. I don't have the first two kitchen tools so I grated the potatoes on a small hole cheese grater.
  3. Sprinkle potatoes with the flour, add the egg yolks and half tablespoon salt. Knead well until the ingredients are mixed well and the dough is smooth, about 3 minutes. Cut the dough into 5 pieces, sprinkle flour on the rolling surface and roll them out into long ropes (about 3/4 on an inch thick). Cut dough into thumb size pieces (or smaller if that's what you prefer) and place them on a piece of parchment paper. Sprinkle with flour and let them rest. 
  4. To cook, bring a large pot of generously-salted water to a boil. Add gnocchi to the pot making sure you don't over fill it. Work in batches if you have to. Stir gnocchi and let them cook for about 1 minute until they float to the top. Remove them from the water using a sieve.

NOTES

If using a non-stick dutch oven for the ragù, the cooking times may reduce a bit. I prefer the cast-iron though because the heat is distributed evenly and the temperature swing is minimal.

June 04, 2015 /Aurel Pop
pasta, slow-cooked, ragu, Italian, comfort food, oxtail, short-rib
Main Dish, Side Dish
4 Comments
  • Newer
  • Older

Copyright ©2017 Aurel Pop & gourmetcubicle. All rights reserved. Don't steal, ask.